Last updated on June 3, 2025
Tiramisu is an Italian dessert that has captured the hearts of many with its rich flavors and smooth texture. But what if you could enjoy this classic treat in just a matter of minutes? Introducing 10 Minute Tiramisu Balls! These delightful bite-sized treats bring all the deliciousness of traditional tiramisu into a no-fuss, quick-and-easy format. In just ten minutes, you can create these scrumptious balls that are perfect for a snack, a party, or a cozy night at home. Whether you’re a seasoned chef or a cooking novice, this recipe is guaranteed to impress!
Table of Contents
Why You’ll Love This 10 Minute Tiramisu Balls
There are so many reasons to adore these 10 Minute Tiramisu Balls! For one, they’re incredibly quick to make, taking only ten minutes of your time. They offer all the flavor of classic tiramisu without the complexity of layering and baking. You can enjoy them immediately or chill them for later; they fit perfectly into any occasion. Plus, the combination of coffee and mascarpone is simply irresistible! Whether you’re a coffee lover or someone who enjoys light desserts, these tiramisu balls are tailored to please every palate. And let’s not forget—they’re perfect for sharing, making you the star of your next gathering.
Print
10 Minute Tiramisu Balls
- Total Time: 10 minutes
- Yield: 15–18 tiramisu balls 1x
- Diet: Vegetarian
Description
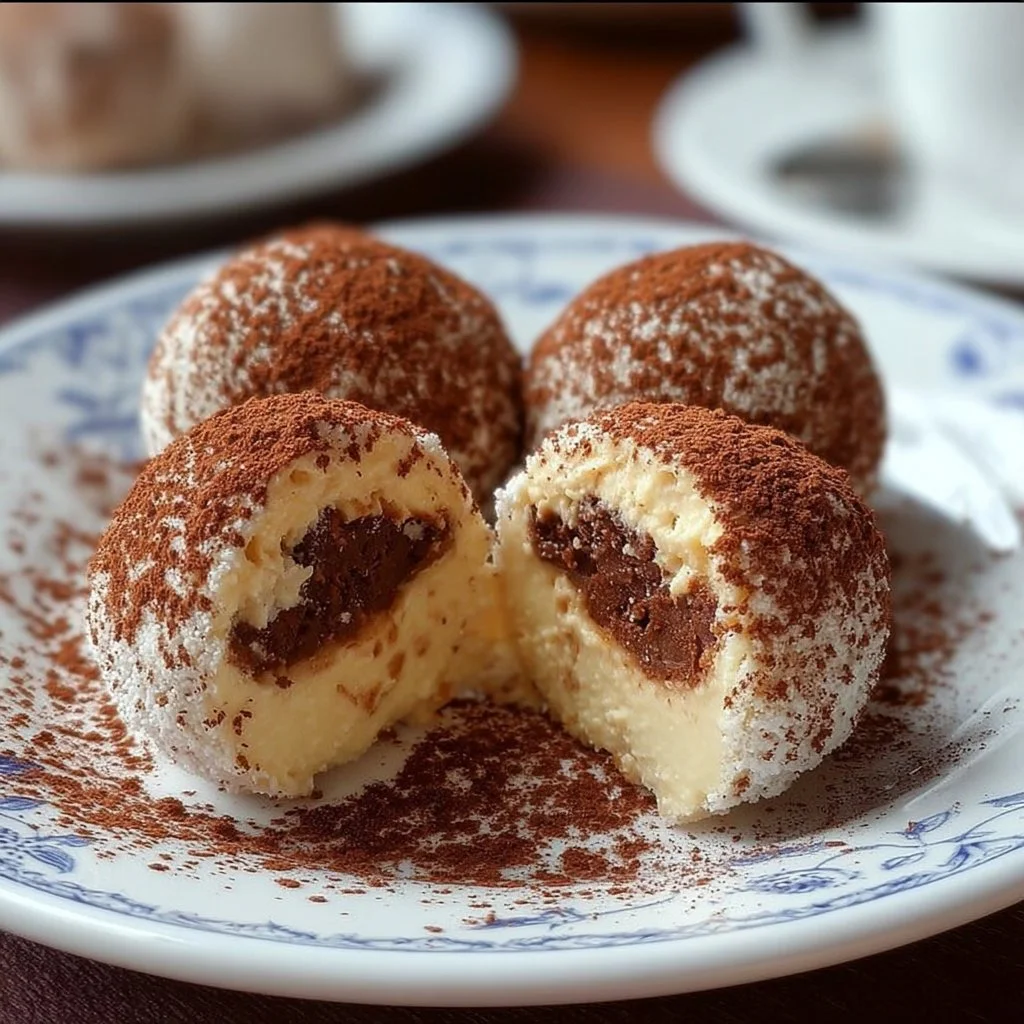
10-Minute Tiramisu Balls are an easy, no-bake dessert inspired by classic tiramisu. These bite-sized treats blend ladyfingers, mascarpone, espresso, and cocoa into rich, creamy truffles—perfect for parties, holidays, or coffee lovers on the go.
Ingredients
- 200g ladyfingers (savoiardi): The base of the recipe, crushed into fine crumbs.
- 1/2 cup brewed espresso (cooled): Adds that signature tiramisu coffee flavor.
- 250g mascarpone cheese: Creates the creamy texture and rich taste.
- 1/2 cup powdered sugar: Sweetens the mixture without grittiness.
- 1 tablespoon cocoa powder: For that classic chocolate essence.
- 1 teaspoon vanilla extract: Enhances the overall flavor.
- A pinch of salt: Balances and brings out all the flavors.
- Optional Add-Ons:
- 1 tablespoon coffee liqueur (e.g., Kahlúa): Adds depth and a boozy kick.
- Extra cocoa powder (for dusting): To finish each ball with a rich, chocolatey coating.
Instructions
- Crush ladyfingers: Use a food processor or place them in a zip-top bag and crush with a rolling pin until finely ground.
- Mix wet ingredients: In a bowl, whisk together the mascarpone, espresso, powdered sugar, vanilla extract, cocoa powder, and salt until smooth.
- Combine: Add the crushed ladyfingers to the mascarpone mixture. Stir until fully combined and a dough-like consistency forms.
- Chill (optional but helpful): If the mixture feels too soft, refrigerate for 10–15 minutes to make rolling easier.
- Roll into balls: Scoop and roll into bite-sized balls, about 1 inch in diameter.
- Coat: Roll each ball in cocoa powder or your desired topping.
- Serve or store: Enjoy immediately or chill for up to 3 days in an airtight container.
Notes
- To make these kid-friendly, omit the coffee liqueur.
- For a firmer texture, freeze the tiramisu balls for 30 minutes before serving.
- Try dipping them in melted chocolate for an extra indulgent version.
- Prep Time: 10 minutes
- Cook Time: 0 minutes
- Category: Dessert
- Method: No-Bake
- Cuisine: Italian
Nutrition
- Serving Size: 1 tiramisu ball
- Calories: 120
- Sugar: 9g
- Sodium: 45mg
- Fat: 7g
- Saturated Fat: 4g
- Unsaturated Fat: 2g
- Trans Fat: 0g
- Carbohydrates: 12g
- Fiber: 0g
- Protein: 2g
- Cholesterol: 15mg
Keywords: tiramisu balls, no-bake tiramisu, easy tiramisu dessert, tiramisu truffles, mascarpone coffee bites
Ingredients You’ll Need for 10 Minute Tiramisu Balls
Creating these delightful tiramisu balls requires some simple ingredients, many of which you may already have at home. Here’s what you’ll need:
Essential Ingredients
- 200g ladyfingers (savoiardi): These light, airy cookies are the base of our tiramisu balls.
- 1/2 cup brewed espresso: Ensure it’s cooled for mixing.
- 250g mascarpone cheese: This rich Italian cheese gives that creamy texture we love.
- 1/2 cup powdered sugar: Sweetens the mixture without the grainy texture of granulated sugar.
- 1 tablespoon cocoa powder: Adds a chocolaty twist to our tiramisu balls.
- 1 teaspoon vanilla extract: Gives a fragrant kick of flavor.
- A pinch of salt: Enhances all the flavors beautifully.
Optional Add-Ons
- 1 tablespoon coffee liqueur: For those who want an extra punch of flavor.
- Additional cocoa powder for dusting: To finish your tiramisu balls with a touch of chocolate.
These ingredients come together to form a luscious treat that you won’t be able to resist. Feel free to adjust the recipe to your taste—there’s plenty of room for creativity!
How to Make 10 Minute Tiramisu Balls: A Step-by-Step Guide
Making these tiramisu balls is a simple and straightforward process. Here’s how you can make them in just a few easy steps:
Step 1: Crush the Ladyfingers
Begin by placing the ladyfingers into a food processor. Pulse them until they form fine crumbs. If you don’t have a food processor, you can place the ladyfingers in a sealed plastic bag and crush them with a rolling pin.
Step 2: Prepare the Mascarpone Mixture
In a large mixing bowl, add the mascarpone cheese, powdered sugar, vanilla extract, and a pinch of salt. Using a spatula or hand mixer, mix everything together until the mixture is smooth and creamy. Be sure to scrape down the sides to ensure all ingredients are well combined.
Step 3: Incorporate the Coffee
Next, add the coffee liqueur (if using) and the cooled espresso to the mascarpone mixture. Stir gently until everything is fully combined and you have a lovely, creamy mixture.
Step 4: Fold in the Ladyfinger Crumbs
Now it’s time to add the crushed ladyfinger crumbs. Gradually fold them into the mascarpone mixture. Use a spatula and gently combine until the mixture is homogeneous, ensuring not to deflate the creamy texture.
Step 5: Roll into Balls
With clean hands, take small portions—about the size of a walnut—and roll them into balls. You can make them larger or smaller according to your preference.
Step 6: Dust with Cocoa Powder
Once all the balls are formed, place them on a lined tray. Lightly dust the tops with cocoa powder for that classic tiramisu finish.
Step 7: Chill or Serve
For the best experience, chill the tiramisu balls in the refrigerator for at least 30 minutes. This helps them to set and enhances the flavors. However, if you’re feeling impatient, feel free to serve them immediately for a soft texture!
And there you have it—a delicious batch of 10 Minute Tiramisu Balls ready to be enjoyed!
Serving Suggestions for 10 Minute Tiramisu Balls
Now that your tiramisu balls are ready, how should you serve them? Here are some delightful serving suggestions:
On a Platter: Arrange the balls on a beautiful platter. This is perfect for parties or gatherings, allowing guests to help themselves.
With Fresh Berries: Serve the tiramisu balls alongside fresh strawberries or raspberries. This adds a pop of color and a refreshing flavor that complements the richness of the dessert.
With a Dusting of Cinnamon: For an added twist, sprinkle a little cinnamon with the cocoa powder for an extra layer of flavor.
In Individual Cups: Place each ball in mini dessert cups for a chic presentation. This works well for formal occasions or romantic dinners.
With Coffee: Pair these tiramisu balls with a nice cup of coffee or espresso for a satisfying after-meal treat.
Let your creativity shine as you set up your serving display!
Pro Tips for Perfecting Your 10 Minute Tiramisu Balls
Here are some expert tips to ensure that your tiramisu balls turn out perfectly every time:
Use Fresh Espresso: For the best flavor, use freshly brewed espresso. The rich taste of coffee is key to an authentic tiramisu.
Don’t Over-Mix: When you combine the ladyfinger crumbs with the mascarpone mixture, gently fold them in. Over-mixing can make the texture less creamy.
Chill Time: While you can serve them immediately, allowing them to chill for at least 30 minutes not only firms them up but also enhances their flavor.
Experiment with Flavors: Feel free to experiment with different liqueurs or extracts. Hazelnut liqueur, for instance, adds a nutty flavor that pairs beautifully with coffee.
Presentation Matters: Take a moment to beautifully arrange your tiramisu balls; it makes them even more enticing when served. A little effort goes a long way!
By following these tips, you’ll create tiramisu balls that are not only delicious but also impressive to serve.
Easy Variations for 10 Minute Tiramisu Balls
While the classic tiramisu balls are absolutely delicious as is, there are plenty of ways to mix things up! Here are some easy variations you might consider:
Chocolate Covered: After rolling the balls, dip them in melted chocolate before dusting them with cocoa powder. This adds a rich twist that chocolate lovers will devour.
Fruity Infusion: Incorporate fruit flavors by folding in pureed fruit like strawberries or raspberries into the mascarpone mixture. This adds a fruity freshness to each bite.
Nutty Crunch: Chop up some nuts—like hazelnuts or almonds—and fold them into the mixture for added texture and flavor.
Caramel Drizzle: Drizzle your tiramisu balls with caramel sauce before serving for a sweet, gooey surprise.
Vegan Version: For a plant-based option, substitute the mascarpone with a vegan cream cheese alternative and use non-dairy milk to brew your espresso.
Feel free to mix and match these variations to find your perfect version of tiramisu balls!
Storage Tips to Store 10 Minute Tiramisu Balls
If you find yourself with leftover tiramisu balls (though that’s unlikely!), here are some simple storage tips:
Refrigerate: Store leftover tiramisu balls in an airtight container in the refrigerator. They will keep well for up to 3 days.
Avoid Freezing: While you may be tempted to freeze them, be aware that the texture may change once thawed due to the creaminess of the mascarpone.
Serve Cold: Tiramisu balls are best served cold, so when you’re ready to eat them, just pop them back in the fridge if they’ve been sitting out for a while.
With these storage tips, you can enjoy your delicious treats for days without compromising their taste!
Conclusion
In just ten minutes, you can whip up a batch of 10 Minute Tiramisu Balls that are perfect for satisfying your sweet tooth or impressing friends and family. With a minimal ingredient list and a simple method, these bites of decadence are ideal for any occasion. They bring the rich, beloved flavors of traditional tiramisu into a modern, fun form. So go ahead, roll up your sleeves, and dive into this delightful dessert. Whether for a dinner party or a quiet evening treat, your taste buds will thank you!
FAQs About 10 Minute Tiramisu Balls
1. Can I use store-bought ladyfingers for this recipe?
Yes! Store-bought ladyfingers are perfect for this recipe. Make sure to choose a good quality brand for the best flavor.
2. Can I make these tiramisu balls without alcohol?
Absolutely! The coffee liqueur is optional. You can simply omit it and still enjoy the delicious coffee flavor.
3. How long do these tiramisu balls last in the refrigerator?
They will stay fresh in an airtight container for up to 3 days.
4. Can I freeze tiramisu balls?
While it’s possible to freeze them, the texture may be affected upon thawing. It’s best to enjoy them fresh or refrigerated.
5. What can I substitute for mascarpone cheese?
If you don’t have mascarpone, you can use cream cheese mixed with a little heavy cream for a similar texture and flavor. However, the taste might differ slightly.
Now you’re all set to create these irresistible 10 Minute Tiramisu Balls! Enjoy your cooking adventure!
Looking for more delicious recipes? Follow us on Pinterest and Facebook!