Last updated on March 3, 2026
A Cozy Start
Do you ever get that warm, sugary craving that takes you back to childhood Easter mornings—hunting for a basket full of colorful candies and laughing when a sibling hides the best chocolate? I remember one year I tried to arrange jellybeans by color and ended up wearing more than I placed in the basket. If you’re a beginner who worries about melting chocolate or making things look neat, I get it; I used to too. This Easter Bunny Bark recipe is my answer: simple, forgiving, and perfect for little helpers. I even borrowed a few quick ideas from a fun pretzel bark twist I tried once, and it made decorating a snap.
A Quick Look at This Easter Bunny Bark Recipe
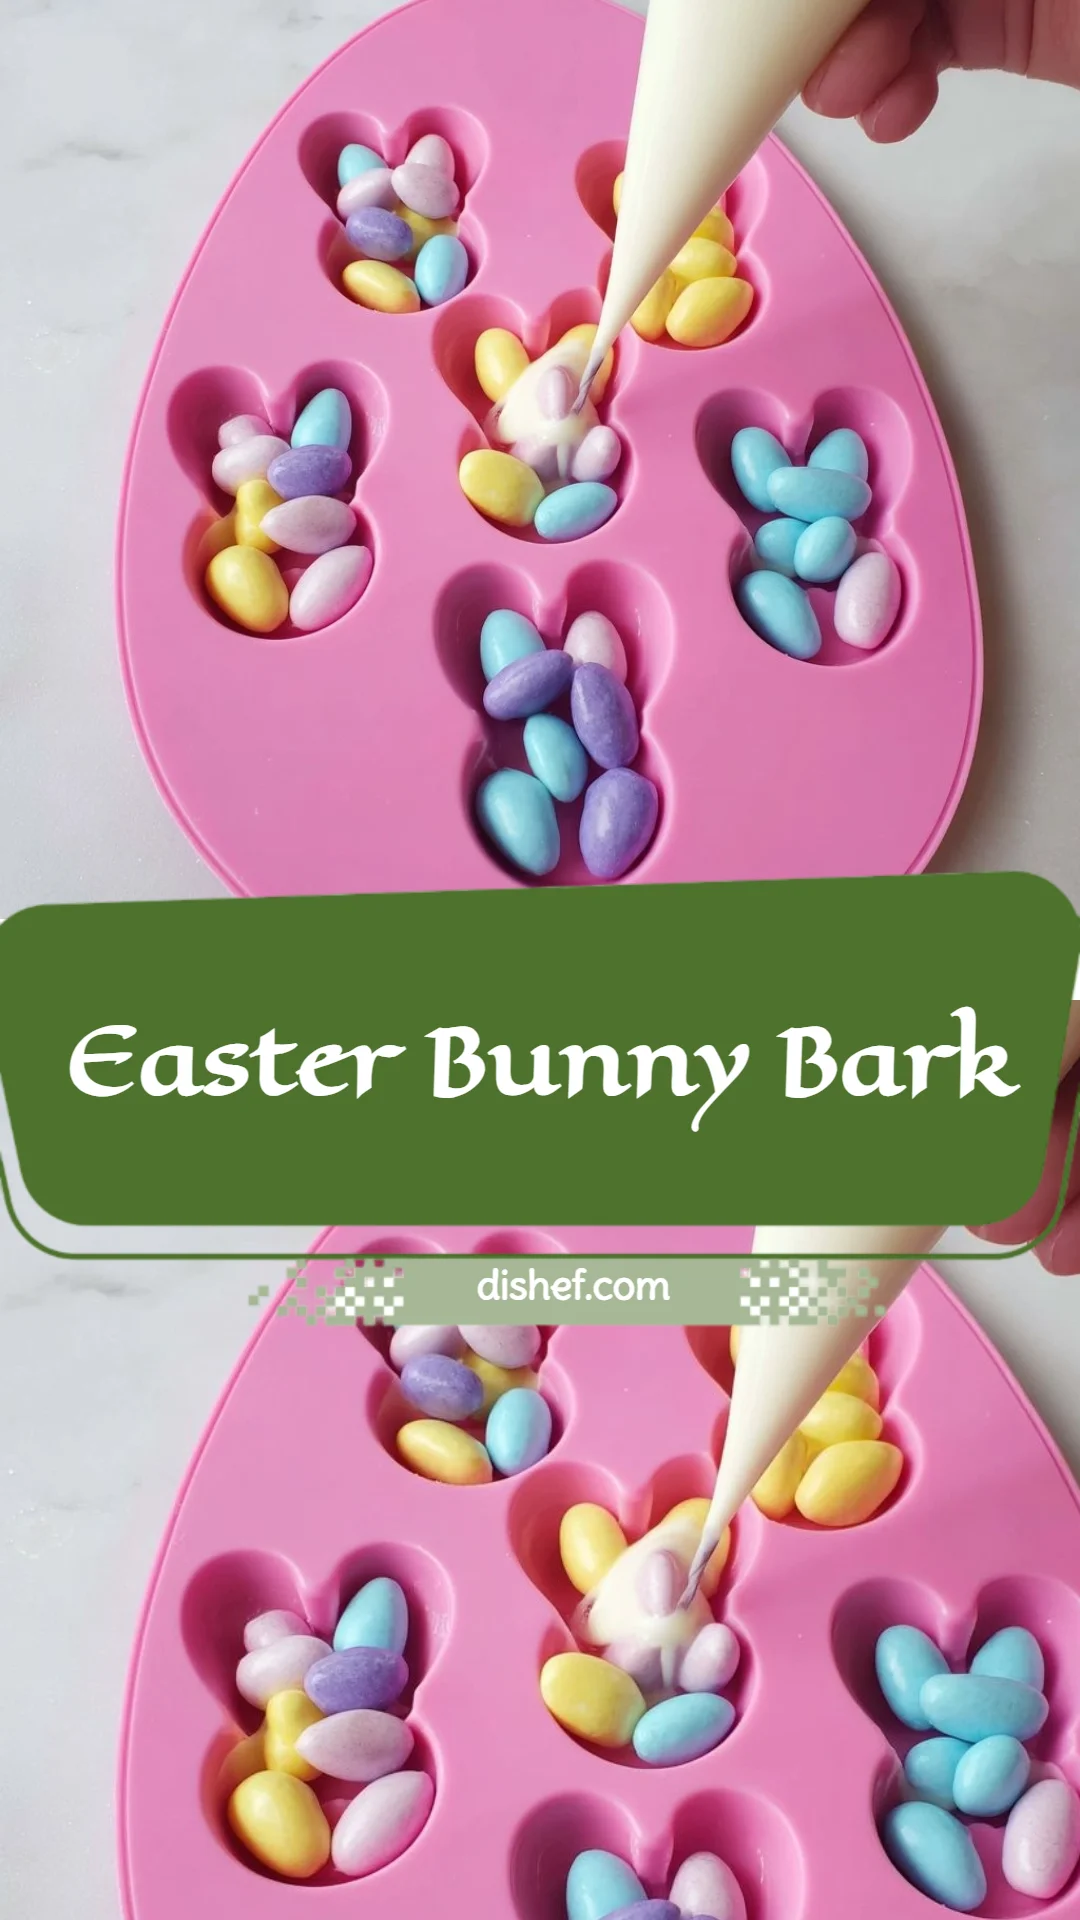
This Easter Bunny Bark is a cheerful, no-bake treat made with bright white candy melting wafers and pastel M&M’s—the colors do all the decorating for you. It’s fast to make and stores well, which makes it a wonderful convenient treat to prepare ahead of parties or gifting. Home cooks and beginners will love how low-pressure the process is: you don’t temper chocolate or pipe complicated designs. Keep reading to learn simple tricks for melting, filling, and customizing these cute bunnies so they come out neat and festive every time.
Ingredients You’ll Need for Easter Bunny Bark
Essentials
- Easter bunny silicone pan (24-cavity) — flexible molds make popping the bunnies out easy.
- Disposable piping bag — for neat, controlled pouring of melted wafers.
- 120 pastel colored M&M’s (24 each pink, blue, green, yellow, and purple) — these bring the party colors and a satisfying crunch.
- 2 cups bright white candy melting wafers — these are the main “glue” and base of the bark.
- 1 teaspoon shortening or vegetable oil (optional) — helps keep the melted wafers glossy and smooth.
Optional add-ons
- Sprinkles — a small amount adds texture and more color if you like extra sparkle.
- Mini chocolate chips or white chocolate chips — dot these into cavities before pouring for bits of chocolate surprise.
- Edible food markers — decorate faces, details, or give each bunny personality after the bark sets.
Substitutions and shortcuts
- White chocolate chips: If you prefer, you can swap candy melting wafers for high-quality white chocolate chips, but melt slowly and gently to avoid seizing.
- Pre-sorted candy: Buy multi-colored candies already sorted in party packs if you don’t want to sort 120 M&M’s by hand.
- Microwave-safe cup instead of piping bag: If you don’t have a piping bag, melt in a microwave-safe cup and spoon into cavities, or pour into a small resealable bag and snip a corner.
- Flavoring: Add 1/4 teaspoon of vanilla extract or almond extract to the melted wafers for a subtle flavor note (skip if using flavored wafers).
- Quick melt method: Use a double boiler if you prefer stovetop melting—stir constantly until smooth.
- Seasonal spins: If you love themed bark (I do), you might borrow ideas from other recipes like Valentine’s Day chocolate bark to mix in heart sprinkles or different candy shapes.
How to Make Easter Bunny Bark Step-by-Step
I’ll walk you through this exactly as I do it in my cozy kitchen. The steps are forgiving—and there’s room for little helpers to join in.
Step 1 — Set up your workspace
- Clear a flat workspace and grab a baking sheet that will fit your 24-cavity silicone bunny pan. Placing the silicone pan on the baking sheet gives you a sturdy base to move the pan without sloshing melted candy.
- Lay out all your ingredients and tools: M&M’s sorted by color, the piping bag, melting wafers, optional shortening, sprinkles, and any chips or markers you plan to use. Having everything in reach makes the process calm and efficient.
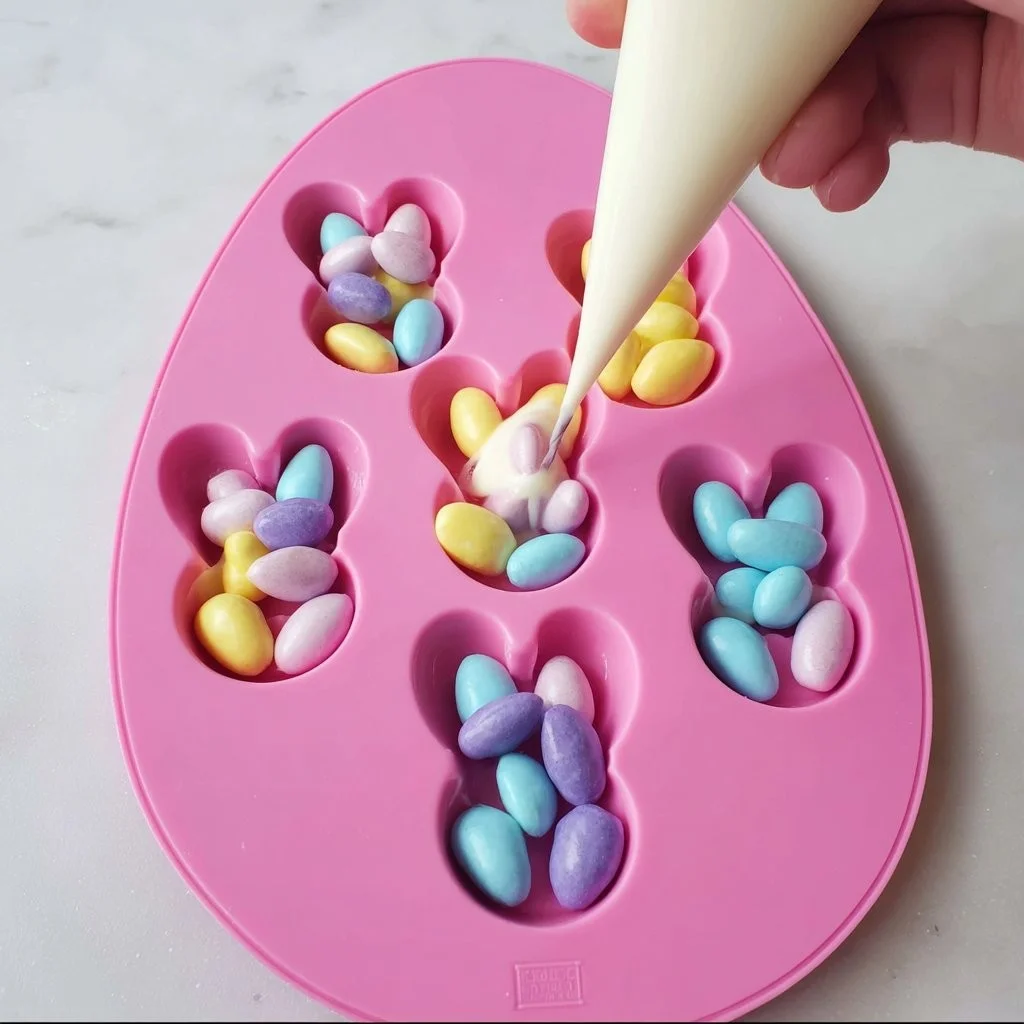
Step 2 — Sort the M&M’s and pre-fill the mold
- For a neat, balanced look, sort M&M’s by color and place about five into each bunny cavity, arranging them so they sit on the bottom where the top of each bunny will be when flipped. The pastel colors create a jolly mosaic under the white surface.
- If you like patterns, try grouping same-color clusters or alternating colors for a striped effect. This is a great job for kids—just keep the colors fairly even so you use about 120 candies total.
Step 3 — Melt the candy wafers in the piping bag
- Measure out 1 cup of your bright white candy melting wafers and put them into a disposable piping bag or a microwave-safe bowl if you prefer spooning. I like the piping bag because it makes pouring into small cavities cleaner.
- Microwave in short bursts: start with 15 seconds on high, squeeze the bag gently to redistribute, then microwave again for 10–15 seconds. Squeeze and check the consistency. Repeat until smooth and fully melted—usually 30 to 60 seconds total depending on your microwave.
- If the melted wafers look thick, add up to 1 teaspoon of shortening or vegetable oil and mix gently (knead through the piping bag or stir with a spoon if in a bowl). This thins the wafers slightly and gives a shiny finish. Don’t overdo it—too much oil affects the set.
Step 4 — Pipe the melted candy over the M&M’s
- Snip a tiny tip from the piping bag (start small; you can always cut more) and gently squeeze melted candy into each cavity, covering the M&M’s completely. Aim to fill each bunny cavity about 1/4 inch from the top so the edges are full but not overflowing.
- Work steadily but don’t rush—if bubbles form on the surface, tap the pan gently on the countertop to release them and help the candy settle. If any air pockets show at the bottom around the candies, use the tip of the bag or a toothpick to nudge the candy so it fills gaps.
Step 5 — Add extras and let set
- If you want sprinkles or mini chips on the surface, scatter them right after you pour so they adhere before the waxy candy hardens. Edible markers can be used later once fully set.
- Let the silicon pan sit at room temperature until the candy is completely firm—this usually takes 30 to 60 minutes depending on room temperature. For faster setting, place the baking sheet with the pan in the refrigerator for 15–30 minutes; avoid freezing, which can cause condensation when brought back to room temp.
Step 6 — Unmold and store
- Once set, press gently from the bottom of each cavity to pop out the bunnies. A flexible silicone pan makes this delightfully easy—wiggle slightly if needed.
- Store your Easter Bunny Bark in an airtight container at room temperature for up to 2 weeks; if your home is warm, refrigerate in a single layer between sheets of parchment for up to a month. Bring back to room temperature before serving so flavors aren’t muted.
Extra tips I use every time
- Warm the piping bag between hands if the melted wafers start to stiffen while you work.
- Keep a cleanup bowl of hot water nearby; wipe the bag tip or spoon between uses for neat edges.
- For neater edges around the bunnies, use a small offset spatula or an icing scraper to level the top before the candy sets.
Common Mistakes to Avoid
These little slip-ups are easy to make, but once you know them, you can sidestep each one and enjoy a stress-free baking session.
Mistake 1: Overheating the candy wafers
If you microwave too long or on too high a power, white candy wafers can seize or separate and become grainy. I always heat in short intervals—15 seconds at a time—pausing to squeeze and gently knead the bag. If the mixture looks thick or a little grainy, a tiny bit of shortening stirred in can rescue the texture. If it looks scorched, start over with fresh wafers.
Mistake 2: Filling cold or uneven molds
Silicone molds should sit on a firm baking sheet; otherwise you risk spills and uneven pieces. Also, if the mold is cold from refrigeration, the candy can set too quickly and trap air around your M&M’s. I let my mold come to room temperature and make sure the candies are settled before pouring to avoid tiny air pockets.
Mistake 3: Rushing the set time
Trying to unmold too early leads to cracked or sticky bunnies. If you want them firm quickly, chill briefly in the refrigerator, but don’t freeze. When bunnies are slightly warm or still tacky, they’ll lose definition when popped out of the mold. Patience gives clean edges and smooth surfaces.
Serving Suggestions for Easter Bunny Bark
Easter Bunny Bark is playful and versatile—perfect for snack plates, gifting, and party displays. It’s light, colorful, and pairs beautifully with warm drinks and simple platters.
Bunny Bark Party Platter
Arrange the bunnies on a platter with mini marshmallows, pastel jelly beans, and a small bowl of extra M&M’s for a dessert table centerpiece. The variety of textures keeps guests nibbling and mingling.
Gift Bags and Party Favors
Place two or three bunnies in clear treat bags tied with pastel ribbon. Add a handwritten tag and you’ve got homemade favors that look professional without fuss. These are adorable for classroom parties or neighbor gifts.
Cozy Snack Pairings
I love pairing a bunny with a warm mug—think chamomile tea for kids or a hot chocolate bar for grown-ups. The creamy white chocolate and crisp candy make each bite feel like a tiny celebration.
Conclusion
I hope this Easter Bunny Bark recipe makes your holiday a little sweeter and a lot more relaxed—it’s easier than it looks, endlessly customizable, and absolutely beginner-approved. If you want a visual reference or a different take on bunny-shaped bark, I often look to classic inspiration like Easy Bunny Bark – Sprinkle Bakes for charming ideas and presentation tips. Now go melt some candy, enlist a helper or two, and enjoy a cozy afternoon making treats that will put smiles on everyone’s faces.
FAQs About Easter Bunny Bark
Q1: How long does Easter Bunny Bark last?
A1: Properly stored in an airtight container at room temperature, Easter Bunny Bark will keep for up to two weeks. If your home gets warm, refrigerate and use within a month; bring to room temperature before serving for best flavor.
Q2: Can I make Easter Bunny Bark ahead of time for a party?
A2: Yes—Easter Bunny Bark is perfect to make a few days ahead. Store in an airtight container in a cool, dry place; add sprinkles or edible marker decorations right before serving if you want them fresh-looking.
Q3: Can I use regular white chocolate instead of candy melting wafers for Easter Bunny Bark?
A3: You can, but regular white chocolate needs gentle melting (preferably in a double boiler) and can be more temperamental. Candy melting wafers are formulated to melt smoothly and set with a glossy finish, which is why I recommend them for Easter Bunny Bark.
Q4: Are there allergies to watch for in Easter Bunny Bark?
A4: Yes—M&M’s contain milk and may contain traces of peanuts; always check package labels for allergens. You can substitute allergy-friendly candies (dairy-free or nut-free) and use allergen-safe wafers if needed to make Easter Bunny Bark suitable for your guests.
Q5: How can I decorate Easter Bunny Bark to look more professional?
A5: For a cleaner look, pipe a thin border around each bunny with a contrasting color before the main pour, use a small offset spatula to level tops, and add sprinkles or mini chips immediately after pouring. Edible food markers let you draw faces or patterns once the bark is fully set for personality and charm.
Easter Bunny Bark
- Total Time: 25 minutes
- Yield: 24 servings 1x
- Diet: Vegetarian
Description
A cheerful, no-bake treat made with white candy melting wafers and pastel M&M’s, perfect for Easter celebrations.
Ingredients
- 1 Easter bunny silicone pan (24-cavity)
- 1 disposable piping bag
- 120 pastel colored M&M’s (24 each pink, blue, green, yellow, and purple)
- 2 cups bright white candy melting wafers
- 1 teaspoon shortening or vegetable oil (optional)
- Sprinkles (optional)
- Mini chocolate chips or white chocolate chips (optional)
- Edible food markers (optional)
Instructions
- Set up your workspace: Clear a flat workspace and grab a baking sheet to fit the silicone bunny pan.
- Sort the M&M’s and pre-fill the mold: Place about five M&M’s into each bunny cavity.
- Melt the candy wafers in the piping bag: Put wafers in piping bag and microwave in short bursts until melted.
- Pipe the melted candy over the M&M’s: Fill each bunny cavity with melted candy covering the M&M’s completely.
- Add extras and let set: Scatter sprinkles or mini chips and let the pan sit until candy is firm.
- Unmold and store: Press gently from the bottom to pop out the bunnies and store in an airtight container.
Notes
Easter Bunny Bark can be stored for up to 2 weeks at room temperature or refrigerated for up to a month.
- Prep Time: 15 minutes
- Cook Time: 10 minutes
- Category: Dessert
- Method: No-bake
- Cuisine: American
Nutrition
- Serving Size: 1 bunny
- Calories: 100
- Sugar: 8g
- Sodium: 15mg
- Fat: 5g
- Saturated Fat: 3g
- Unsaturated Fat: 1g
- Trans Fat: 0g
- Carbohydrates: 12g
- Fiber: 0g
- Protein: 1g
- Cholesterol: 0mg
Keywords: Easter treats, no-bake desserts, colorful candy, children-friendly recipes, holiday snacks