Last updated on March 3, 2026
A Cozy Beginning
Have you ever caught the house smelling like sweet coconut and thought of childhood afternoons hunting for chocolate in the yard? I sure have—one spring, my niece tried to hide a coconut macaroon and then forgot where she put it. It was a funny little treasure hunt that ended with sticky fingers and big smiles. If you’re nervous about complicated Easter desserts or worried you don’t have the right baking skills, I promise this is one of the friendliest recipes you’ll try. It’s a no-bake, low-stress treat that’s perfect for beginners and for anyone who loves something sweet and nostalgic. If you like coconut-based frozen treats, you might also enjoy my take on vegan coconut peach popsicles for another easy, refreshing dessert.
A Quick Look at This Easter Bunny Coconut Tails – A Sweet No-Bake Treat! Recipe
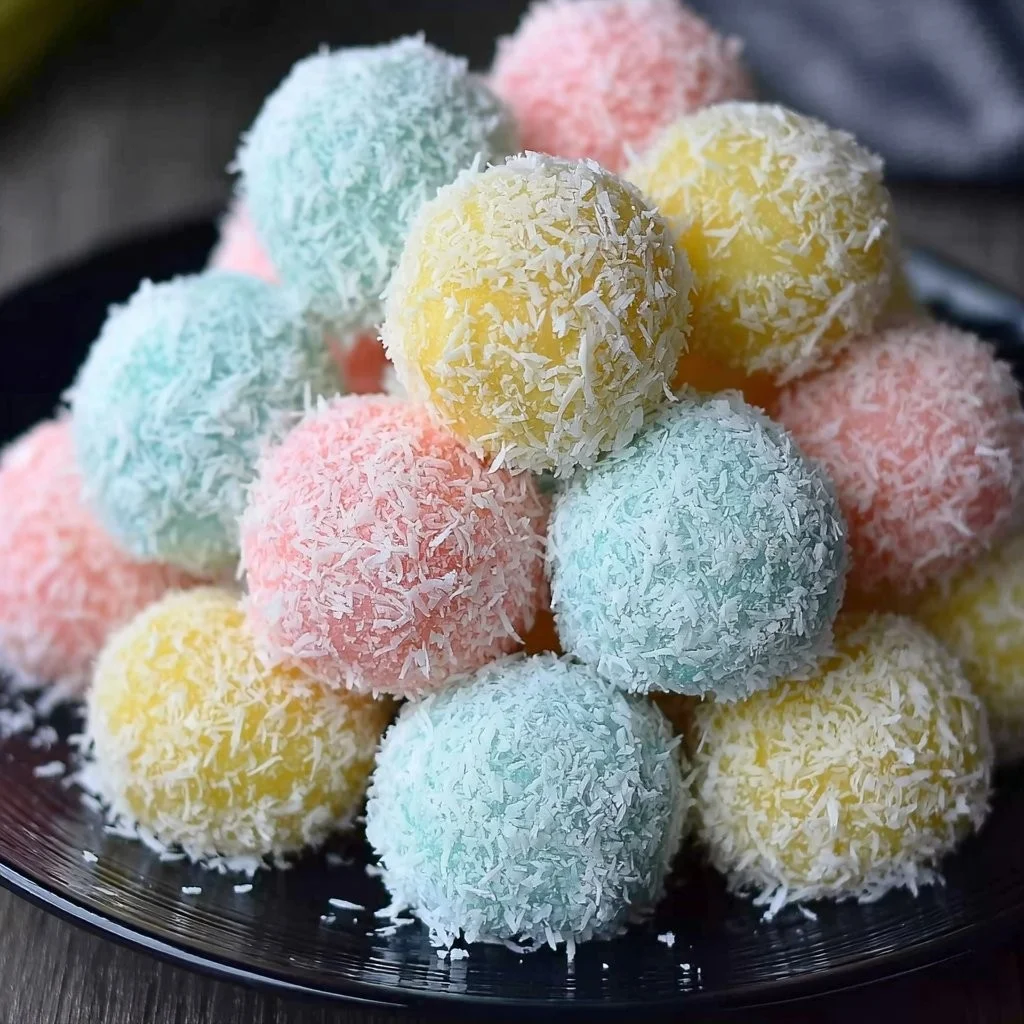
This no-bake recipe uses sweetened condensed milk and plenty of unsweetened shredded coconut to make pillowy coconut bites that look like tiny bunny tails. The texture is chewy and satisfying; the colors come from pastel liquid food coloring for a festive Easter feel. It’s a quick, refrigerator-set confection—no oven needed—which makes it perfect for home cooks, parents, or anyone short on time. Scroll down to see how simple shaping and rolling in colored coconut turns pantry staples into the cutest seasonal bite.
Ingredients You’ll Need for Easter Bunny Coconut Tails – A Sweet No-Bake Treat!
Below I break the ingredient list into what you must have, what you might like to add, and useful substitutions or shortcuts so you can make these with what’s on hand.
Essentials
- 5 cups unsweetened coconut (medium shred) — this gives the mixture body and chew
- 2 cups unsweetened coconut (fine shred) — for coating and color
- 14 oz sweetened condensed milk (one standard can) — the binder and sweetener
- 2 tbsp butter, melted and cooled — adds richness and helps the mixture hold together
- 1 tsp vanilla extract — for warmth and flavor depth
- 1/4 cup confectioner’s sugar — light sweetness and helps firm the mix
Optional small flavor tweak that I sometimes use in place of vanilla:
- 1/4 tsp almond extract (optional, include more in optional add-ons section)
Optional add-ons
These let you dress the bites up or change the flavor profile:
- Liquid food coloring (pastel colors) — for coloring the fine coconut and creating those bunny-tail hues
- Mini chocolate chips — a whimsical eye or sprinkle inside the tail (if you want little specks)
- Toasted coconut flakes — for a toasty coating instead of or alongside colored coconut
- Chopped dried fruit (apricots or pineapple) — fold tiny bits into the base for chewier texture
- Shredded white chocolate or candy melts — drizzle or pipe for decoration
- Pastel sprinkles — for extra festive looks
- A few drops almond extract — for an almond-coconut twist (optional, but aromatic)
Substitutions and shortcuts
- Sweetened condensed milk: If you prefer a less-sweet bite, use a light condensed milk or reduce confectioner’s sugar slightly, but realize texture will change. Do not substitute evaporated milk — it’s unsweetened and won’t bind properly.
- Butter: Use coconut oil (solid/softened) to keep the recipe dairy-free, though flavor will be slightly different.
- Confectioner’s sugar: If avoiding refined sugar, use a powdered sugar alternative or omit and chill the mix longer; sweetness will be less balanced.
- Shredded coconut: If your pantry only has one shred size, you can use medium for both base and coating—just pulse the medium in a food processor briefly to get some finer bits for coating.
- Coloring: If you don’t have liquid food coloring, use gel food coloring (less is needed) or skip coloring entirely and use toasted coconut flakes for visual interest.
- Time-saver: If you’re short on time, press the mixture into a small pan to chill and cut into squares, then roll each square in colored coconut to mimic the look.
How to Make Easter Bunny Coconut Tails – A Sweet No-Bake Treat! Step-by-Step
I’ll walk you through each step as if I’m standing beside you. Take your time and enjoy the process—this is meant to be simple and fun.
Prep your workspace and tools
- Line a baking sheet with parchment paper or a silicone mat for easy chilling.
- Measure out your ingredients so everything is within reach. I like to have the medium and fine coconut separated in bowls, the can of sweetened condensed milk open, and a small bowl for melted butter.
- Have a small scoop or tablespoon ready for portioning and a separate bowl or plate for the colored coconut coating.
Make the coconut base
- In a large mixing bowl, add the entire 14 oz can of sweetened condensed milk.
- Pour in the 2 tablespoons of melted and slightly cooled butter. The butter should be warm enough to be liquid but not hot—hot butter can alter the condensed milk texture.
- Add 1 teaspoon of vanilla extract.
- Whisk these together until smooth and glossy. I use a balloon whisk for a few quick circles—this helps the mixture be uniform before adding coconut.
Add the medium-shred coconut and confectioner’s sugar
- Stir in the 5 cups of medium-shred unsweetened coconut and the 1/4 cup confectioner’s sugar.
- Use a sturdy spatula to fold until the coconut is evenly coated and the mixture looks sticky but holds shape when pressed together.
- Taste a tiny pinch (clean spoon!) to check sweetness—if you prefer a sweeter tail, add another tablespoon of confectioner’s sugar, but don’t overdo it or the texture will change.
Chill briefly to firm up
- Cover the bowl with plastic wrap and refrigerate for about 15 minutes. This step helps the mixture firm up so you can scoop and shape it without it spreading.
- If your kitchen is warm, you might want to chill for 20–25 minutes. I’ve found that the 15-minute mark is usually enough, but it depends on room temperature.
Color the fine-shred coconut
- Divide the 2 cups of fine-shred coconut into small bowls—one bowl for each color you want to make. I usually do pale pink, soft blue, and light yellow.
- Add a drop or two of liquid food coloring to each bowl. Start small; pastel shades need very little color. Use a fork or your fingers (wear gloves if you want) to stir and massage the color into the coconut until evenly tinted.
- If a shade is too faint, add another drop. If it’s too vibrant, fold in a little plain fine coconut to tone it down.
Portion and shape the coconut tails
- Use a small cookie scoop (about 1–1.5 tablespoons) or a spoon to portion the chilled base mixture. Scoop and gently release onto your working surface.
- Roll the portion between your palms into a ball for a round “tail,” or shape into a teardrop/oval for realistic rabbit tails. Keep your hands slightly damp (rinse and dry them) if the mixture sticks too much.
- For a more rustic look, don’t over-roll—slight texture makes them look homey.
Coat each tail in colored coconut
- Place a small pile of colored fine coconut on a plate. Gently roll each shaped tail in the colored coconut, pressing lightly to adhere the coating. Turn and press until fully covered.
- For two-tone tails, roll one half in one color and the other half in another color, or roll twice in two different colors for a blended look.
- If you want toasted-coconut contrast, dip some in toasted flakes instead of colored coconut.
Chill to set
- Arrange the coated tails on the prepared baking sheet with parchment, spaced slightly apart.
- Refrigerate for about 1 hour or until firm. This helps them hold their shape and makes them easier to handle when plating.
- If you plan to pipe white chocolate decoration, wait until the tails are chilled and firm so the chocolate sets quickly.
Optional finishing touches
- If using shredded white chocolate or melted candy melts, melt according to package directions and drizzle with a small spoon or piping bag over the chilled tails.
- Add a mini chocolate chip (press gently into the side) to mimic a tiny nose or as whimsical decoration.
- Sprinkle pastel nonpareils or sugar pearls lightly before chocolate sets.
Store and serve
- Store the finished treats in an airtight container in the refrigerator for up to 7 days. They’re best served slightly chilled or at cool room temperature.
- Bring a container to an Easter gathering and let them warm for 5 minutes out of the fridge if you prefer a softer chew.
A quick pairing note: These coconut tails are delightful alongside a scoop of something creamy or citrusy—if you like contrasting textures, consider a chilled dessert like the brownie ice cream sandwiches for a crowd-pleasing spread.
Common Mistakes to Avoid
These treats are forgiving, but a few hiccups can make shaping or texture tricky. Below are the most common missteps and how to avoid them.
I’ll walk you through the mistakes I’ve learned from—nothing dramatic, just small fixes that make your coconut tails look and taste their best.
Mistake 1: Mixture too wet or sticky
If the base mixture is very sticky and won’t hold shape, it likely needs more chilling time or a touch more coconut. Refrigerate the mixture for another 10–15 minutes, then try scooping. If it’s still too soft, fold in a little extra medium-shred coconut, a tablespoon at a time, until it holds. Avoid adding too much liquid.
Mistake 2: Over-coloring the coconut
I’ve seen folks add way too much dye and end up with neon tails. Start with one drop of liquid food coloring and mix thoroughly. Pastels are subtle—if you need more color, add it sparingly. Gel coloring works, but use even less. If a shade ends up too dark, mix in some plain coconut to tone it down.
Mistake 3: Coating not sticking
If the colored coconut falls off the shaped tails, the base may be too dry or the coating applied too roughly. Press the colored coconut gently into the shaped tail so it adheres. If the base is dry, brush a tiny bit of condensed milk on the surface before rolling in the colored coconut. Don’t soak it—just a light touch to help the coating stick.
Serving Suggestions for Easter Bunny Coconut Tails – A Sweet No-Bake Treat!
These bite-sized tails are versatile—serve them as part of a dessert board, package them for gifting, or tuck them into Easter baskets. They’re charming and portable, perfect for spring gatherings.
Party platter with pastel fruit
Arrange the coconut tails on a large platter surrounded by sliced strawberries, kiwi, and small bunches of grapes. The fresh fruit counterbalances the sweetness and adds color.
Gift boxes or mason jars
Layer a few tails in waxed paper within small boxes or mason jars. Add a ribbon and a little tag—these make sweet handmade gifts for neighbors or teachers.
Dessert pairing and drinks
Serve with a pot of tea (Earl Grey or chamomile) or a tall glass of cold milk. For a brunch table, pair with lemon bars or shortbread to add buttery contrast.

Conclusion
I love how simple and cheerful these little bites are—Easter Bunny Coconut Tails – A Sweet No-Bake Treat! really is easier than it looks, and the whole family can join in the shaping and decorating. They’re endlessly customizable: swap in toasted coconut, fold in dried fruit, or go bold with colored layers. If you enjoyed this recipe and want to compare tips or see another version, you can find the original inspiration at Easter Bunny Coconut Tails – Lord Byron’s Kitchen. Try making a double batch; friends and neighbors always appreciate a small handmade treat.
FAQs About Easter Bunny Coconut Tails – A Sweet No-Bake Treat!
Q1: How long do Easter Bunny Coconut Tails – A Sweet No-Bake Treat! last in the fridge?
A1: Easter Bunny Coconut Tails – A Sweet No-Bake Treat! will keep well in an airtight container in the refrigerator for up to 7 days. For best texture, eat within 3–5 days when they’re freshest.
Q2: Can I freeze Easter Bunny Coconut Tails – A Sweet No-Bake Treat!?
A2: Yes—freeze the coated tails on a baking sheet until solid, then transfer them to a freezer-safe container with parchment between layers. They should keep up to 2 months. Thaw in the refrigerator for a few hours before serving.
Q3: Are Easter Bunny Coconut Tails – A Sweet No-Bake Treat! dairy-free?
A3: The standard recipe isn’t dairy-free because it uses butter and sweetened condensed milk. To make Easter Bunny Coconut Tails – A Sweet No-Bake Treat! dairy-free, substitute melted coconut oil for butter and use sweetened condensed coconut milk (available in many stores) instead of dairy condensed milk.
Q4: How can I make Easter Bunny Coconut Tails – A Sweet No-Bake Treat! less sweet?
A4: To reduce sweetness in Easter Bunny Coconut Tails – A Sweet No-Bake Treat!, cut the confectioner’s sugar slightly or use a reduced-sugar condensed milk alternative. Be aware that sweetness affects texture, so reduce sugar gently and chill longer to achieve the right firmness.
Q5: Can children help make Easter Bunny Coconut Tails – A Sweet No-Bake Treat!?
A5: Absolutely. Easter Bunny Coconut Tails – A Sweet No-Bake Treat! are great for kids—mixing the base, shaping the tails, and rolling in colored coconut are all kid-friendly tasks. Supervise the use of small decorations like mini chocolate chips for younger children and help with any melting or stirring steps.
I hope you enjoy making these as much as I do—there’s something cozy about sticky fingers and pastel coconut at springtime. If you try them, tell me how you decorated yours; I love swapping little tricks and color combos.
Print
Easter Bunny Coconut Tails – A Sweet No-Bake Treat!
- Total Time: 75 minutes
- Yield: 20 servings 1x
- Diet: Vegetarian
Description
Delightful no-bake coconut bites that resemble bunny tails, perfect for Easter celebrations.
Ingredients
- 5 cups unsweetened coconut (medium shred)
- 2 cups unsweetened coconut (fine shred)
- 14 oz sweetened condensed milk
- 2 tbsp butter, melted and cooled
- 1 tsp vanilla extract
- 1/4 cup confectioner’s sugar
- Liquid food coloring (pastel colors, optional)
- Mini chocolate chips (optional)
- Toasted coconut flakes (optional)
- Chopped dried fruit (optional)
- Shredded white chocolate or candy melts (optional)
- Pastel sprinkles (optional)
Instructions
- Line a baking sheet with parchment paper or a silicone mat.
- Measure out your ingredients and have them ready.
- Add the sweetened condensed milk and melted butter to a bowl and whisk until smooth.
- Stir in the medium-shred coconut and confectioner’s sugar until combined.
- Cover the bowl with plastic wrap and refrigerate for about 15 minutes to firm up.
- Divide the fine-shred coconut into bowls and add food coloring as desired.
- Portion the mixture using a small cookie scoop and shape into tails.
- Roll each shaped tail in colored coconut to coat.
- Arrange the tails on the baking sheet and refrigerate for about 1 hour to set.
- Optional: Drizzle with melted white chocolate or decorate as desired before serving.
Notes
For a less sweet treat, adjust sugar levels and use alternative ingredients as suggested.
- Prep Time: 15 minutes
- Cook Time: 60 minutes
- Category: Dessert
- Method: No-bake
- Cuisine: American
Nutrition
- Serving Size: 1 tail
- Calories: 120
- Sugar: 10g
- Sodium: 50mg
- Fat: 7g
- Saturated Fat: 5g
- Unsaturated Fat: 2g
- Trans Fat: 0g
- Carbohydrates: 14g
- Fiber: 1g
- Protein: 1g
- Cholesterol: 15mg
Keywords: Easter, coconut, no-bake, dessert, sweet treats, spring recipes