Last updated on March 3, 2026
A Cozy Welcome
Do you ever crave a sweet project that reminds you of childhood holidays—sticky fingers, pastel colors, and the kind of treat everyone smiles at? I do, and that’s how this recipe was born: a quick, cheerful snack I can make between errands or while the kids hunt for eggs in the backyard. If you’re new to candy-making, I promise this is one of the friendliest recipes you’ll try; it’s more about gentle stirring than fancy technique. If you want other simple recipes to pair with this sweet bark or for a dessert table, I sometimes turn to easy weeknight recipe ideas for inspiration and simplicity.
A Quick Look at This Easy Easter Marshmallow Bark Recipe
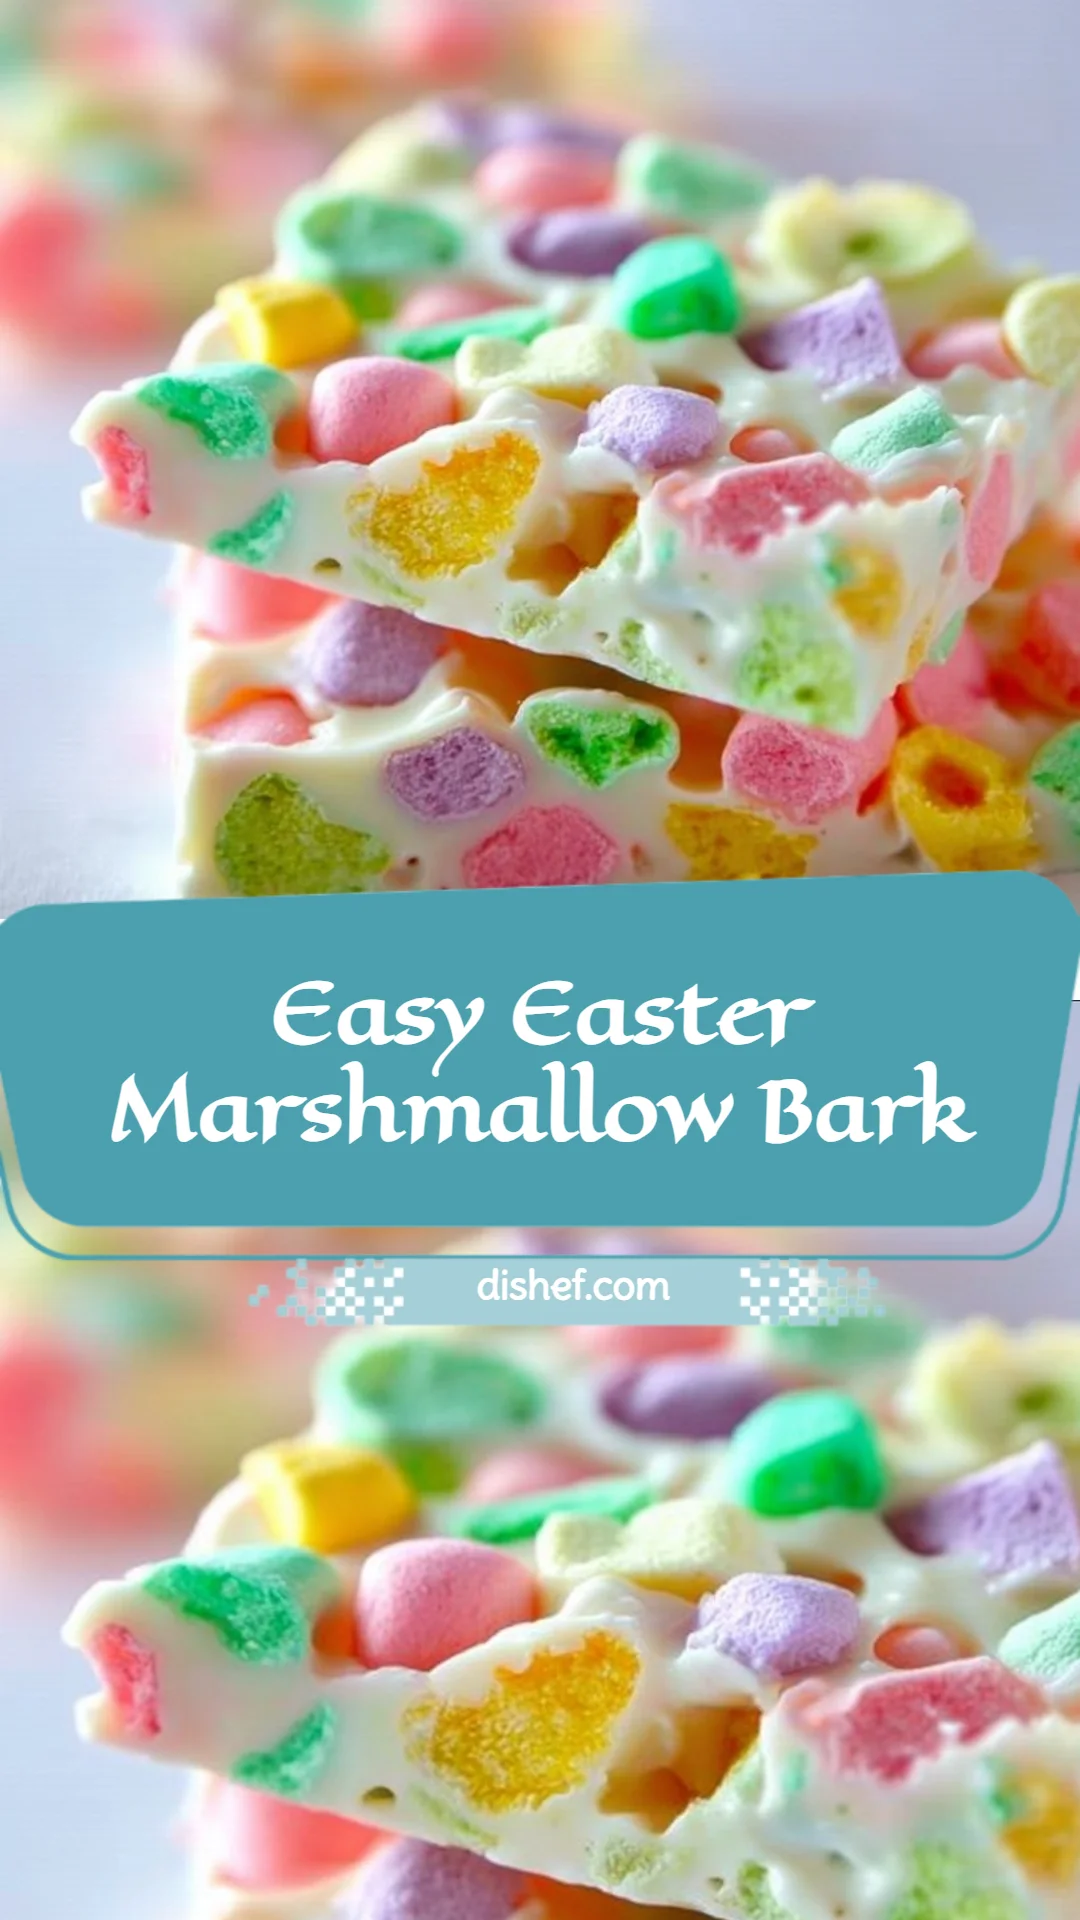
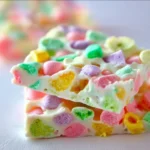
This Easy Easter Marshmallow Bark centers on creamy white chocolate and pillowy pastel mini marshmallows—simple components that make a very festive treat. It’s perfect for when you want a fast, no-bake dessert that still looks special; the colorful sprinkles add charm without any extra effort. This recipe is ideal for home cooks and beginners because it uses straightforward steps and basic tools—no tempering or candy thermometer required. Keep reading to find helpful tips for customization, storage, and kid-friendly ways to get everyone involved.
Ingredients You’ll Need for Easy Easter Marshmallow Bark
Below I break the ingredients into essentials and optional add-ins so you can tailor the recipe to your pantry and taste. Nothing here includes pork or alcohol—just sweet, fun pantry goodies.
Essentials
- 2 cups white chocolate chips
- Use good-quality chips or bakery-style chips for a creamy melt. White chocolate couverture is optional but not necessary.
- 1 cup pastel mini marshmallows
- The tiny marshmallows are light and airy and give the bark that classic Easter look. If you can’t find pastel, plain mini marshmallows work just as well.
- 1/2 cup colorful sprinkles
- Choose small, nonpareil or jimmies in spring colors. Keep some to press on top after spreading the chocolate.
Optional add-ons
- 1 teaspoon vegetable oil (optional)
- This helps smooth the white chocolate and makes it easier to spread; use only if the chips are thick after melting.
- Chopped mini candy pieces (optional)
- Think mini chocolate eggs, M&M-style candies, or candy-coated bits for crunch and color.
- Crushed graham crackers or vanilla cookies (optional)
- Sprinkle a little for a subtle crunchy texture and a touch of buttery flavor.
- Toasted coconut flakes (optional)
- Lightly toast until golden and scatter for a tropical note and extra texture.
- Light dusting of fine sea salt (optional)
- A very small pinch accentuates the sweetness and deepens the flavor.
- Drizzle of melted milk or dark chocolate (optional)
- A contrasting chocolate drizzle makes the bark look more professional and balances white chocolate sweetness.
Substitutions and shortcuts
- Chocolate swap: If you prefer a less-sweet option, substitute half the white chocolate with milk or dark chocolate chips. Keep in mind that darker chocolates take a little more care when melting.
- Dairy-free: Use dairy-free white chocolate chips or a vegan white candy coating if you need this to be vegan-friendly.
- Marshmallow substitute: If you can’t find pastel minis, chop regular marshmallows into small pieces or use tiny meringue bits for crunch (mildly changes texture).
- Faster setting: Chill the finished sheet in the refrigerator for 15–20 minutes to speed setting—this is handy when you’re short on time.
- No-sprinkles shortcut: If you don’t have sprinkles, use crushed freeze-dried berries or chopped colorful cereal for a playful alternative.
- One-bowl method: Melt the chocolate directly in a microwave-safe bowl, fold in mix-ins, and then spread—no second bowl needed.
- Make-ahead: You can melt the chocolate and have your mix-ins ready to fold in quickly; assembled but not set bark can be refrigerated for short-term storage before breaking into pieces.
I also like to keep a simple shortcut on hand: if you’re aiming for a textural contrast but not extra fuss, just stir in cookie crumbs and press marshmallows on top. For more quick snack ideas—especially if you love bite-sized treats—try my go-to recipe for 10-minute fluffy pretzel bites which pairs well with this bark on a party tray.
How to Make Easy Easter Marshmallow Bark Step-by-Step
This section walks you through each step in a clear, calm way—perfect if you’ve never made candy bark before. Gather everything before you start so the chocolate behaves.
Prepare your workspace and baking sheet
- Line a baking sheet with parchment paper or a silicone baking mat. I prefer parchment for easier lifting, but a silicone mat works great for non-stick release. Place the sheet on a level surface so your bark sets even.
- Arrange your marshmallows, sprinkles, and any optional add-ins nearby. Chocolate cools quickly, so it helps to have everything within arm’s reach.
Measure the white chocolate chips
- Measure 2 cups of white chocolate chips into a microwave-safe bowl. If you’re using a plastic bowl, make sure it’s microwave-safe. Glass or ceramic bowls hold heat a bit longer and help melt evenly.
Melt the white chocolate gently
- Microwave in 30-second bursts on medium power. After each burst, remove the bowl and stir thoroughly. This is the easiest way to avoid scorching.
- As the chips begin to soften, stirring will finish the melting. If the chocolate is a little thick, stir in up to 1 teaspoon of vegetable oil to smooth it out—add just enough so the chocolate becomes shiny and fluid. Be careful: too much oil can make the bark greasy.
Fold in the pastel mini marshmallows and half of the sprinkles
- When the chocolate is fully melted and smooth, fold in 1 cup of pastel mini marshmallows and half of the 1/2 cup of sprinkles using a silicone spatula. Use gentle strokes so you don’t crush the marshmallows; the goal is to distribute them evenly across the chocolate.
- If you’re adding chopped candies, cookie crumbs, or toasted coconut, fold a portion in now—save some to sprinkle on top for visual appeal.
Pour and spread the chocolate mixture on the prepared sheet
- Pour the melted chocolate and marshmallow mixture onto the lined baking sheet. Use an offset spatula or the back of a spoon to spread it to your desired thickness—about 1/4 to 1/2 inch thick is classic. Keep edges slightly thinner if you want delicate pieces, or a uniform thickness if you prefer consistent chunks.
Add the finishing touches
- Sprinkle the remaining sprinkles and any reserved add-ins over the top, pressing lightly so they stick to the warm chocolate. If you’re using a chocolate drizzle, melt a small amount of milk or dark chocolate and drizzle thin ribbons with a spoon or piping bag. Finish with a very light dusting of fine sea salt if you like a sweet-salty contrast.
Let the bark set
- Allow the bark to cool and harden at room temperature for about 1–2 hours. If you’re short on time, transfer the baking sheet to the refrigerator for 15–30 minutes to speed the setting process. Avoid freezing, as it can cause condensation when thawed.
Break into pieces and serve
- Once fully set, lift the parchment or mat and turn it over on a cutting board. Break the bark into irregular pieces with your hands or use a sharp knife to cut neat bars. Serve on a platter or wrap in little cellophane bags for gifts.
Store leftovers properly
- Place leftover pieces in an airtight container layered with parchment paper to prevent sticking. Store at cool room temperature for up to 1 week or in the refrigerator for up to 2 weeks. If stored in the fridge, bring to room temperature before serving to restore the soft marshmallow texture.
Common Mistakes to Avoid
Making marshmallow bark is forgiving, but a few missteps are common—here’s how to avoid them.
I find most problems come from overheating the chocolate, rushing the set, or using too many wet mix-ins. With a little attention to temperature and timing, you’ll have glossy, stable bark every time.
Mistake 1: Overheating the chocolate
White chocolate burns easily and can seize into a grainy mess. Always melt in short intervals and stir in between. If your chocolate thickens as you stir, stop microwaving and let the residual heat complete the melting. Adding a tiny bit of vegetable oil can help rescue a slightly dry batch, but if it’s scorched, it’s best to start fresh.
Mistake 2: Adding marshmallows while chocolate is too hot
If you add marshmallows to extremely hot chocolate, they can melt and lose their shape. Let the chocolate cool for a minute or two after melting—stir often to bring the temperature down slightly—before folding in the marshmallows. You want the marshmallows to stay pillowy rather than dissolve.
Mistake 3: Trying to rush the setting with the freezer
Quick-chilling in the freezer can produce condensation when you remove the bark, which may make it sticky or weep when returning to room temperature. Use the refrigerator if you need to speed things up; it’s gentler and reduces the chance of condensation forming on the surface.
Serving Suggestions for Easy Easter Marshmallow Bark
This bark is playful and easy to adapt to different gatherings. It looks great on a dessert table and pairs well with simple drinks and other finger foods.
I often pair pieces with a warm brewer of tea or a chilled glass of milk—nostalgic and satisfying.
For a brunch spread
Arrange the bark on a long platter alongside fruit skewers, mini muffins, and a bowl of mixed nuts for contrast. The colorful bark brightens the table and makes brunch feel more festive without extra work.
As party favors
Wrap small clusters in cellophane and tie with ribbon for easy take-home treats. Adding a handwritten tag with the date or a short message makes them feel personal—perfect for Easter gatherings, baby showers, or classroom parties.
On a dessert board
Create a “snack board” with a mix of sweet and salty: include the marshmallow bark, salted pretzels, chocolate-covered almonds, and some fresh berries. Guests can mix and match flavors for a fun tasting experience.
Conclusion
I love how this Easy Easter Marshmallow Bark turns minimal effort into maximum charm—it’s truly easier than it looks and wonderfully customizable. Whether you stick with the basics or sprinkle on extras like chopped candies or toasted coconut, this is a recipe that welcomes creativity and little helpers. If you want a quick visual guide or another take on the same idea, I found a handy step-by-step inspiration at Super Easy Easter Marshmallow Bark – Instructables. Try making a batch today, then come back and tell me which add-ins you loved most—I can’t wait to hear.
FAQs About Easy Easter Marshmallow Bark
Q1: How long does Easy Easter Marshmallow Bark keep fresh?
A1: Easy Easter Marshmallow Bark stays fresh in an airtight container at cool room temperature for about 5–7 days. If you live somewhere warm or humid, store it in the refrigerator for up to 2 weeks to keep the chocolate firm and the marshmallows from getting sticky. Bring pieces to room temperature before serving for best texture.
Q2: Can I freeze Easy Easter Marshmallow Bark?
A2: You can freeze Easy Easter Marshmallow Bark for up to 1 month, but be careful. Wrap pieces tightly in plastic wrap and store in a freezer-safe bag. When thawing, move the bark to the refrigerator for a few hours first to reduce condensation, then bring to room temperature before unwrapping to avoid moisture forming on the surface.
Q3: Is there a dairy-free version of Easy Easter Marshmallow Bark?
A3: Yes. Use dairy-free white chocolate chips or a vegan candy coating and vegan mini marshmallows to make a dairy-free or vegan-friendly version. Check labels carefully, as some marshmallows and white chocolates contain gelatin or milk solids.
Q4: Can I make Easy Easter Marshmallow Bark ahead of time for a party?
A4: Absolutely. You can make it 1–2 days ahead and store it in an airtight container at room temperature if your kitchen is cool. For longer storage, keep it in the refrigerator up to two weeks. Pack it into small bags or boxes if you’d like to prepare favors in advance.
Q5: How can I make my Easy Easter Marshmallow Bark look more polished or “professional”?
A5: For a polished look, keep the surface smooth and drizzle contrasting chocolate in thin, even lines. Use an offset spatula for a clean spread and press decorative add-ins—like mini candy eggs or toasted coconut—neatly along one half of the bark for a two-tone effect. A light sprinkle of edible glitter or finely ground freeze-dried fruit can add an elevated finish without much extra work.
Easy Easter Marshmallow Bark
- Total Time: 15 minutes
- Yield: 16 pieces 1x
- Diet: Vegetarian
Description
A delightful and simple no-bake dessert made with white chocolate, pastel marshmallows, and colorful sprinkles—perfect for Easter celebrations.
Ingredients
- 2 cups white chocolate chips
- 1 cup pastel mini marshmallows
- 1/2 cup colorful sprinkles
- 1 teaspoon vegetable oil (optional)
- Chopped mini candy pieces (optional)
- Crushed graham crackers or vanilla cookies (optional)
- Toasted coconut flakes (optional)
- Light dusting of fine sea salt (optional)
- Drizzle of melted milk or dark chocolate (optional)
Instructions
- Prepare your workspace and baking sheet: Line a baking sheet with parchment paper or a silicone baking mat.
- Measure the white chocolate chips into a microwave-safe bowl.
- Melt the white chocolate gently in the microwave in 30-second bursts.
- Fold in the pastel mini marshmallows and half of the sprinkles once the chocolate is fully melted.
- Pour and spread the chocolate mixture onto the prepared baking sheet.
- Add the remaining sprinkles and any reserved add-ins over the top.
- Let the bark set at room temperature for about 1–2 hours.
- Break into pieces and serve.
- Store leftovers in an airtight container at room temperature for up to 1 week or in the refrigerator for up to 2 weeks.
Notes
For a faster setting, chill in the refrigerator for 15–30 minutes. Use different chocolates or mix-ins as per your preference.
- Prep Time: 10 minutes
- Cook Time: 5 minutes
- Category: Dessert
- Method: No-Bake
- Cuisine: American
Nutrition
- Serving Size: 1 piece
- Calories: 200
- Sugar: 20g
- Sodium: 50mg
- Fat: 8g
- Saturated Fat: 5g
- Unsaturated Fat: 3g
- Trans Fat: 0g
- Carbohydrates: 30g
- Fiber: 0g
- Protein: 1g
- Cholesterol: 0mg
Keywords: Easter, dessert, marshmallow, bark, no-bake