Last updated on July 24, 2025
Have you ever found yourself daydreaming about sweet, creamy ice cream on a hot summer day? I know I have! The moment when that cold scoop touches your tongue and sends waves of pure bliss dancing throughout your body—there’s just nothing quite like it. One of my happiest memories is walking through my neighborhood with a loved one, sharing a cone of vibrant purple ube ice cream. The luscious sweetness and subtle hints of coconut brought back fond moments of childhood, where sweet treats were the reward for a good day.
If you’re anything like me and the thought of making homemade ice cream excites you but also fills you with a touch of fear—or maybe a sense of overwhelm—you’re in the right spot! The fear of making ice cream often stems from the complicated steps, the equipment you might not have, and the concern of ruining it all for a scoop of something so divine. But don’t fret! This Ninja Creami Ube Ice Cream Recipe is here to put your mind at ease. I promise that by the end of this post, you’ll feel equipped and excited to whip up this rich and creamy dessert, even if it’s your first time in the kitchen.
Table of Contents
Why I Love This Recipe of Ninja Creami Ube Ice Cream Recipe
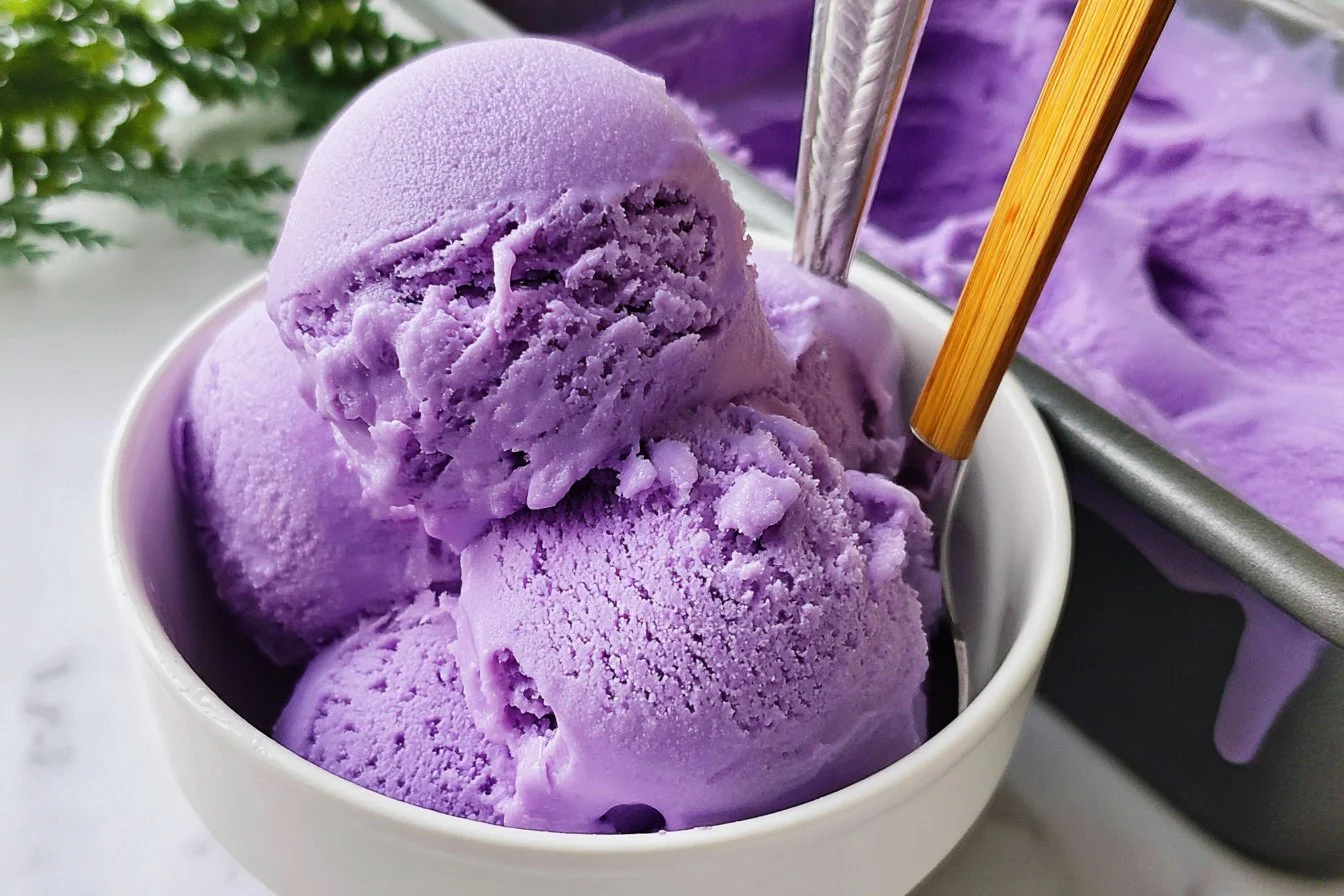
There are multiple reasons why this recipe holds a special place in my heart. For one, ube—also known as purple yam—has a unique flavor profile that offers a delightful mix of nutty and sweet. The vibrant color is simply captivating and a feast for the eyes, making any dessert feel special.
What’s great about this Ninja Creami Ube Ice Cream recipe is its simplicity. It’s an easy, stress-free way to create an indulgent treat at home without needing an ice cream churner. While it might appear fancy, it’s composed of just a handful of ingredients easily found at the grocery store. This combination not only makes it beginner-friendly but also opens the door for delightful experimentation. Want it sweeter? Add more condensed milk. Prefer a creamier texture? Opt for heavy cream instead of half and half. Each tweak allows you to customize it to your tastes and it’s all made in a cozy home environment, which is particularly satisfying.
Ingredients You’ll Need for Ninja Creami Ube Ice Cream Recipe
Here’s what you’ll need to get this delightful treat started. I suggest gathering everything before you begin to make the process as smooth as possible.
Print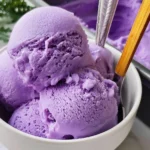
Ninja Creami Ube Ice Cream
- Total Time: 24 hours 10 minutes
- Yield: 1 pint 1x
- Diet: Vegetarian
Description
This Ninja Creami Ube Ice Cream recipe brings the beautiful purple hue and subtle nuttiness of ube into a creamy, dreamy frozen treat. Perfectly sweet, silky smooth, and customizable with your favorite toppings.
Ingredients
- 2 cups Half and Half (or heavy cream): Half and half gives a balance of creaminess and lightness. Use heavy cream for a richer texture.
- ½ cup Condensed Milk: Provides sweetness and a velvety mouthfeel.
- ½ cup Cottage Cheese (or cream cheese): Adds protein and creaminess. Cream cheese offers a tangier taste.
- 1 tablespoon Ube Powder: The key ingredient for color and flavor. Substitute with ½ cup ube jam or halaya if preferred.
- 1 teaspoon Ube Extract (optional): Intensifies the ube flavor.
Optional Add-Ons
- Toasted coconut flakes for a tropical twist.
- Chocolate chips or swirls for a decadent addition.
- Chopped nuts like macadamias or pistachios for crunch.
- Fresh fruit such as banana slices or strawberries.
Substitutions and Shortcuts
- Dairy-Free: Use coconut cream instead of half and half, cashew cream instead of cottage cheese, and coconut milk instead of condensed milk.
- Sweetness Control: Use unsweetened condensed milk or your preferred sweetener for less sugar.
Instructions
- Blend Ingredients: In a blender, combine half and half, cottage cheese, condensed milk, ube powder, and ube extract. Blend until smooth and creamy.
- Prepare for Freezing: Pour the mixture into a Ninja Creami pint container, leaving room at the top (do not exceed the max fill line).
- Freeze: Place the container in the freezer for 18–24 hours until fully frozen.
- Process: Insert the frozen container into the Ninja Creami, secure the lid, and select the “Lite Ice Cream” setting.
- Serve: Scoop your creamy ube ice cream into bowls. Top with coconut flakes, fruit, or other add-ons.
Notes
- For a deeper purple color, add an extra teaspoon of ube powder or a drop of food coloring.
- If texture is crumbly after the first spin, add 1–2 tablespoons of milk and use the “Respin” function.
- Ube jam (halaya) provides both color and natural sweetness, making it a great substitute for ube powder.
- Prep Time: 10 minutes
- Cook Time: undefined
- Category: Dessert
- Method: Ninja Creami
- Cuisine: Filipino-Inspired
Nutrition
- Serving Size: ½ cup
- Calories: 230
- Sugar: 17g
- Sodium: 70mg
- Fat: 14g
- Saturated Fat: 9g
- Unsaturated Fat: undefined
- Trans Fat: undefined
- Carbohydrates: 21g
- Fiber: undefined
- Protein: 4g
- Cholesterol: undefined
Keywords: ube ice cream, Ninja Creami ube recipe, purple yam ice cream, Filipino dessert, cottage cheese ice cream
Must-Have Ingredients
2 cups Half and Half (or heavy cream): Half and half provides a perfect balance between creaminess and lightness. If you want ultra-rich ice cream, feel free to swap it out for heavy cream.
½ cup Condensed Milk: This ingredient is the star of the show when it comes to sweetness and creaminess. You can adjust this based on how sweet you like your ice cream.
½ cup Cottage Cheese (or cream cheese): Cottage cheese adds a protein punch and provides a wonderfully creamy texture. If you prefer, you can opt for cream cheese for a stronger, tangy richness.
1 tablespoon Ube Powder: This gives our ice cream its stunning purple color and flavor. Alternatively, if you don’t have ube powder, you can substitute with ½ cup ube jam or halaya for excellent results.
1 teaspoon Ube Extract: This optional ingredient adds an extra layer of ube flavor. Feel free to add more if you love that distinct taste!
Optional Add-Ons
Once you’re comfortable with the base recipe, you can play around with additional ingredients. Here are some suggestions:
Coconut Flakes: For a tropical twist, sprinkle some toasted coconut on top before serving.
Chocolate Chips: For a decadent mix, toss in some chocolate chips or even swirl in your favorite chocolate sauce.
Nuts: Chopped macadamia nuts or pistachios can add a delightful crunch.
Fresh Fruit: Top your ice cream with fresh fruit like slices of bananas or strawberries for a refreshing addition.
Substitutions and Shortcuts
- Dairy-Free Option: Use coconut cream instead of half and half, cashew cream instead of cottage cheese, and coconut milk for a dairy-free version if desired.
- Sweetness Control: If you’re watching your sugar intake, you can use unsweetened condensed milk or even a sweetener of your choice.
How to Make Ninja Creami Ube Ice Cream Recipe Step-by-Step
Let’s get into the nitty-gritty of creating your own homemade ube ice cream using the Ninja Creami.
Step 1: Blend Your Ingredients
In a blender, combine:
- 2 cups of half and half (or heavy cream)
- ½ cup of cottage cheese (or cream cheese)
- ½ cup of condensed milk
- 1 tablespoon of ube powder
- 1 teaspoon of ube extract
Blend until all the ingredients are smooth and creamy. This shouldn’t take more than a couple of minutes! Make a note of the color and texture; you want it to be a beautiful light purple and well combined.
Step 2: Prepare for Freezing
Pour the blended mixture into a Ninja Creami pint container. Make sure to leave a little space at the top, and do not exceed the max fill line indicated on the container. This will ensure there is enough room for the mixture to expand as it freezes.
Step 3: Freeze the Mixture
Place the pint container into the freezer and allow it to freeze for at least 18-24 hours. This might feel like a patience-testing step, but I promise it’s worth the wait.
Step 4: Process in the Ninja Creami
Once frozen solid, remove the container from the freezer. Insert it into the Ninja Creami machine, and secure the pint holder lid. Select the “Lite Ice Cream” setting. The machine will do its magic, transforming your frozen mixture into a luscious ice cream.
Step 5: Enjoy Your Creation!
After processing, take a moment to admire your creation! Scoop the ube ice cream into bowls, and feel free to top it with your favorite add-ons. Enjoy it with someone special, or scoop a big bowl for yourself—you deserve it!
Common Mistakes to Avoid
When tackling a new recipe, it’s easy to stumble. Here are common pitfalls to steer clear from:
Not Blending Enough
It may be tempting to just give a quick blend, but a few extra seconds can make a significant difference. Make sure all ingredients are well-combined, providing a smoother texture.
Overfilling the Container
Leaving space in the pint container is essential. Overfilling can lead to spills when the mixture expands during freezing, and nobody wants to waste delicious ice cream!
Not Freezing Long Enough
Patience truly is a virtue here. Freezing the mixture for less than 18 hours can result in a soft and icy texture rather than a creamy delight.
Skipping the Extraction
Don’t skip the extracting step! If you do, you might end up with a texture closer to slush than ice cream, and we all want that creamy, rich finish.
Quick Wins for Beginner Cooks
Now that you’re all set with the basics, here are some tips to ensure a smooth experience in the kitchen:
Read the Recipe Twice
Before diving in, read through the entire recipe to avoid any surprises. Each step builds on the last, and knowing what’s coming can save valuable time and minimize mishaps.
Gather all Your Ingredients
Make sure everything is set up before starting your blending process. This practice not only streamlines the cooking process but also keeps you organized.
Use Good Quality Ingredients
The better the ingredients, the better your ice cream will taste. If possible, try to choose fresh, high-quality brands, especially for the ube powder and condensed milk.
Keep it Simple
Stick with the basic recipe on your first try. Once you’ve mastered it, feel free to experiment with flavors and toppings to make it truly your own.
Pro-Level Tips for When You’re Ready
As you grow more comfortable in your ice-cream-making journey, here are some advanced tips to elevate your skills:
Experiment with Flavor Profiles
Feel free to mix flavors! Try blending ube with coconut or vanilla for a delightful twist. Just be cautious of overwhelming the ube flavor.
Customize Texture
If you like a creamier feeling, adjust your ingredients. Consider adding a bit more cream or using a different mix of dairy to see its impact on texture and flavor.
Infuse Ingredients
Think about infusing other flavors directly into your base mixture while blending. For instance, using vanilla beans for that added depth can be an unforgettable flavor experience.
Explore Presentation
When it comes to serving, take some time to style your bowl with toppings. This could mean stacking fruit beautifully, swirls of sauces, or even creating layers in your bowl with more than one flavor of ice cream.
Conclusion & Next Steps
As you can see, making this Ninja Creami Ube Ice Cream Recipe is far simpler than you might have thought! I hope you’re feeling empowered to whip up this delicious treat. Remember, it’s easier than it looks, and you can customize it to your heart’s content.
Why not invite a friend over for an ice cream-making date? Not only does it bond you through shared experiences, but it also allows you to taste-test right off the bat.
Looking for more delicious recipes? Follow us on Pinterest and Facebook!
FAQs About Ninja Creami Ube Ice Cream Recipe
What is the Ninja Creami Ube Ice Cream Recipe?
The Ninja Creami Ube Ice Cream Recipe is a simple and delightful way to create creamy ube ice cream using just a blender and a Ninja Creami machine.
Can I use coconut milk instead of half and half for the Ninja Creami Ube Ice Cream Recipe?
Yes! Coconut milk is a great dairy-free option if you’re looking for a lighter or non-dairy alternative.
How long should I freeze the mixture for the Ninja Creami Ube Ice Cream Recipe?
You should freeze the mixture for at least 18-24 hours for the best texture and flavor.
How can I make the Ninja Creami Ube Ice Cream Recipe sweeter?
You can adjust the sweetness by adding more condensed milk or even experimenting with flavored syrups if you’re looking for different effects.
Can I add other flavors to the Ninja Creami Ube Ice Cream Recipe?
Absolutely! Once you master the base recipe, feel free to mix in other complementary flavors like coconut or mix-ins like chocolate chips or fresh fruit.
With this ultimate guide to creating a cozy batch of Ninja Creami Ube Ice Cream, all that’s left is to get into your kitchen and start blending! Enjoy every luscious spoonful you’ve created at home.

