Last updated on July 19, 2025
You know that feeling when you dive into a hug from a loved one? That’s how I feel every time I sink my fork into a bowl of warm, perfectly cooked brown rice. There’s something nostalgic about it, something that reminds me of family dinners shared over steaming bowls of comforting food. But let me tell you, the first time I tried making brown rice, I had my doubts. The thought of a pot that might explode under pressure, burn my precious grains, or just turn them into a mushy mess was terrifying!
Does this sound familiar? Many of us have struggled with cooking grains, especially brown rice, which can become sticky or undercooked so easily. Well, I’m here to reassure you—this guide on making Instant Pot brown rice is designed to be simple, stress-free, and totally approachable. Even if this is your first time attempting it, I promise you can do this!
Table of Contents
Why I Love This Recipe of Instant Pot Brown Rice
What makes this recipe special to me is its accessibility and the cozy warmth it brings to my kitchen and dining table. When I discovered how the Instant Pot could effortlessly deliver perfectly fluffy brown rice, it changed my meal-prepping game entirely. This dish serves as a fundamental base for so many meals—from hearty stir-fries to comforting grain bowls.
For beginner cooks, you’ll appreciate how forgiving this method is. Unlike stovetop cooking, which can lead to numerous disappointments with overcooked or undercooked rice, the Instant Pot gives you consistent results every single time. It’s also a wonderful reminder of the nourishing power of home-cooked meals; nothing feels better than serving a dish you made yourself, especially when it’s as comforting as this.
Ingredients You’ll Need for Instant Pot Brown Rice
Print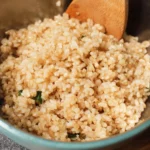
Instant Pot Brown Rice
- Total Time: 50 minutes
- Yield: 4 to 6 servings 1x
Description
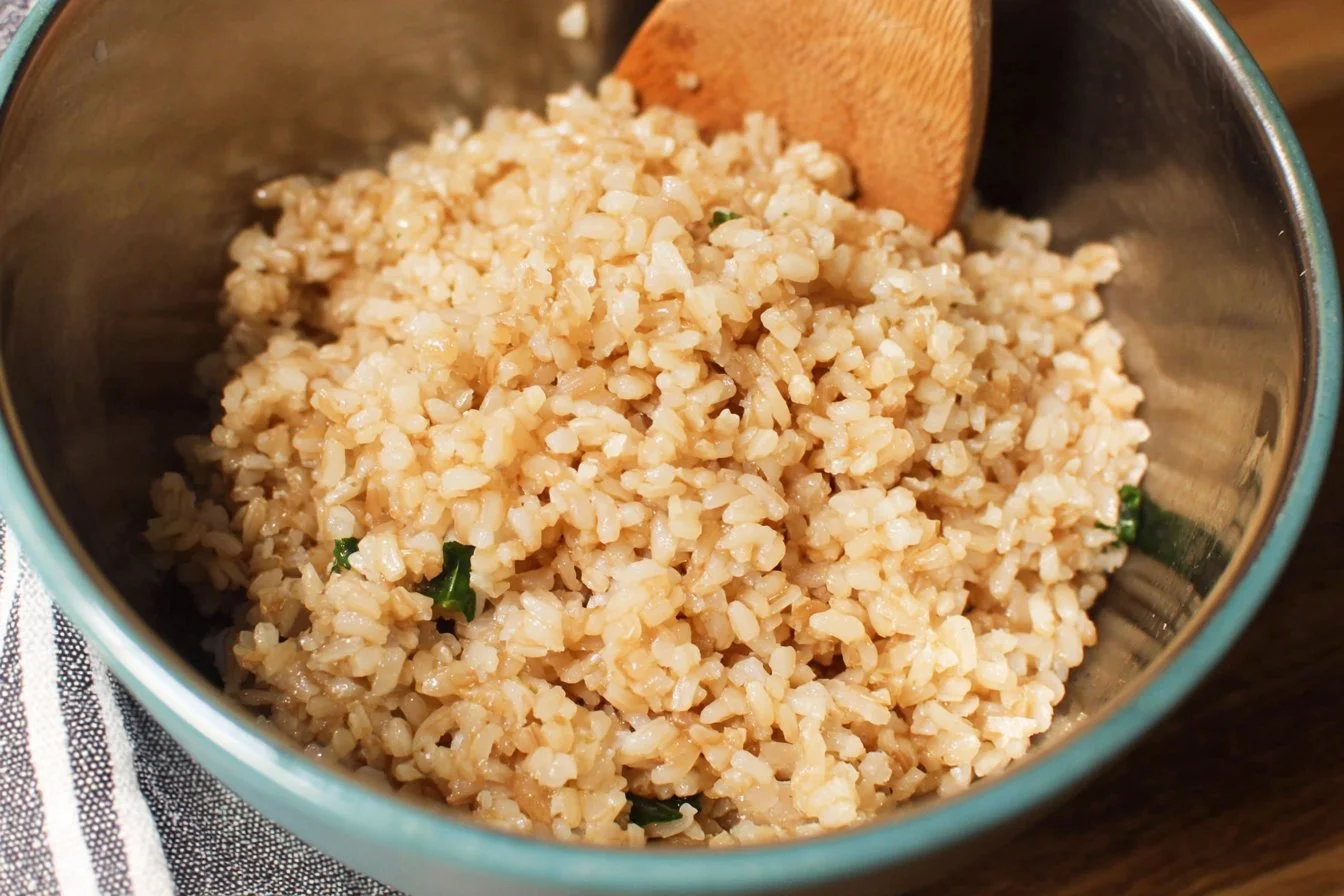
This easy Instant Pot Brown Rice recipe yields perfectly fluffy, tender grains every time—without any babysitting! Whether you’re serving it as a base for stir-fries, curries, or grain bowls, this foolproof method makes brown rice a breeze.
Ingredients
- 2 cups uncooked brown rice (well-rinsed) – Rinse thoroughly under cold water to remove excess starch; long-grain brown rice is best for fluffiness.
- 2½ cups water – The ideal water-to-rice ratio for the perfect texture in the Instant Pot.
Optional Add-Ons
- 1 teaspoon salt – Enhances the flavor without overpowering the dish.
- Bay leaf, garlic powder, or dried herbs – Add depth and complexity.
- Vegetable broth – Use in place of water for added savory richness.
Substitutions and Shortcuts
- Instant brown rice – Great for a time-saving option (adjust method per package instructions).
- Alternative grains – Try quinoa or farro in the Instant Pot; adjust time and liquid accordingly.
Instructions
- Rinse the Rice: Place 2 cups of brown rice in a fine-mesh strainer and rinse under cold water until the water runs clear. This removes surface starch and helps prevent clumping.
- Combine Ingredients: Add the rinsed rice and 2½ cups of water to a 6-quart Instant Pot. Add optional salt or flavor enhancers if using.
- Secure the Lid: Close the lid and ensure the steam release valve is set to “Sealing.”
- Pressure Cook: Set the Instant Pot to “Pressure Cook” or “Manual” mode on High Pressure for 20 minutes.
- Natural Pressure Release: Once the cooking time ends, allow the pressure to release naturally—this takes about 20–30 minutes. Wait until the float valve drops.
- Fluff and Serve: Carefully remove the lid. Fluff the rice with a fork and serve hot. Store leftovers in an airtight container in the fridge for up to 5 days.
Notes
- Storage: Store cooked rice in an airtight container in the refrigerator for up to 5 days, or freeze for up to 3 months.
- Doubling: You can double or halve the recipe using the same cooking time.
- Batch cooking tip: Make extra rice to use in meal prep bowls, fried rice, or soups later in the week.
- Prep Time: 5 minutes
- Cook Time: 20 minutes
- Category: Side Dish
- Method: Instant Pot
- Cuisine: Global
Nutrition
- Serving Size: 1 cup cooked
- Calories: 216
- Sugar: 0g
- Sodium: 5mg
- Fat: 1.8g
- Saturated Fat: 0.3g
- Unsaturated Fat: undefined
- Trans Fat: undefined
- Carbohydrates: 44g
- Fiber: 3.5g
- Protein: 5g
- Cholesterol: undefined
Keywords: instant pot brown rice, pressure cooker brown rice, how to cook brown rice instant pot, easy brown rice recipe, meal prep rice, healthy brown rice side dish
Essentials
To make perfect Instant Pot brown rice, you’ll need just two ingredients:
2 cups uncooked brown rice (well-rinsed): It’s important to rinse the rice thoroughly under cold running water to remove excess starch, which can cause it to become overly sticky. I recommend using long-grain brown rice for the best texture.
2½ cups water: The right water-to-rice ratio is crucial for achieving that fluffy texture you want. The Instant Pot does most of the work for you, but getting this ratio right sets you up for success.
Optional Add-Ons
While the base recipe is delightfully simple, feel free to experiment with these optional add-ins:
1 teaspoon of salt: This is entirely up to your taste. A little salt enhances the flavor without overshadowing the rice itself.
Herbs or spices: Bay leaves, thyme, or even a sprinkle of garlic powder can add a lovely depth of flavor.
Vegetable broth: Replace water with vegetable broth for an extra kick of flavor.
Substitutions and Shortcuts
If you’re looking for shortcuts or alternatives, here are a few:
Instant brown rice: If you’re really short on time, you can use instant brown rice. Just follow the package instructions, but keep in mind that it won’t provide the same texture.
Other grains: Quinoa or farro can be cooked using a similar method in the Instant Pot, but be sure to adjust the liquid and cooking time according to the specific grain.
How to Make Instant Pot Brown Rice Step-by-Step
Rinse the Rice: Start by measuring 2 cups of brown rice and rinsing it under cold water in a fine-mesh strainer. This step is crucial as it removes the excess starch, helping to prevent the rice from being overly sticky.
Combine Ingredients: Next, in your 6-quart Instant Pot, combine the rinsed brown rice and 2½ cups of water. If you’re using salt or optional herbs, add them to the pot now.
Secure the Lid: Close the Instant Pot lid, ensuring it’s locked into place. You should also ensure the venting knob is set to the “Sealing” position.
Pressure Cook: Select the “Pressure Cook” or “Manual” setting and set the timer for 20 minutes on High Pressure. Go ahead and walk away; this is the easy part!
Natural Pressure Release: Once the cooking time is complete, allow the Instant Pot to release pressure naturally. This will take about 20 to 30 minutes. You’ll know it’s ready when the float valve drops. Don’t rush this step; patience is key to fluffy rice.
Fluff and Serve: Carefully open the lid, taking care to avoid the steam. Using a fork, fluff the rice gently to separate the grains. Now, it’s ready to be enjoyed!
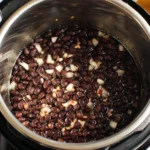
Looking for more delicious recipes? You can try the Instant Pot Black Beans recipe or join our community on Pinterest and Facebook!
Common Mistakes to Avoid
Not Rinsing the Rice
One of the biggest mistakes is neglecting to rinse the rice. This can lead to sticky, clumpy results. A thorough rinse removes the excess starch that can cause this issue, ensuring each grain remains distinct.
Overfilling the Instant Pot
Always be mindful of the maximum fill line on your Instant Pot. Overfilling can cause pressure issues and lead to undercooked rice. Stick to the recommended amounts and you’ll be just fine.
Skipping Natural Pressure Release
While tempting, don’t skip the natural pressure release. This step is important for the rice to finish cooking and to help it maintain the right texture. How you handle this release can make or break your final dish.
Ignoring the Water Ratio
Getting the water-to-rice ratio right is key to perfect rice. If you find your rice consistently comes out too mushy or undercooked, it might be time to double-check those measurements.
Quick Wins for Beginner Cooks
Use the Right Equipment
Make your life easier by ensuring your Instant Pot is well-maintained. Regularly check and clean the sealing ring and float valve so you can cook with confidence!
Play with Flavor
You don’t have to stick with just plain rice. Experimenting with different broths or seasonings can help you find a combination that your whole family will enjoy.
Get Creative with Leftovers
If you have leftover brown rice, don’t let it go to waste! Consider tossing it into stir-fries, salads, or as a base for a nutritious breakfast bowl topped with eggs and veggies.
Practice Makes Perfect
If it’s your first time, consider making a double batch. The process gets easier over time, and you’ll have a delicious base ready for future meals. Also, practice helps you understand exactly how the Instant Pot cooks.
Pro-Level Tips for When You’re Ready
Experiment with Different Types of Rice
Once you’ve mastered brown rice, consider trying other varieties. Jasmine or basmati rice can also be cooked in the Instant Pot, but keep in mind that cooking times and water ratios may vary.
Layering Flavors
Before you start the Instant Pot, sauté some onions or garlic in a bit of oil using the sauté function to deepen the flavor in your final dish. This adds an extra level of warmth and coziness.
Be Mindful of Serving Sizes
While brown rice is a healthy addition to many meals, portion control is key. Understanding serving sizes can help you manage your meals better and reduce food waste.
Use Leftover Rice in Creative Ways
Next time you have leftover rice from a meal, get creative! Use it to make fried rice, stuffed peppers, or even rice pudding. The possibilities are endless!
Conclusion
Cooking Instant Pot brown rice may seem tricky at first, but it’s truly easier than it looks. With this simple guide, you now possess the knowledge to create a cozy staple for your kitchen. Remember that you can customize this dish in so many ways, making it not just a recipe but a canvas for your delicious creations.
Now it’s your turn! Go ahead and give it a try. Once you do, come back and let me know how it went. Did you love the fluffy texture? What did you serve it with? I can’t wait to hear about your cozy culinary adventures.
FAQs About Instant Pot Brown Rice
1. Can I use white rice instead of brown rice for this recipe?
No, this recipe is specifically designed for brown rice. White rice has a different cooking time and water ratio. It’s best to follow a specific recipe for white rice to get the best results.
2. Why do I need to rinse the brown rice?
Rinsing brown rice removes excess starch that can cause the rice to be overly sticky. It helps achieve fluffy, separate grains, making your dish much more enjoyable.
3. Can I add spices while cooking the rice?
Absolutely! Adding spices, herbs, or even broth to the water can enhance the flavor of the rice without much extra effort. Feel free to experiment!
4. What should I do if my rice turns out sticky or mushy?
If your rice is sticky, it’s often due to overcooking or not rinsing enough. Be sure to rinse thoroughly before cooking and adhere to the cooking times provided. If it’s mushy, check your water ratio next time.
5. How do I store leftover brown rice?
Store leftover brown rice in an airtight container in the refrigerator for up to five days. You can also freeze it in portions for later use; just reheat it in the microwave or on the stovetop with a little water to help it steam back to life.
With these tips and a cozy recipe up your sleeve, you’re all set to become a brown rice expert! Enjoy the process, savor those comforting flavors, and happy cooking!