Last updated on February 12, 2026
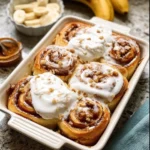
I still remember the aroma of brown sugar and cinnamon warming the kitchen on a quiet morning—the way the scent felt like a soft blanket around whatever I was making. If you enjoy playful twists on a classic, you’ll find this version both charming and approachable; I often nudge readers who love texture and sweetness toward similar variations like banana bread cinnamon rolls when they want to experiment. Heart-shaped cinnamon rolls are one of those rare recipes that look celebratory yet come together with comforting, everyday techniques—perfect for a weekend brunch, a small celebration, or simply a way to make the morning feel intentional.
A Quick Look at This Heart-Shaped Cinnamon Rolls Recipe
These Heart-Shaped Cinnamon Rolls pair the warm, toasty notes of cinnamon with the caramelized depth of brown sugar and a tender, buttery dough. The standout ingredients—unsalted butter and brown sugar—create a glossy, indulgent filling that melts into the dough as it bakes. The benefit is twofold: they’re visually delightful for gifting or gatherings, and their flavor is layered and nuanced without requiring pastry expertise. The shaping technique turns ordinary pinwheels into charming hearts, making them feel special yet wholly achievable for home bakers. Keep reading to learn a few gentle tricks that make the shaping effortless and the finish irresistibly glossy.
Ingredients You’ll Need for Heart-Shaped Cinnamon Rolls
Essentials
- 2 cups all-purpose flour — Use a fresh bag and spoon-and-level the flour for consistent texture. The flour is the backbone of the tender crumb.
- 1/4 cup granulated sugar — Adds light sweetness to the dough and helps yeast fermentation subtly.
- 1 packet (2 1/4 tsp) active dry yeast — The lift and soft chew of classic cinnamon rolls come from active, properly proofed yeast.
- 1/2 cup milk — Whole milk yields the richest, most tender dough; scald and cool slightly to help butter incorporate smoothly.
- 1/4 cup unsalted butter — For both dough richness and the filling; room temperature butter creates a silkier dough while melted butter in the filling gives a glossy, flavored layer.
- 1/2 teaspoon salt — Balances sweetness and enhances the dough’s flavor.
- 1 egg — Adds structure, richness, and a golden hue to the finished rolls.
- 1 tablespoon ground cinnamon — Use a fragrant, fresh jar for the best aromatic lift.
- 1/4 cup brown sugar — Soft brown sugar (light or dark) brings molasses notes that caramelize in baking.
- 1/2 cup powdered sugar — For the classic silky icing.
- 1–2 tablespoons milk (for icing) — Adjust to reach a glossy, pourable consistency.
Optional Add-ons
- Vanilla extract (1/2 teaspoon) — Stir into the icing for warmth and complexity.
- Toasted chopped pecans or almonds — Sprinkle into the filling for a nutty contrast and crunch.
- Citrus zest (lemon or orange) — Mix a little into the icing to brighten the sweet finish.
- Red gel food coloring or pink sprinkles — For a romantic presentation, especially around holidays or celebrations.
- Melted dark chocolate drizzle — A small indulgent accent that plays well with cinnamon.
Substitutions and Shortcuts
- Milk: Swap equal parts unsweetened almond or oat milk for a dairy-free version; the texture will be slightly lighter but still tender.
- Butter: If you prefer convenience, use melted butter in the dough (cooled) instead of room-temperature; the rolls remain tender though the dough may be slightly denser.
- Yeast: If you only have instant yeast, reduce proofing time slightly and mix it directly with dry ingredients—reduce liquid by a tablespoon to compensate.
- Quick shortcut dough: Use store-bought pizza dough or refrigerated biscuit dough in a pinch—these shortcuts will change the texture but preserve the cinnamon-sugar magic and the heart-shaped presentation.
- Sugar: Swap coconut sugar for brown sugar in the filling for a caramel-like note with a lower glycemic profile, but expect a darker color and slightly different flavor.
How to Make Heart-Shaped Cinnamon Rolls Step-by-Step
I’ll walk you through each stage with small technique tips that make the process feel easy and intentional. The goal is a pillowy interior, a glossy caramelized filling, and neatly formed hearts that hold their shape in the oven.
- Prepare the dry mix and warm the milk
- In a large bowl, whisk together the flour, granulated sugar, and active dry yeast. Mixing these first ensures even distribution of the yeast and prevents clumps.
- In a small saucepan, gently heat the milk with the butter until the butter melts and the mixture feels warm to the touch (about 105–110°F / 40–43°C). It should be comfortably warm, not hot—too much heat can kill the yeast and slow the rise.
- Why this matters: Warm milk melts the butter and helps the yeast wake up without shocking it, producing consistent rise and tender crumb.
- Combine to form a soft dough
- Pour the warm milk-and-butter mixture into the dry ingredients. Add the salt and the egg, then stir until a shaggy dough forms.
- Turn the dough onto a lightly floured surface and knead for about 5 minutes until it becomes smooth and slightly elastic. If it sticks excessively, dust with a little flour—but keep the dough slightly tacky for a softer result.
- Why this matters: Kneading develops enough gluten to give structure while maintaining a tender bite. Five minutes by hand is usually sufficient for this enrichment-style dough.
- First rise
- Place the dough in a lightly greased bowl, cover it with a clean towel or plastic wrap, and let it rise in a warm, draft-free place until doubled in size—about 1 hour.
- Tip: If your kitchen is cool, preheat your oven to its lowest setting for 1 minute, turn it off, and set the covered dough inside with the oven door slightly ajar.
- Why this matters: A full rise ensures an airy, soft interior. Rushing this stage will yield dense rolls.
- Roll and assemble the filling
- On a lightly floured surface, roll the dough into a roughly 12×8-inch rectangle (or similar; the exact size isn’t critical—aim for an even thickness).
- Spread a thin layer of softened butter evenly over the dough, leaving a small margin along one long edge so the roll will seal.
- Mix the brown sugar and ground cinnamon together, then sprinkle it evenly over the buttered surface.
- Optional: scatter chopped nuts or citrus zest now if you’re using them.
- Why this matters: An even spread of butter and filling ensures every bite has the right balance of sugar and spice. Leaving a margin helps the roll seal so filling doesn’t spill out.
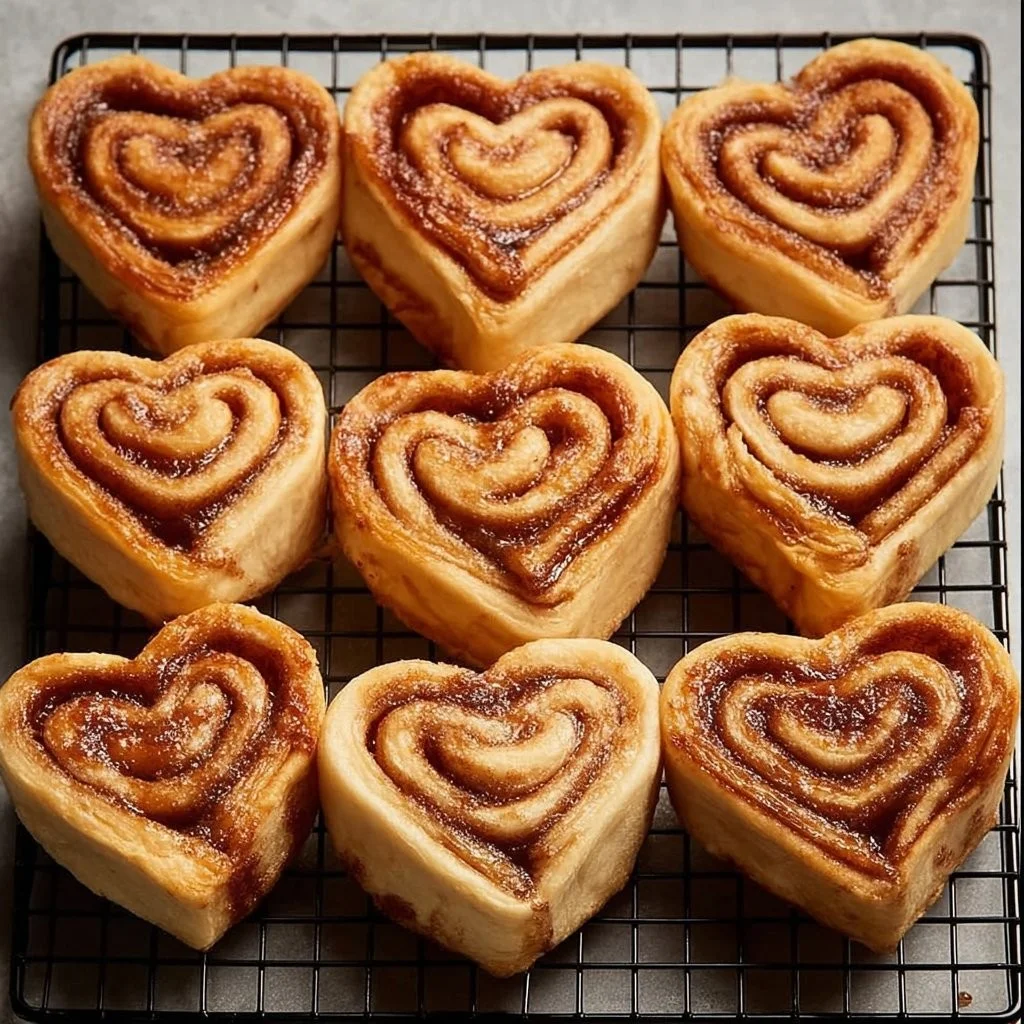
- Roll up and shape into hearts
- Starting from the long edge opposite the margin, roll the dough tightly into a log. The tighter the roll, the crisper your spiral layers will be.
- For hearts: Cut the log into pieces about 1 to 1 1/4 inches thick. Take each piece, slice it halfway through lengthwise (so you have two parallel halves still attached at the top), then press the two rounded cut sides together to form the indentation of the heart and pinch the bottom to create the point. Another method is to flatten each slice slightly and pinch the top edges inward to create a heart silhouette.
- Why this matters: Precise but gentle handling preserves the swirls and creates the classic heart silhouette. Practicing with one or two pieces first helps you find the motion that’s comfortable.
- Second rise
- Place each heart-shaped roll on a lightly greased or parchment-lined baking sheet with a little space between them. Cover loosely and let them rise for about 30 minutes until puffy.
- Why this matters: A short second rise completes the lift and helps the hearts expand and hold their form in the oven without flattening.
- Bake to golden perfection
- Preheat your oven to 375°F (190°C). When the rolls are puffy and nearly doubled, bake for 15–20 minutes, rotating the sheet halfway if your oven bakes unevenly, until they’re golden brown and the centers feel springy.
- Tip: If the tops brown too quickly, tent loosely with foil for the last 5 minutes.
- Why this matters: The right temperature yields a tender inside with a caramelized edge and glossy filling—too long and they dry; too short and they’ll be underbaked in the center.
- Glaze and finish
- While the rolls are hot, whisk the powdered sugar with 1–2 tablespoons of milk to a thick but pourable consistency. Stir in a splash of vanilla if desired.
- Drizzle the glaze over warm rolls so it sinks slightly into the crevices, then immediately decorate with sprinkles or a tiny dip of red coloring if you want a romantic flourish.
- Why this matters: Glazing while warm creates a delicate sheen and ensures the icing adheres beautifully, enhancing both taste and presentation.
Throughout the process, move at a relaxed pace. The shaping is forgiving and the flavors are robust—your hands-on time is rewarded with an elegant, bakery-quality result.
Common Mistakes to Avoid
Baking is part precision, part feel; I see the same small missteps with home bakers and I like to think of them as quick corrections that elevate the final roll. Below are the three mistakes I recommend watching for—each one is easy to fix and makes a noticeable difference in texture, flavor, or appearance.
Mistake 1: Using milk that’s too hot or too cold
If the milk is too hot, it can kill the yeast; too cold and the dough will barely rise. Aim for a warm, comfortable temperature (around 105–110°F), where the milk feels warm but not hot to your wrist. If you’re unsure, test with a cooking thermometer or err on the side of slightly cooler—your dough will forgive a gentle nudge.
Mistake 2: Overfilling the dough
It’s tempting to pile on filling, but too much brown sugar and butter can leak during baking and weigh down the spiral, flattening the shaped hearts. Use an even, thin layer of butter and a moderate sprinkle of cinnamon-sugar so each roll keeps a defined swirl and bakes evenly.
Mistake 3: Skipping the second rise or rushing the shaping
The second rise gives the hearts their light, pillowy texture and helps them hold their shape. If you skip it, the rolls will be compact and less tender. Allow the 30-minute second rise in a slightly warm spot; it’s a small time investment with a big payoff.
Serving Suggestions for Heart-Shaped Cinnamon Rolls
A single pan of heart-shaped cinnamon rolls can be styled to suit a quiet morning, a bridal shower, or a celebratory brunch. Presentation and thoughtful pairings elevate the experience from casual to deliberate without extra fuss.
Breakfast for two
Plate two rolls on a warm dish, add a small ramekin of softened butter, and a side of fresh berries. The bright acidity balances the sweetness while keeping the moment intimate and relaxed.
Brunch buffet centerpiece
Arrange several heart-shaped rolls on a wooden board, glaze them lightly, and scatter edible flowers or finely grated citrus zest across the platter. Guests can help themselves—this style makes a beautiful, shareable centerpiece.
Gift or special occasion
Place two or three rolls in a bakery box lined with parchment and add a handwritten note. A small jar of extra glaze on the side lets the recipient warm and crown their treat, making it feel like an intentional, handmade gift.
Conclusion
I love how Heart-Shaped Cinnamon Rolls transform simple pantry staples into a dish that looks curated and tastes indulgent—tender, cinnamon-scented dough swirled with caramelized brown sugar and finished with a glossy icing. This recipe is forgiving, adaptable, and the shaping technique gives every batch a special, celebratory feel without complicating the baking process. If you’d like an alternative shaping inspiration or another heart-shaped approach, I also find this lovely reference to Heart Shaped Cinnamon Rolls | Sweet Heart Cinnamon Rolls – My Cooking Journey a charming companion to try different finishes and decorations.
FAQs About Heart-Shaped Cinnamon Rolls
Q1: How long do Heart-Shaped Cinnamon Rolls keep, and what’s the best way to store them?
A: Heart-Shaped Cinnamon Rolls keep well at room temperature for up to 2 days in an airtight container. For longer storage, refrigerate for up to 4 days—bring them to room temperature and warm gently in a low oven (300°F / 150°C for 5–8 minutes) before serving for the freshest texture.
Q2: Can I freeze Heart-Shaped Cinnamon Rolls before baking?
A: Yes. After shaping, place the unbaked hearts on a tray and freeze until firm, then transfer to a freezer bag for up to one month. When ready, thaw and allow them to complete the second rise before baking. This is a great way to have freshly baked rolls without the last-minute work.
Q3: Can I make Heart-Shaped Cinnamon Rolls gluten-free?
A: You can. Use a high-quality gluten-free all-purpose blend formulated for yeast breads and follow the manufacturer’s guidance—sometimes additional xanthan gum or a slightly different hydration level is needed. I also like adapting to recipes such as easy gluten-free blueberry cinnamon rolls for technique tips when working with gluten-free doughs.
Q4: How can I prevent the filling from leaking out of Heart-Shaped Cinnamon Rolls?
A: Roll the dough tightly and leave a small margin on the edge before rolling to seal the log. When cutting, use a sharp, serrated knife to get clean slices rather than squishing the log. A tighter roll and careful handling will minimize leakage and help the hearts hold a neat shape.
Q5: Can I make the icing a day ahead for Heart-Shaped Cinnamon Rolls?
A: Yes—store the icing in an airtight container in the refrigerator. Stir in a small splash of milk to loosen it before drizzling over warm rolls. Freshly warmed rolls will still absorb the glaze beautifully and retain that bakery sheen I aim for when I bake.
I hope you enjoy the ritual of shaping and baking these Heart-Shaped Cinnamon Rolls as much as I do—the process is generous, the outcome is joyful, and each bite rewards the care you put into it.
Print
Heart-Shaped Cinnamon Rolls
- Total Time: 2 hours 10 minutes
- Yield: 8 rolls 1x
- Diet: Vegetarian
Description
Soft, fluffy heart-shaped cinnamon rolls filled with buttery cinnamon sugar and finished with a sweet glaze — a charming homemade treat perfect for special occasions or cozy mornings.
Ingredients
- 2 cups all-purpose flour
- 1/4 cup granulated sugar
- 1 packet (2 1/4 tsp) active dry yeast
- 1/2 cup milk
- 1/4 cup unsalted butter
- 1/2 teaspoon salt
- 1 egg
- 1 tablespoon ground cinnamon
- 1/4 cup brown sugar
- 1/2 cup powdered sugar
- 1–2 tablespoons milk (for icing)
- Optional: 1/2 teaspoon vanilla extract
- Optional: toasted chopped pecans or almonds
- Optional: citrus zest (lemon or orange)
- Optional: red gel food coloring or pink sprinkles
- Optional: melted dark chocolate drizzle
Instructions
- Whisk flour, granulated sugar, and yeast in a large bowl. Heat milk and butter together until warm (about 105–110°F / 40–43°C) and butter is melted.
- Pour warm liquid into dry ingredients, add salt and egg, and stir to form dough. Knead on a floured surface for about 5 minutes until smooth and elastic.
- Place dough in a greased bowl, cover, and let rise in a warm place for about 1 hour until doubled in size.
- Roll dough into a rectangle about 12×8 inches. Spread softened butter, then sprinkle cinnamon mixed with brown sugar evenly over the surface.
- Roll dough tightly into a log, cut into 1–1 1/4 inch pieces, and shape each piece into a heart by splitting and pinching edges together.
- Arrange on a lined baking sheet, cover, and let rise again for about 30 minutes until puffy.
- Bake in a preheated oven at 375°F (190°C) for 15–20 minutes until golden brown.
- Whisk powdered sugar with 1–2 tablespoons milk (and vanilla if desired) to form icing. Drizzle over warm rolls, decorate if desired, and serve.
Notes
- Use plant-based milk and dairy-free butter for a lactose-free variation.
- Instant yeast can replace active dry yeast with slightly reduced rise time.
- Store-bought dough can be used for quicker preparation.
- Keep dough slightly tacky during kneading for softer rolls.
- Roll tightly for defined swirls and better heart shapes.
- Prep Time: 20 minutes
- Cook Time: 20 minutes
- Category: Dessert
- Method: Baking
- Cuisine: American
Nutrition
- Serving Size: 1 roll
- Calories: 260
- Sugar: 14g
- Sodium: 180mg
- Fat: 8g
- Saturated Fat: 5g
- Unsaturated Fat: 2g
- Trans Fat: 0g
- Carbohydrates: 40g
- Fiber: 1g
- Protein: 5g
- Cholesterol: 35mg
Keywords: heart shaped cinnamon rolls, cinnamon rolls recipe, sweet breakfast pastry, homemade rolls, holiday baking