Last updated on February 11, 2026
I still remember one rainy Tuesday when I wanted something comforting but effortless—just a tender, saucy chicken that made the whole house smell like home. If you’ve ever hesitated to make a "fancy" dinner because you’re worried about complicated steps or weird ingredients, I get it—that’s the beginner challenge right there. I promise this Melt in Your Mouth Chicken is one of those foolproof recipes that’s stress-free, cozy, and perfect for weeknights or when you want to impress without the fuss; and if you need ideas for easy allergy-friendly sides, check out these gluten-free, dairy-free dinner recipes for inspiration.
A Quick Look at This Melt in Your Mouth Chicken Recipe
This Melt in Your Mouth Chicken is built around two star ingredients: creamy mayonnaise (or plain Greek yogurt) and salty Parmesan cheese, which team up to keep the chicken juicy and add a golden, savory crust. The main benefit is convenience—minimal prep and no complicated sauces—while still delivering comforting, satisfying flavor that families love. It’s especially great for home cooks and beginners because the steps are simple and forgiving: mix, spread, bake. Keep reading to see easy tips that make this recipe reliably tender every time and quick swaps for what to do if you’re missing an ingredient.
Ingredients You’ll Need for Melt in Your Mouth Chicken
Below I break down what to have on hand before you start so you can breeze through this recipe. I like to set everything out on the counter first—mise en place makes the whole process calm and fast.
Essentials
- 4 boneless, skinless chicken breasts — trimmed of excess fat and patted dry with paper towels. I recommend even-sized breasts so everything cooks uniformly.
- 1 cup mayonnaise OR 1 cup plain Greek yogurt — mayonnaise gives a classic richness; plain Greek yogurt is a lighter, tangy swap that still keeps the chicken moist.
- 1/2 cup grated Parmesan cheese — this melts into a savory, slightly nutty crust. Freshly grated yields the best texture and flavor.
- 1 teaspoon seasoning salt — I use a mild, all-purpose seasoning salt; it seasons the chicken underneath the Parmesan.
- 1/2 teaspoon black pepper — freshly ground if possible, for the best aroma.
- 1 teaspoon garlic powder — adds gentle garlicky warmth without extra chopping.
Kitchen tools you’ll want: a medium mixing bowl, measuring cups and spoons, a baking dish (about 9×13 or similar), aluminum foil (optional), and a meat thermometer to ensure perfect doneness.
Optional add-ons
These extras are great when you want to add more flavor or texture, but the basic recipe is delicious on its own.
- 1/2 cup panko breadcrumbs — for extra crunch on top (mix with a little melted butter before sprinkling).
- 1 teaspoon dried herbs (thyme, Italian seasoning, or oregano) — stir into the mayo mixture for herbaceous notes.
- 1 tablespoon lemon juice or zest — adds bright lift to the dish after baking.
- 2 tablespoons melted butter — brushed on top for a richer finish and deeper browning.
- 1/4 teaspoon smoked paprika — for a hint of smoky color and flavor.
- Freshly chopped parsley or chives for garnish — adds color and freshness before serving.
Substitutions and shortcuts
If you’re short on time or ingredients, here are reliable swaps:
- Mayonnaise substitute: plain Greek yogurt is the best one-to-one substitute (same texture, tang). If you prefer dairy-free, use a dairy-free mayo.
- Parmesan substitute: Pecorino Romano or a finely grated aged cheddar can work in a pinch, but adjust salt because some cheeses are saltier.
- Seasoning salt substitute: use 1/2 teaspoon kosher salt plus 1/2 teaspoon garlic powder and a pinch of onion powder.
- Shortcut: Buy pre-grated Parmesan and pre-mixed seasoning blends to save time. I do this when life’s hectic and it still tastes great.
- Make-ahead: Mix the mayo/yogurt and Parmesan in a container and refrigerate up to 24 hours. Spread it on the chicken right before baking.
- Using leftovers: Shred leftover Melt in Your Mouth Chicken and toss it into salads, sandwiches, or even a simple pasta. If you want a cozy breakfast twist, serve shredded chicken on a toasted bagel — here are some fun gluten-free bagel recipes you can try.
How to Make Melt in Your Mouth Chicken Step-by-Step
I always say simple recipes shine when you pay attention to the small details. Here’s how I make this recipe foolproof for beginners and busy cooks alike.
Step 1 — Preheat and prep (10 minutes)
- Preheat your oven to 375°F (190°C). This temperature gives the chicken enough gentle heat to cook through evenly while allowing the topping to brown without burning.
- While the oven warms, pat the chicken breasts dry with paper towels. Removing surface moisture helps the topping stick and encourages even baking.
- If your chicken breasts are uneven in thickness, pound them gently to an even thickness (about 1 inch) using a meat mallet or the bottom of a heavy pan. This prevents thinner edges from drying out before the centers are done.
Step 2 — Make the creamy Parmesan coating (3–5 minutes)
- In a medium bowl, combine 1 cup mayonnaise (or plain Greek yogurt) with 1/2 cup grated Parmesan cheese, 1 teaspoon seasoning salt, 1/2 teaspoon black pepper, and 1 teaspoon garlic powder.
- Stir until everything is fully incorporated into a smooth, spreadable mixture. I like to taste a tiny bit (if using mayonnaise) to adjust the seasoning—add a touch more pepper if you like a little kick.
Step 3 — Coat the chicken (5 minutes)
- Place the chicken breasts in a single layer in your baking dish.
- Using a spoon or small offset spatula, spread an even layer of the mayo-Parmesan mixture over the top of each breast, covering from edge to edge. Don’t be shy—this coating is what keeps the chicken moist and develops that wonderful crust.
- If you’re using optional panko for crunch, sprinkle the panko evenly over the coated breasts now. For extra flavor, mix the panko with a tablespoon of melted butter and a pinch of dried herbs before sprinkling.
Step 4 — Bake with care (35–45 minutes)
- Place the baking dish in the preheated oven on the middle rack.
- Bake for about 35–45 minutes depending on thickness. The most reliable way to check is with an instant-read thermometer: the internal temperature should reach 165°F (74°C) at the thickest part.
- If the topping is browning too quickly before the chicken is fully cooked, tent a piece of aluminum foil loosely over the dish to prevent burning while allowing the chicken to finish cooking.
Step 5 — Rest and serve (5–10 minutes)
- Once the chicken reaches 165°F, remove it from the oven and let it rest for 5–7 minutes. This step helps the juices redistribute so each bite is tender.
- Garnish with freshly chopped parsley or a little lemon zest if you like brightness.
- Serve hot and enjoy! Leftovers keep well in an airtight container in the fridge for 3–4 days and reheat gently in a low oven to maintain the topping’s texture.
Extra tips for success
- Use a meat thermometer: it’s the simplest way to avoid overcooking. I’ve saved so many dinners by relying on the thermometer rather than guessing.
- If you’re feeding kids, try making smaller portions in a muffin tin for individual servings and easier presentation.
- Want a hands-off version? Assemble in a slow cooker (on low for 3–4 hours), but be aware the topping won’t brown—add a quick broil at the end in a hot oven for color.
Common Mistakes to Avoid
Even this simple recipe has a few common pitfalls that can lead to dry chicken or uneven cooking. I’ll walk you through what I’ve learned so you can skip the trouble and enjoy reliable, tender results every time.
Mistake 1: Skipping the pat dry and pound step
If you don’t dry the chicken first, the topping can slip off and the surface won’t brown as nicely. Uneven thickness means the thinner parts overcook while the center is still underdone. Patting dry and gently pounding to even thickness takes just a few minutes and pays off in juiciness.
Mistake 2: Overbaking without checking temperature
Ovens vary, and time alone isn’t a perfect indicator. Relying solely on minutes can leave you with dry chicken. Use an instant-read thermometer and pull the chicken out at 165°F (74°C) for the best texture.
Mistake 3: Using too much heat for browning
Cranking the oven too high to speed things up can burn the Parmesan topping before the chicken is cooked through. Stick to 375°F and tent with foil if the crust gets too dark before the internal temperature reaches 165°F.
Serving Suggestions for Melt in Your Mouth Chicken
This chicken is wonderfully versatile—comforting on its own or dressed up with simple sides. I prefer easy, colorful plates that balance the richness of the topping.
Light and fresh: lemony salad and steamed veggies
Pair the chicken with a crisp green salad dressed with lemon vinaigrette and a side of steamed broccoli or green beans. The acidity cuts through the richness and keeps the meal feeling bright.
Cozy and comforting: mashed potatoes and roasted carrots
For a homestyle dinner, serve this chicken over buttery mashed potatoes with honey-roasted carrots on the side. The creamy potatoes soak up any juices beautifully.
Quick weeknight bowl: rice and sautéed greens
Make a simple bowl with warm rice (white, brown, or cauliflower rice), sautéed spinach or kale, and sliced Melt in Your Mouth Chicken on top. Finish with a squeeze of lemon or a sprinkle of red pepper flakes for contrast.

Conclusion
I promise—this Melt in Your Mouth Chicken is easier than it looks, wildly customizable, and perfect for beginner cooks who want a cozy, reliable dinner without the drama. If you want a trusted variation and a bit more background on the original idea, check out the Melt In Your Mouth Chicken Recipe (Just 4 Ingredients) on The Kitchn for inspiration and extra tips. Try it tonight, and then make it your own with the add-ons that suit your family—come back and tell me which combo became your new favorite.
FAQs About Melt in Your Mouth Chicken
Q1: Can I make Melt in Your Mouth Chicken ahead of time?
A1: Yes—you can mix the mayo/Parmesan topping up to 24 hours ahead and keep it refrigerated. Spread it on the chicken right before baking. Assembled but uncooked chicken can be refrigerated for a few hours; for longer storage, freeze portions and bake from frozen, adding extra time and checking the internal temperature.
Q2: Is Melt in Your Mouth Chicken healthy?
A2: It can be—using plain Greek yogurt instead of mayonnaise lowers fat and increases protein while keeping the texture creamy. Serving with veggies and whole grains balances the meal. Parmesan adds flavor in small amounts, so it’s still reasonable for a balanced plate.
Q3: How can I get the Melt in Your Mouth Chicken to be extra crispy on top?
A3: For more crunch, mix 1/2 cup panko breadcrumbs with a tablespoon of melted butter and a pinch of dried herbs, then sprinkle over the mayo-Parmesan coating before baking. You can also broil for 1–2 minutes at the end, watching closely so it doesn’t burn.
Q4: Can I use chicken thighs for Melt in Your Mouth Chicken?
A4: Absolutely—boneless, skinless thighs work great and are even more forgiving because they’re naturally juicier. Reduce baking time slightly and check temperature; thighs are done at 165°F but may be more tender at slightly higher temperatures due to fat content.
Q5: How long will leftovers of Melt in Your Mouth Chicken stay good?
A5: Store leftovers in an airtight container in the refrigerator for 3–4 days. Reheat gently in a 300°F oven until warmed through to avoid drying out, or reheat slices in a skillet with a splash of broth for moisture.

Melt in Your Mouth Chicken
- Total Time: 55 minutes
- Yield: 4 servings 1x
- Diet: Gluten-Free Option, Dairy-Free Option
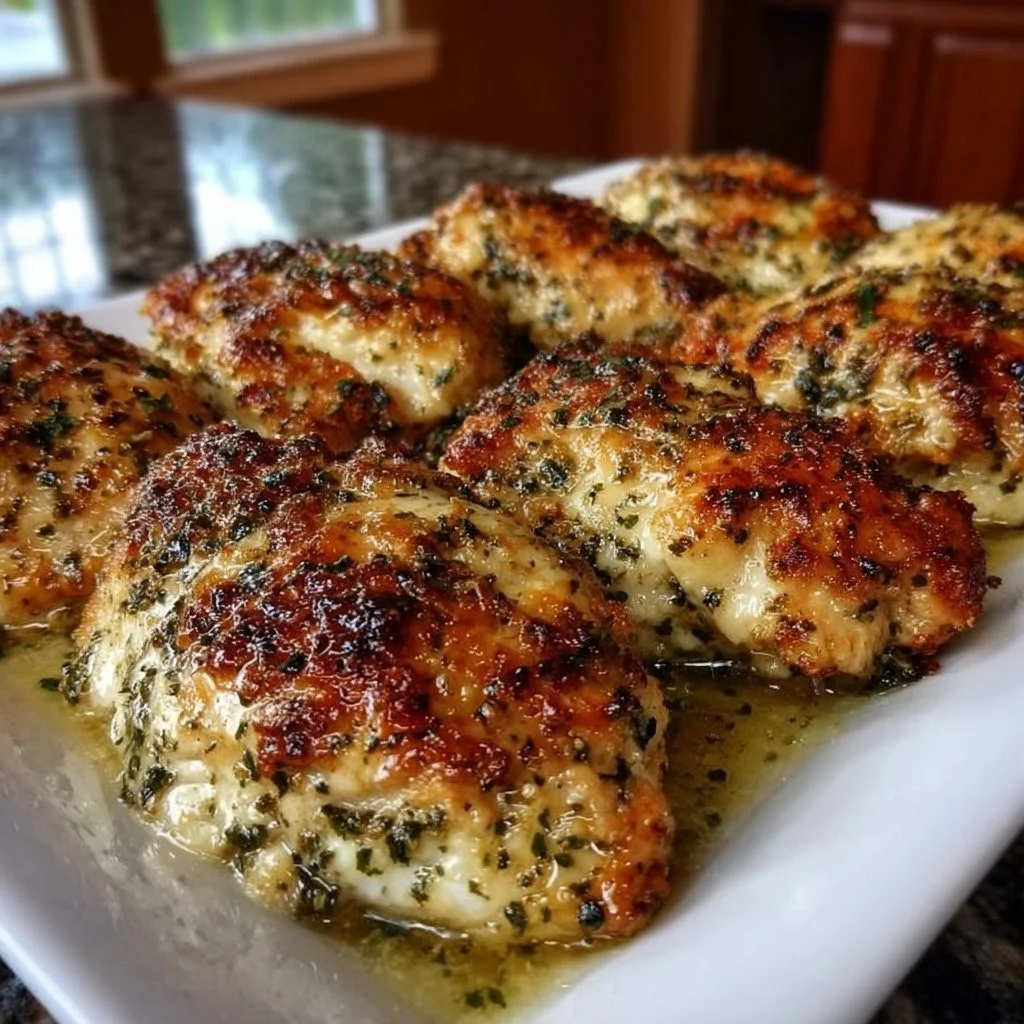
Description
This Melt in Your Mouth Chicken is an effortless, comforting dish with a creamy Parmesan coating that keeps the chicken juicy and flavorful.
Ingredients
- 4 boneless, skinless chicken breasts
- 1 cup mayonnaise or 1 cup plain Greek yogurt
- 1/2 cup grated Parmesan cheese
- 1 teaspoon seasoning salt
- 1/2 teaspoon black pepper
- 1 teaspoon garlic powder
- Optional: 1/2 cup panko breadcrumbs
- Optional: 1 teaspoon dried herbs
- Optional: 1 tablespoon lemon juice or zest
- Optional: 2 tablespoons melted butter
- Optional: 1/4 teaspoon smoked paprika
- Optional: Freshly chopped parsley or chives for garnish
Instructions
- Preheat oven to 375°F (190°C) and pat the chicken dry.
- In a bowl, mix mayonnaise (or yogurt), Parmesan, seasoning salt, pepper, and garlic powder.
- Coat chicken with the mixture in a baking dish.
- Sprinkle optional panko and herbs over the top if using.
- Bake for 35-45 minutes until the internal temperature reaches 165°F (74°C).
- Let rest for 5-7 minutes before serving.
Notes
For a crispier topping, consider using panko breadcrumbs mixed with melted butter.
- Prep Time: 15 minutes
- Cook Time: 40 minutes
- Category: Main Course
- Method: Baking
- Cuisine: American
Nutrition
- Serving Size: 1 serving
- Calories: 350
- Sugar: 3g
- Sodium: 600mg
- Fat: 24g
- Saturated Fat: 6g
- Unsaturated Fat: 12g
- Trans Fat: 0g
- Carbohydrates: 3g
- Fiber: 0g
- Protein: 30g
- Cholesterol: 90mg
Keywords: chicken, easy chicken recipe, comforting dinner, quick meal, family-friendly