Last updated on July 19, 2025
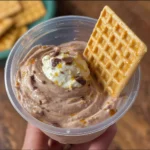
Ah, ice cream! Just the thought of it brings a smile to my face. It’s one of those iconic treats that can brighten up any day, but there’s something extra special about homemade versions, especially when it’s tied to joyful memories. I remember the first time I tried making ice cream as a kid. I had the biggest mess on my hands. There were a few tears of frustration mixed with giggles, and let’s just say my kitchen looked like a dessert disaster zone. But when that first spoonful touched my tongue, all the chaos melted away in an instant. If you’ve ever tried making ice cream and found it overwhelming or complicated, you’re not alone—but that’s where this Ninja Creami Butterfinger Ice Cream Recipe comes in.
The beauty of this recipe lies in its simplicity. I know many home cooks fear ruining a dish, especially something as beloved as ice cream. You might worry about the steps being too complicated or whether you’ll find the right ingredients. Today, I assure you this recipe is simple, stress-free, and totally doable, even for your very first try. With just a handful of ingredients and a Ninja Creami, you’ll create a luscious, creamy Butterfinger ice cream that tastes like childhood nostalgia with every bite.
Table of Contents
Why I Love This Recipe of Ninja Creami Butterfinger Ice Cream Recipe
What makes this Ninja Creami Butterfinger Ice Cream Recipe so dear to my heart is the perfect blend of nostalgia and indulgence. The crunch of buttery toffee from the Butterfinger candy bars combined with a creamy texture makes it a delightful treat. It’s not just about satisfying a sweet tooth; it’s about the memories tied into enjoying ice cream. This recipe brings a cozy, homestyle comfort that resonates with both children and adults alike.
For beginner cooks, this recipe stands out because it doesn’t require fancy kitchen skills or complicated techniques. It’s a great confidence booster for anyone looking to tackle ice cream making for the first time. You’ll appreciate how easy it is to customize, whether you want to add more candy or try other flavor profiles. Plus, there’s something undeniably satisfying about creating your own flavors at home rather than buying store-bought versions.
Ingredients You’ll Need for Ninja Creami Butterfinger Ice Cream Recipe
Creating this wonderful ice cream doesn’t demand rare or hard-to-find ingredients. Here’s a breakdown of the essentials you’ll need:
Print
Ninja Creami Butterfinger Ice Cream
- Total Time: 24 hours 15 minutes
- Yield: 4 servings 1x
- Diet: Vegetarian
Description
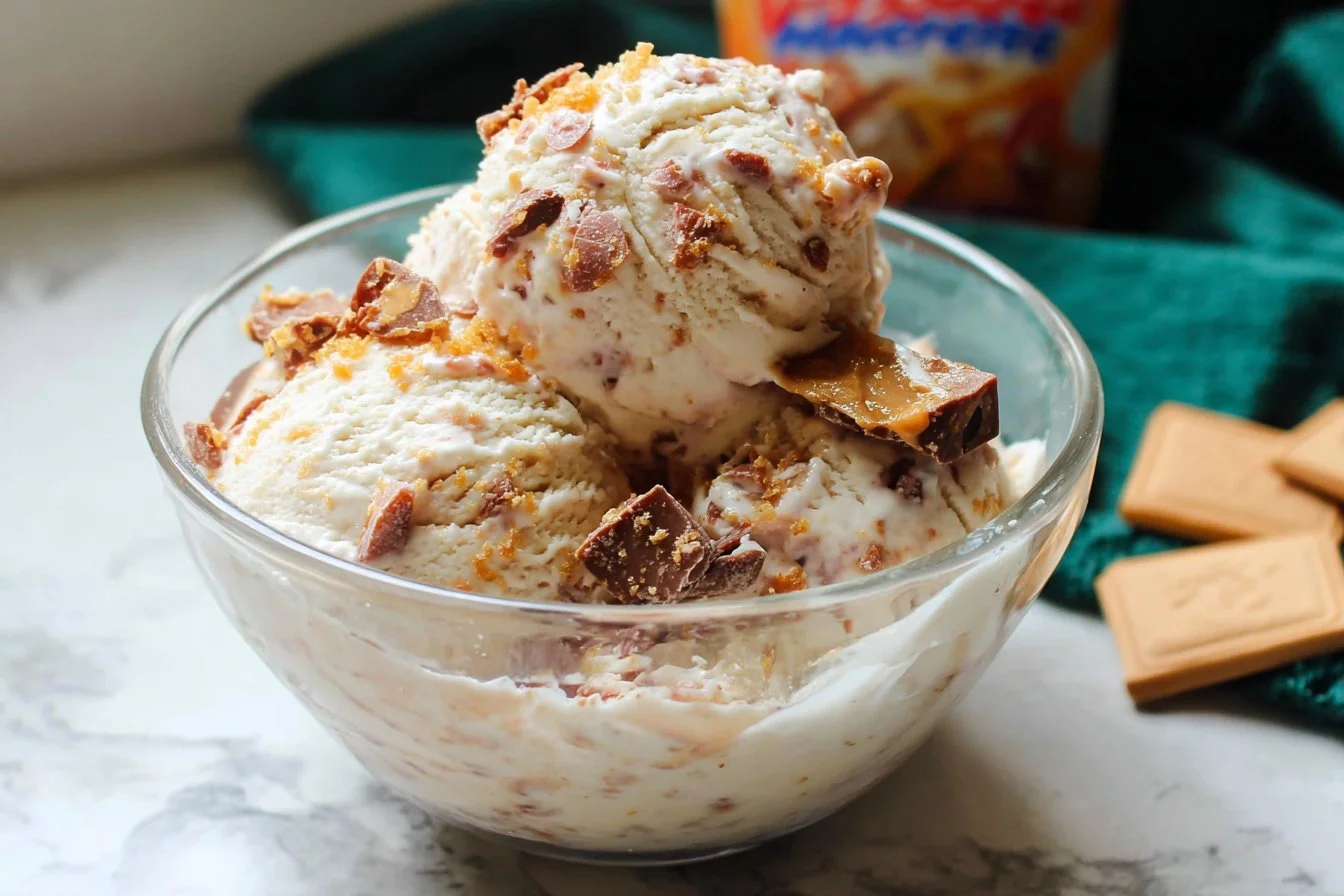
This Ninja Creami Butterfinger Ice Cream is a rich, creamy, and irresistible treat made with peanut butter, cream cheese, and crushed Butterfinger candy. It’s the perfect blend of sweet, nutty, and crunchy in every scoop. Whether you’re treating yourself or impressing guests, this recipe is a guaranteed crowd-pleaser!
Ingredients
- 1¾ cup half and half – The creamy base for your ice cream
- ½ cup sweetened condensed milk – Adds sweetness and rich texture
- ¼ cup PB2 powdered peanut butter – Brings nutty flavor with less fat
- ½ cup cream cheese – Enhances creaminess and depth
- 2 teaspoons vanilla extract – Classic flavor enhancer
- 8 fun-size Butterfinger bars, chopped – Crunchy candy bits that star in the show
Optional Add-Ons
- Chopped nuts – Adds extra crunch and texture
- Chocolate syrup – For drizzling on top
- Whipped cream – A perfect finishing touch
- More candy – Add other chocolates or crushed cookies for variety
Substitutions and Shortcuts
- Milk Alternatives – Whole milk or almond/oat milk (texture may vary)
- Traditional Peanut Butter – Use instead of PB2, but reduce the condensed milk
- Candy Swaps – Try Snickers, Reese’s, or M&Ms for fun variations
Instructions
- Make the Base: In a blender, combine half and half, sweetened condensed milk, PB2, cream cheese, and vanilla. Blend until smooth and fully mixed.
- Freeze: Pour the mixture into your Ninja Creami pint container. Freeze for 24 hours until solid.
- Process: Remove the pint from the freezer and process it in your Ninja Creami using the “Lite Ice Cream” or “Ice Cream” setting.
- Add Mix-Ins: Create a small well in the center of the ice cream. Add the chopped Butterfinger bars and run the “Mix-In” cycle to incorporate them evenly.
- Serve: Scoop into bowls, and top with more Butterfinger pieces, chocolate syrup, or whipped cream if desired. Enjoy immediately!
Notes
- Freeze Time: 24 hours is essential for the right texture — don’t skip it!
- Blending Tip: Make sure your base is lump-free before freezing for smooth results.
- Storage: Re-spin leftovers for 1–2 minutes in Ninja Creami before next serving if needed.
- Prep Time: 10 minutes
- Cook Time: undefined
- Category: Dessert
- Method: Blended & Frozen
- Cuisine: American
Nutrition
- Serving Size: 1/4 of recipe
- Calories: 330
- Sugar: 24g
- Sodium: 140mg
- Fat: 22g
- Saturated Fat: 12g
- Unsaturated Fat: undefined
- Trans Fat: undefined
- Carbohydrates: 28g
- Fiber: 1g
- Protein: 6g
- Cholesterol: undefined
Keywords: ninja creami butterfinger ice cream, peanut butter ice cream, ninja creami recipe, homemade candy ice cream, butterfinger dessert, ninja creami frozen treat, easy ninja creami ice cream
Essentials:
- 1¾ cup half and half: This is the base of your ice cream, providing the right creaminess you’re looking for.
- ½ cup sweetened condensed milk: This adds sweetness and a rich texture that makes your ice cream delectable.
- ¼ cup PB2 powdered peanut butter: If you’re a peanut butter fan (who isn’t?), the PB2 brings in that nutty flavor without adding too much fat.
- ½ cup cream cheese: This gives your ice cream an incredibly creamy texture while enhancing its richness.
- 2 teaspoons vanilla extract: This will give your ice cream that comforting, familiar flavor we all love.
- 8 bit-sized Butterfinger bars, chopped coarsely: The star of the recipe that adds that delightful crunch and buttery toffee flavor.
Optional Add-Ons:
- Chopped nuts: If you want a little extra crunch, consider adding some chopped peanuts or almonds.
- Chocolate syrup: Drizzle it over the top for a chocolatey twist.
- Whipped cream: For serving and making each scoop look even more inviting.
- More candy pieces: If you’re feeling extra indulgent, feel free to toss in other chocolate bars or candy of your choice.
Substitutions and Shortcuts:
If you’re missing some ingredients or want a lighter version, don’t fret! Here are some ideas:
- Milk Alternatives: If you don’t have half-and-half, you can use whole milk or a non-dairy milk like almond or oat milk. However, be aware that it may alter the creaminess a bit.
- Whole Peanut Butter: Instead of PB2, you can use traditional peanut butter, but cut back on the sweetened condensed milk to avoid overpowering sweetness.
- Flavor Variations: Feel free to mix in different candies, cookies, or even fruits to make this your own!
How to Make Ninja Creami Butterfinger Ice Cream Recipe Step-by-Step
Now, let’s dive into making this delightful treat. I’ve broken it down into easy-to-follow steps so you can create it without any worries:
Step 1: Make the Base Mixture
In a blender, combine the 1¾ cup of half and half, ½ cup of sweetened condensed milk, ¼ cup of PB2, and 2 teaspoons of vanilla extract. Blend the mixture on high until it’s smooth and creamy. Make sure everything is well combined with no lumps. This step is crucial because it lays the foundation for the perfect ice cream texture.
Step 2: Pour into Pint Container
Once you have a smooth mixture, pour it into your Ninja Creami pint container. It’s essential to use the right container to ensure even freezing. Seal it well, and place it in your freezer for 24 hours. Yes, it takes patience, but trust me, this waiting time will be worth it!
Step 3: Process in Ninja Creami
After 24 hours, take the pint container out of the freezer. It should be nicely frozen solid. Now, place it in your Ninja Creami and choose either the “Lite Ice Cream” or “Ice Cream” function. The magic happens here as the Ninja Creami churns your frozen base into a luscious, creamy treat.
Step 4: Add the Butterfinger Pieces
Once the processing is done, create a well in the center of the ice cream. This is where all the fun happens! Coarsely chop 8 bit-sized Butterfinger bars and sprinkle them into the well you created. Select the “Mix-In” function to incorporate those crunchy, buttery bits into your ice cream thoroughly. This step guarantees every scoop has that delightful Butterfinger crunch.
Step 5: Serve and Enjoy
Now comes the best part. Grab your favorite ice cream scoop, and dig into that creamy, dreamy Butterfinger ice cream. If you want to go the extra mile, top each serving with additional chopped Butterfinger and maybe a drizzle of chocolate syrup or whipped cream.
Sit back, relax, and take in those cozy memories as you enjoy this homemade delight!
Common Mistakes to Avoid
While making ice cream is a simple process, there are some common pitfalls that can occur. Here’s how to navigate them:
Overmixing the Base
Be careful not to overblend your base mixture. Once it’s smooth, stop blending. Overmixing can incorporate too much air, making the texture less creamy.
Not Freezing Long Enough
The 24-hour freezing time is vital for achieving the right consistency. If you try to process the mixture before it’s frozen solid, you’ll end up with a slushy mess instead of creamy ice cream.
Forgetting the Butterfinger Add-In
It can be easy to forget adding the Butterfinger pieces after processing. Ensure you create a well in the ice cream to avoid lumps down the line. Mixing them in after the initial freeze is essential for the best flavor distribution.
Not Using a Proper Pint Container
This might seem trivial, but using the wrong container can lead to uneven freezing. Stick to the Ninja Creami pint container to ensure the best results.
Quick Wins for Beginner Cooks
If you’re just starting in the kitchen, it can be great to have a few insider tips to ensure success:
Start Small
Begin with a smaller batch, especially if you’re unsure about the process. The proportions in this recipe can easily be halved if you want to test it out before going for a full pint.
Prep Ingredients Ahead
Take a few moments to measure out all your ingredients before you start. Having everything ready can streamline the process and make it less overwhelming.
Follow the Steps
As simple as they may be, make sure to follow each step closely. You can’t rush the freezing process, and taking your time will ensure a successful outcome.
Don’t Rush to Serve
Once it’s processed, give the ice cream a few moments to set before serving. This gives it a better texture for scooping.
Pro-Level Tips for When You’re Ready
Once you’re comfortable with the basics, here are some ways to elevate your ice cream game:
Experiment with Flavors
Feel free to get creative! Try adding different extracts like almond or even cocoa powder for a chocolate twist.
Homemade Mix-Ins
Instead of store-bought candy, you could create your own mix-ins. Chocolate-covered pretzels, toffee bits, or homemade brownie chunks can take this ice cream to a new level.
Try Different Bases
Want to experiment with healthier options? Swap out the half-and-half for coconut milk or use Greek yogurt for a tangy twist.
Make It a Sundae
Serve your Butterfinger ice cream as a sundae with hot fudge, fresh fruits, and nuts. The possibilities are endless!
Conclusion & Next Steps
You’ve learned how to make a cozy, delightful Ninja Creami Butterfinger Ice Cream Recipe, and it’s easier than you might have thought! This treat isn’t just about the taste; it’s about the fun and satisfaction of creating something delicious all by yourself. You can tailor it to your preferences and remember—it’s a classic that welcomes adaptations. So get ready to impress your family and friends with this beginner-approved recipe!
If you enjoyed this recipe as much as I know you will, I encourage you to explore other flavors and mix-ins. Share your creations and tell me how they turned out. Don’t hesitate—grab that Ninja Creami, and let’s churn something sweet!
FAQs About Ninja Creami Butterfinger Ice Cream Recipe
How long does it take to make Ninja Creami Butterfinger Ice Cream?
The actual preparation is quick, taking about 15 minutes, but you will need to freeze the mixture for 24 hours before processing.
Can I substitute the half-and-half in Ninja Creami Butterfinger Ice Cream Recipe?
Yes! You can use whole milk or a non-dairy milk, though it may slightly affect the creaminess of the final product.
What if I don’t have PB2 powdered peanut butter for Ninja Creami Butterfinger Ice Cream Recipe?
You can use traditional peanut butter instead, but keep in mind it’s more calorie-dense, so you might want to reduce the sweetened condensed milk accordingly.
How can I store leftover Ninja Creami Butterfinger Ice Cream?
Store any leftovers in an airtight container in the freezer. It should keep well for about a week, but it’s best enjoyed fresh.
Can I make Ninja Creami Butterfinger Ice Cream without the Ninja Creami?
While this recipe is designed for the Ninja Creami, you can freeze the mixture and periodically stir it to create a homemade ice cream. However, the texture may not be as creamy and smooth.
Looking for more delicious recipes? Follow us on Pinterest and Facebook!