Last updated on February 4, 2026
##Introduction
Do you ever crave something sweet on a summer evening that tastes like childhood picnics and warm kitchen counters? I do—often—and that craving is exactly how this No-Bake Strawberry Icebox Cake came to be a regular in my fridge. If you’re new to no-bake desserts, it can feel tricky to trust a recipe that never goes in the oven, but I promise this one is forgiving and kind to beginners. If you like simple, make-ahead treats, you might also enjoy my take on a no-bake hot chocolate cheesecake, which uses the same easy approach to flavor and texture.
##A Quick Look at This No-Bake Strawberry Icebox Cake Recipe
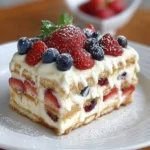
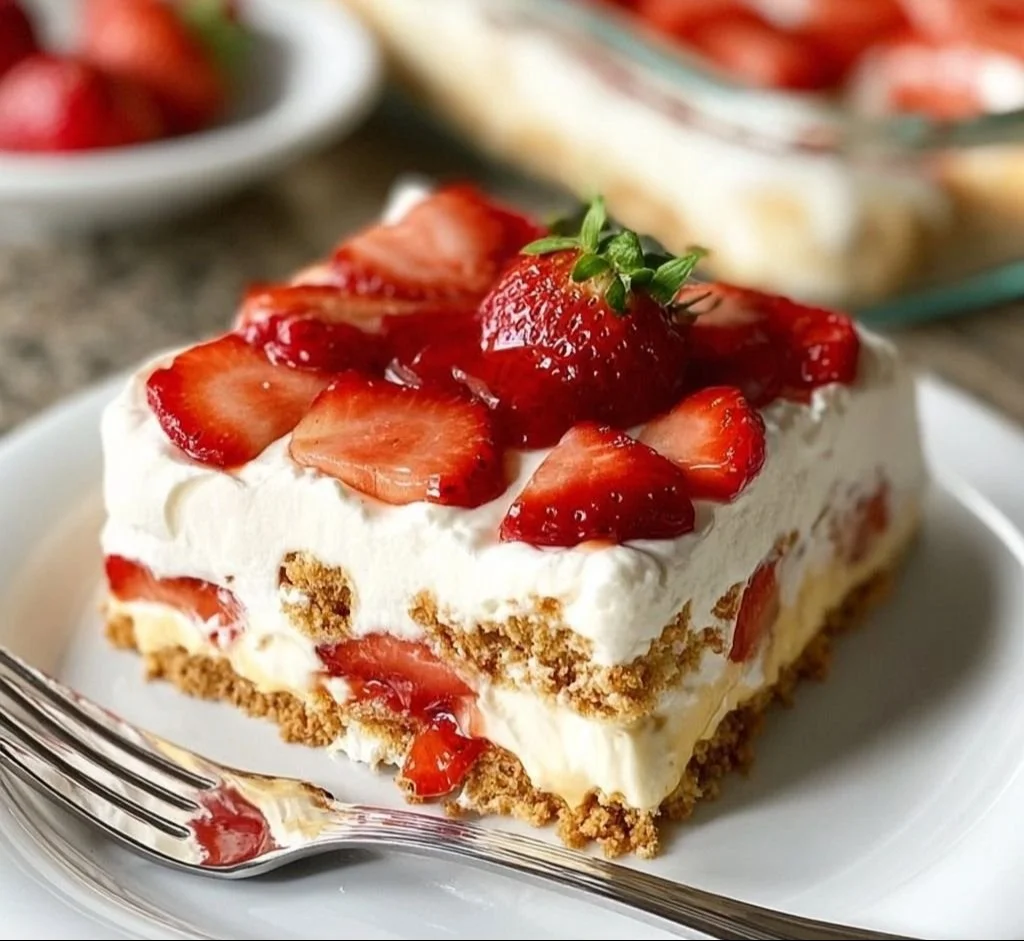
This No-Bake Strawberry Icebox Cake relies on two stars: creamy instant cheesecake or vanilla pudding and crisp graham crackers. It’s a wonderfully convenient dessert because it’s assembled in minutes and chills into a soft, sliceable cake—no oven, no fuss. The fresh strawberries bring bright, juicy contrast to the sweet, velvety layers, making it great for warm days and last-minute guests. Perfect for home cooks and beginners, this recipe is hard to mess up and even easier to customize—keep reading to see simple swaps and tips.
##Ingredients You’ll Need for No-Bake Strawberry Icebox Cake
Essentials
- 3 boxes (3.4 oz each) instant cheesecake or vanilla pudding mix — this builds the creamy filling and sets firmly once chilled
- 2 cups full-fat whipped topping — adds richness and a light, airy texture
- 1 box (14.4 oz) graham crackers — the layers that soften into cake-like sheets as they chill
- 3–4 cups fresh strawberries, washed, diced, and patted dry — fresh berries are the bright, fresh component that makes this dessert sing
Optional add-ons
- Toasted sliced almonds or chopped pecans — for a crunchy contrast on top or between layers
- Lemon zest — a teaspoon or two stirred into the pudding mix can lift the flavor
- Vanilla extract — 1 tsp added to the whipped topping or pudding for extra depth
- A drizzle of strawberry jam or preserves — warmed slightly and brushed on crackers for extra fruitiness
- Mini chocolate chips or shaved white chocolate — if you want a sweet surprise between layers
Substitutions and shortcuts
- Pudding mix: If you can’t find cheesecake-flavored mix, vanilla instant pudding works interchangeably and tastes lovely.
- Whipped topping: Use stabilized whipped cream (whip 1 1/2 cups heavy cream with 1/4 cup powdered sugar and 1 tsp vanilla) if you prefer homemade. Stabilized whipped cream will hold up longer if you’ll be serving the cake over several hours.
- Graham crackers: Use digestive biscuits or a buttery tea biscuit if graham crackers aren’t available. Crush slightly for a layered crumb if you like more texture.
- Strawberries: Frozen strawberries can work in a pinch, but thaw and drain them well to avoid extra moisture. Pat them dry before layering.
- Dish size shortcut: If you don’t have a rectangular baking dish, an 8×8 or 9×9 square dish works—just expect slightly taller layers.
##How to Make No-Bake Strawberry Icebox Cake Step-by-Step
I like to keep my workspace tidy before I begin: measure ingredients, wash and dry strawberries, and line up the graham crackers. This dessert is straightforward, and taking a minute to prep makes the assembly peaceful and quick.
Prepare the pudding mixture
- Empty all three boxes of instant cheesecake or vanilla pudding powder into a large mixing bowl. Pour the amount of cold milk recommended on the packages (usually a combined total based on the boxes—follow the instructions on the pudding boxes for precise milk amounts). Whisk briskly for about 2 minutes until the mixture is lump-free and starts to thicken. Instant pudding firms up quickly, so aim for a smooth, glossy texture.
Fold in the whipped topping
- Spoon the 2 cups of full-fat whipped topping into the thickened pudding. Use a rubber spatula to fold them together gently. Folding, rather than stirring, keeps the mixture light and fluffy. Work until the color is uniform and there are no streaks—this usually takes about 20–30 gentle folds. Taste a little—this is one of those perks of making no-bake desserts.
Prep your dish and graham crackers
- Choose a rectangular dish (a 9×13-inch is classic), and have your graham crackers ready. If any crackers are too large for the dish, break them to fit—don’t worry about perfect pieces. For neat edges, you can trim the crackers slightly, but I often leave them rustic for a homestyle look.
Layer the first course of crackers and filling
- Lay a single layer of graham crackers on the bottom of the dish, covering it as best you can. Spread about one-third of the pudding-whipped mixture evenly over the crackers using a spatula, smoothing to the edges. Scatter about one-third of the diced strawberries over the filling. Don’t press too hard—the layers should remain airy.
Repeat layers until the dish is full
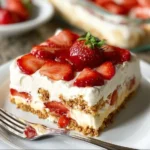
- Add another layer of graham crackers, then another third of the pudding mixture, and another third of the strawberries. Repeat once more with crackers, the remaining pudding mixture, and finish by arranging the remaining strawberries on top. You should end with berries on top for a pretty presentation. If you have leftover crackers or berries, save them—extra makes a nice garnish.
Chill until set
- Cover the dish tightly with plastic wrap or a lid and place it in the refrigerator. Chill for at least 4 hours; overnight is even better. The graham crackers absorb moisture from the pudding and soften into cake-like layers during this time. Chilling also helps the dessert slice cleanly.
Slice and serve
- When ready to serve, use a sharp knife dipped in hot water and wiped dry between cuts for cleaner slices. Serve cold and enjoy. If you like, top each slice with a small dollop of whipped cream, a mint sprig, or a sprinkle of toasted nuts.
Tips while assembling:
- Keep some extra berries to garnish each slice at serving time—fresh fruit on top looks much better than fruit that’s been sitting.
- If you’re transporting the cake, keep it chilled until the last moment and transport on a flat, cold surface.
##Common Mistakes to Avoid
No-bake desserts are forgiving, but a few small slip-ups can affect texture or presentation. Below are the mistakes I see most often and how I fix them.
Mistake 1: Using soggy or overly wet strawberries
If your strawberries are too wet, they’ll release juice as the cake chills and make the layers soggy. Always wash berries quickly, pat them dry with paper towels, and let them breathe on a rack before dicing. If you must use previously frozen berries, thaw them completely in a sieve so excess liquid drains away, then blot dry.
Mistake 2: Skipping the chill time
The pudding needs time to set and the graham crackers need time to soften. Cutting into the cake too soon leads to runny filling and crumbly slices. I set a reminder for at least 4 hours and usually make the cake the night before to serve the next day.
Mistake 3: Overworking the filling
Stirring the pudding and whipped topping vigorously will deflate the whipped topping and create a denser filling. Use a gentle folding motion until the mixture is uniform—lightness makes the cake feel airy and dessert-like rather than heavy and pasty.
##Serving Suggestions for No-Bake Strawberry Icebox Cake
This cake is a crowd-pleaser that pairs well with light, simple accompaniments. I like to keep sides minimal so the strawberries and creamy filling shine.
With a drizzle of berry sauce
Warm a few tablespoons of strawberry jam with a splash of water until pourable, then drizzle over each slice just before serving for a glossy, sweet finish.
With toasted nuts or coconut
Sprinkle toasted almonds, chopped pecans, or toasted coconut flakes over the top to add a crunchy contrast to the soft layers—this is my go-to when I want some texture variety.
As a make-ahead dessert for gatherings
Because it chills and develops flavor over time, the icebox cake is perfect for potlucks and family dinners. Make it the night before, keep refrigerated, and bring it out just before dessert—simple, stress-free entertaining.
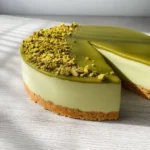
(If you like experimenting with no-bake cakes, you might enjoy my recipe for a no-bake pistachio cheesecake for another make-ahead option.)
{image_template}
Conclusion
I hope this No-Bake Strawberry Icebox Cake feels like the kind of recipe you can make on a whim and still impress everyone at the table. It’s easier than it looks, totally customizable, and beginner-approved—perfect for warm evenings, potlucks, or a quiet dessert after dinner. If you’d like a slightly different take on the same idea, check out this lovely Strawberry Icebox Cake Recipe from The Kitchn for more inspiration.
##FAQs About No-Bake Strawberry Icebox Cake
Q1: How long does the No-Bake Strawberry Icebox Cake last in the fridge?
A1: The No-Bake Strawberry Icebox Cake will keep well in the refrigerator for up to 3–4 days. Keep it covered tightly to prevent the top from drying out and to protect it from absorbing other fridge odors. After about four days the graham cracker layers may become very soft and lose some of their structure, but it will still be tasty.
Q2: Can I freeze No-Bake Strawberry Icebox Cake?
A2: Freezing this No-Bake Strawberry Icebox Cake is possible but not ideal because fresh strawberries can become watery and change texture after thawing. If you plan to freeze, assemble the cake without fresh strawberries (or use frozen, well-drained berries) and wrap the dish tightly; freeze for up to one month. Thaw in the fridge overnight before serving and add fresh berries on top after thawing.
Q3: Can I use other fruits in my No-Bake Strawberry Icebox Cake?
A3: Absolutely. The No-Bake Strawberry Icebox Cake works beautifully with raspberries, sliced peaches, or blueberries. If using softer fruits, be mindful of extra juice—pat them dry or lightly toss in a bit of cornstarch to help absorb moisture.
Q4: Is there a lighter version of this No-Bake Strawberry Icebox Cake?
A4: Yes. For a lighter version, use low-fat whipped topping or make a lighter stabilized whipped cream with lower-fat dairy alternatives. You can also opt for fewer crackers per layer or use whole-grain graham crackers for slightly more fiber. Keep in mind that changes to fat content may affect texture and how well the cake sets.
Q5: How do I get neat slices from my No-Bake Strawberry Icebox Cake?
A5: For clean slices, chill the No-Bake Strawberry Icebox Cake thoroughly—overnight is best. Use a large, sharp knife and dip it briefly in hot water, wipe dry, and slice with confident, single strokes. Re-warm and dry the knife between cuts for the neatest presentation.
No-Bake Strawberry Icebox Cake
- Total Time: 255 minutes
- Yield: 8 servings 1x
- Diet: Vegetarian
Description
A refreshing no-bake dessert featuring layers of creamy cheesecake and fresh strawberries, perfect for warm summer nights.
Ingredients
- 3 boxes (3.4 oz each) instant cheesecake or vanilla pudding mix
- 2 cups full-fat whipped topping
- 1 box (14.4 oz) graham crackers
- 3–4 cups fresh strawberries, washed, diced, and patted dry
- Optional: toasted sliced almonds or chopped pecans
- Optional: lemon zest
- Optional: 1 tsp vanilla extract
- Optional: a drizzle of strawberry jam or preserves
- Optional: mini chocolate chips or shaved white chocolate
Instructions
- Empty pudding powder into a large mixing bowl. Add cold milk as per package instructions and whisk until thickened.
- Fold in the whipped topping gently until combined and fluffy.
- Prepare a rectangular dish and arrange a single layer of graham crackers at the bottom.
- Spread one-third of the pudding mixture over the crackers and scatter one-third of the strawberries on top.
- Repeat layers with remaining ingredients, finishing with strawberries on top.
- Cover with plastic wrap and refrigerate for at least 4 hours or overnight.
- To serve, slice with a hot knife for cleaner cuts and enjoy with optional toppings.
Notes
Ensure strawberries are dry to prevent sogginess; chill the dessert long enough for layers to set.
- Prep Time: 15 minutes
- Cook Time: 240 minutes
- Category: Dessert
- Method: No-Bake
- Cuisine: American
Nutrition
- Serving Size: 1 slice
- Calories: 300
- Sugar: 20g
- Sodium: 250mg
- Fat: 10g
- Saturated Fat: 5g
- Unsaturated Fat: 3g
- Trans Fat: 0g
- Carbohydrates: 42g
- Fiber: 2g
- Protein: 3g
- Cholesterol: 10mg
Keywords: no-bake dessert, strawberry cake, summer recipes, easy dessert, pudding cake