Last updated on February 21, 2026
I still remember the first time I made this Oreo Mousse Cake—my kitchen looked like a cookie graveyard and my dog tried to sample the crust. Have you ever worried that a mousse cake is too fancy for a weeknight dessert or that you’ll never get the texture right? I promise this recipe is forgiving, takes only a little hands-on time, and is perfect for beginners who want something impressive without the stress. If you love cookies and cream, this is an indulgent, cozy treat that’s easier than it looks—plus, if you want another chocolatey Oreo idea, try this Oreo chocolate cake recipe for inspiration.
A Quick Look at This Oreo Mousse Cake Recipe
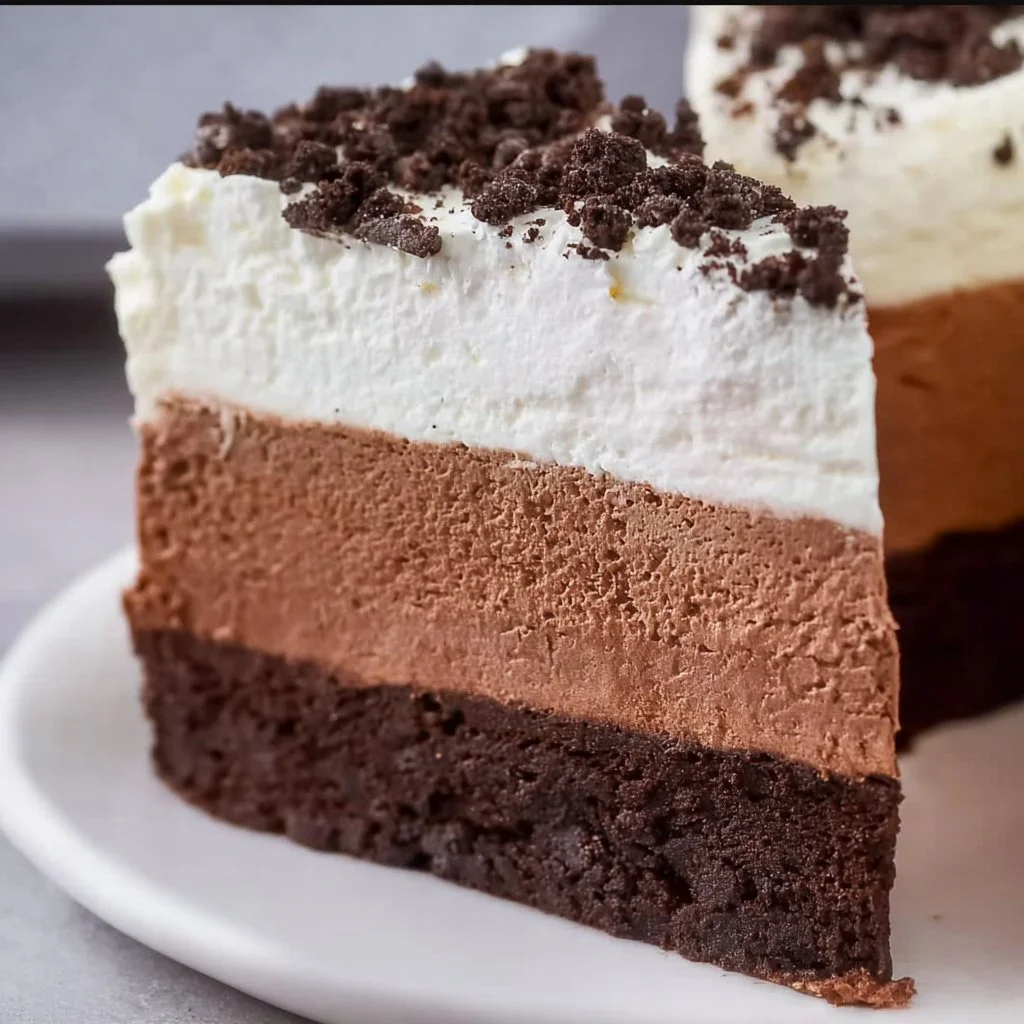
This Oreo Mousse Cake combines a buttery Oreo crust with a light, fluffy cream cheese and whipped cream mousse loaded with crushed Oreos. The two main ingredients that define it are Oreo cookies (for the crust and mix-ins) and whipped cream (for the airy mousse). It’s a comfort dessert that’s great for family gatherings because it can be made ahead and stores well in the fridge. Perfect for home cooks and beginners—no special equipment beyond a mixer and a springform pan—and worth scrolling down because I’ll show you simple tips to get silky mousse every time.
Ingredients You’ll Need for Oreo Mousse Cake
Essentials
- 1 package Oreo cookies (about 36 cookies) — you’ll use most for the crust and some for the mousse; keep a few whole for garnish if you like.
- 4 tablespoons unsalted butter, melted — binds the crust and adds richness.
- 2 cups heavy whipping cream — this is what makes the mousse light and billowy.
- 1 cup powdered sugar — sweetens and stabilizes the whipped cream.
- 1 teaspoon vanilla extract — rounds the flavor.
- 8 ounces cream cheese, softened — gives the mousse body and a slight tang; softened means no lumps and smooth folding.
Optional add-ons
- 1 cup chocolate ganache (optional) — for a glossy drizzle or layer on top.
- Extra crushed Oreos (optional) — for extra crunch between layers or as a topper.
- Mini chocolate chips or chocolate shavings (optional) — pretty and add texture.
- Chopped nuts (optional) — toasted pecans or hazelnuts for a nutty bite.
- Fresh strawberries or raspberries (optional) — a tart contrast to the sweetness.
- Sea salt (optional) — a light sprinkle on top of ganache lifts the chocolate flavor.
Substitutions and shortcuts
- Milk or reduced-fat cream: I don’t recommend substituting heavy cream if you can avoid it—heavy whipping cream whips up firm peaks and gives the mousse its structure. If you must, use a high-fat substitute but expect a softer mousse.
- Cream cheese: If you need a lighter option, try mascarpone (same weight and texture) or a blend of half cream cheese, half mascarpone. Both provide a smooth, rich base.
- Oreos: Use chocolate sandwich cookies if Oreos aren’t available. For gluten-free, use a certified gluten-free chocolate sandwich cookie and check other ingredients.
- Powdered sugar: You can use granulated sugar if you dissolve it first in a tiny bit of warm cream; powdered sugar is easiest and helps stabilize the whipped cream.
- No springform pan? Use a regular round cake pan lined with parchment and remove carefully, or assemble in a deep dish and serve as a trifle.
- Shortcut crust: If you’re short on time, you can press store-bought Oreo crumb crusts into a pan, but homemade is simple and inexpensive.
How to Make Oreo Mousse Cake Step-by-Step
I’ll walk you through each step as if we’re baking together. Take your time, read through, and you’ll be surprised how relaxed and fun this is.
Step 1 — Prep and chill your equipment
Start by chilling a mixing bowl and the beaters in the fridge for 10–15 minutes—cold equipment helps the heavy cream whip faster and hold peaks. Lay out your springform pan (9-inch works well), and line the bottom with parchment if you want an extra-easy release.
Step 2 — Crush the Oreo cookies
Place the Oreo cookies in a food processor and pulse until mostly fine. If you don’t have a processor, pop them in a large zip-top bag and bash with a rolling pin until you have mostly fine crumbs with a few small chunks for texture. Reserve about 1/4 to 1/3 cup of crumbs for garnish if you like.
Tips: Keep a few whole cookies aside for decoration. Don’t over-process if you want those little crunchy bits in the crust and mousse.
Step 3 — Make the Oreo crust
Pour the Oreo crumbs into a bowl and stir in the 4 tablespoons of melted butter until the mixture clumps when pressed between your fingers. Transfer the crumbs to the springform pan and press firmly and evenly into the bottom to form a compact crust. Use the bottom of a measuring cup or glass to press down for a smooth surface.
Tip: Press harder for a firmer crust that won’t crumble when you slice.
Step 4 — Chill the crust
Pop the crust into the fridge to firm up while you prepare the mousse. Fifteen to thirty minutes is fine—if you want to speed things up, stick it in the freezer for 10 minutes.
Step 5 — Whip the heavy cream
Pour the chilled heavy whipping cream into your cold mixing bowl. Add the powdered sugar and vanilla extract. Beat on medium-high speed until you get stiff peaks—this means when you lift the whisk, the peak stands straight up without folding over. Don’t overwhip; you want it firm but still silky.
Tip: If you want to test, stop at soft peaks and give a quick look; if it’s still glossy and holds shape, it’s done.
Step 6 — Beat the cream cheese until smooth
In a separate bowl, place the softened cream cheese and beat it with a mixer on medium speed until smooth and free of lumps. Scrape the bowl sides so everything is uniform. The cream cheese should be very soft—if it’s too cool, it will resist folding and create lumps.
Step 7 — Fold whipped cream into the cream cheese
Take about one-third of the whipped cream and beat it into the cream cheese to loosen the texture—this lightens the mixture and makes folding easier. Then gently fold in the remaining whipped cream using a spatula: scoop from the bottom, fold over, and rotate the bowl. Keep the motion gentle so you don’t deflate the whipped cream.
Tip: When folding, be patient. Slow, gentle folds preserve air and result in a fluffy mousse.
Step 8 — Add crushed Oreos to the mousse (optional)
If you like chunks of cookie inside, fold in about 1 cup of crushed Oreos into the mousse now. For a marbled look, fold just a little so streaks remain.
Step 9 — Build the cake — first mousse layer
Remove the chilled crust from the fridge. Spoon or pipe half of the mousse onto the crust, spreading gently to an even layer. If you want extra texture, sprinkle a few tablespoons of crushed Oreos over this layer—press lightly so they don’t float later.
Tip: If your crust is very firm, let it sit at room temperature for 2–3 minutes so the mousse settles evenly when you add it.
Step 10 — Top with the remaining mousse
Add the remaining mousse and smooth the top with an offset spatula. Tap the pan gently on the counter to remove any air pockets. Cover with plastic wrap.
Step 11 — Chill for set time
Chill the assembled cake for at least 4 hours, but overnight is best for clean slices and firm mousse. During this time the mousse sets and the flavors meld.
Step 12 — Add ganache and garnish before serving
If using chocolate ganache, warm it slightly so it’s pourable but not hot, then drizzle or pour over the chilled mousse cake. Sprinkle with extra crushed Oreos, mini chocolate chips, chocolate shavings, chopped nuts, a light dusting of sea salt, or fresh berries for contrast. Release the springform pan and transfer to a serving plate.
Tip: For a glossy ganache finish, pour while the ganache is slightly warm; for a drip effect, chill the cake for 10 minutes after adding ganache.
Step 13 — Slice and serve
Use a sharp knife heated under hot water and dried between cuts for clean slices. Serve chilled and enjoy the creamy contrast of mousse against the crisp Oreos.
Common Mistakes to Avoid
Making this cake is forgiving, but a few simple errors can change the texture or appearance. Here are the common pitfalls and how I avoid them.
Mistake 1: Overwhipping the cream
Overwhipping turns whipped cream grainy and buttery. I stop as soon as I see stiff peaks and keep an eye on the mixer. If your cream starts to look separated, it’s gone too far—unfortunately that batch is best replaced.
Mistake 2: Folding too aggressively
If you stir the whipped cream into the cream cheese with gusto, you’ll deflate the mousse and end up with a dense filling. Gentle folding keeps air in. I always fold with a rubber spatula and rotate the bowl slowly until the mixture is uniform.
Mistake 3: Using cold cream cheese
Cold, firm cream cheese creates lumps when mixed. I bring the cream cheese to room temperature for about 30 minutes or soften it in short bursts in the microwave (5–8 seconds) if I’m in a hurry. Beat until silky before adding whipped cream.
Serving Suggestions for Oreo Mousse Cake
This cake is versatile—feel free to dress it up or keep it cozy and simple. Here are a few ideas I love when serving family or guests.
I often pair the cake with something bright to cut through the richness—a few spoonfuls of tart berries work wonders.
Berry plate and coulis
Serve with fresh strawberries, raspberries, or a quick mixed berry coulis spooned on the plate. The acidity refreshes the palate and balances the sweet cream.
Hot coffee or cold milk
A strong cup of coffee complements the chocolate notes, while cold milk makes it feel like a classic cookies-and-milk dessert—great for kids’ parties.
Mini slices with fruit garnish
Cut smaller slices for a dessert sampler at gatherings and top each with a raspberry or thin strawberry slice and a small sprinkle of chopped nuts for texture. If you want to explore a fruity mousse pairing, I often look at techniques from this raspberry pistachio mousse cakes recipe to inspire color and flavor contrasts.
Conclusion
This Oreo Mousse Cake is easier than it looks—just a pressed cookie crust, a whipped cream and cream cheese mousse, and a little patience while it chills. It’s wonderfully customizable: add ganache, fresh berries, nuts, or extra cookie chunks to match your mood. If you want a variation or extra inspiration for a similar dessert, I like looking at a classic Oreo Mousse Cake – Inside BruCrew Life for different styling ideas. Give it a try this weekend and tell me how it turns out—I love hearing which garnish people pick.
FAQs About Oreo Mousse Cake
Q1: How long does the Oreo Mousse Cake keep in the fridge?
A1: The Oreo Mousse Cake will keep well for 3–4 days in the refrigerator if covered tightly with plastic wrap or stored in an airtight container. The crust may soften slightly after a day or two, but the flavor stays great. For best texture, consume within two days.
Q2: Can I make the Oreo Mousse Cake ahead of time?
A2: Absolutely. I often make it the day before. Chill it overnight so the mousse sets fully and flavors meld. If you add ganache, wait until just before serving or early the same day so it looks fresh.
Q3: Can I freeze the Oreo Mousse Cake?
A3: Yes, you can freeze the Oreo Mousse Cake for up to 1 month. Wrap it well in plastic wrap and a layer of foil to prevent freezer burn. Thaw in the fridge overnight before serving. Note that the texture may change slightly—some whipped cream lightness can flatten a bit after freezing.
Q4: How can I make the Oreo Mousse Cake more stable for hot weather?
A4: To stabilize the mousse for warmer temperatures, use mascarpone mixed with the cream cheese, or fold in a small amount (1–2 teaspoons) of unflavored gelatin dissolved in warm water to the cream cheese before folding in the whipped cream. Chill until firmly set and keep it refrigerated until serving.
Q5: Is the Oreo Mousse Cake suitable for kids’ parties?
A5: Yes—kids love the cookies-and-cream flavor. Slice into small portions for little hands. Skip the sea salt or nuts on top and use colorful berries or mini chocolate chips for fun decoration. It’s easy to assemble ahead, which makes party prep much simpler.