Last updated on March 3, 2026
##A Cozy Start
Have you ever bitten into a cookie and been instantly transported back to a sunny kitchen table, a cup of tea in hand and flour on your sleeves? I have—more times than I can count—and that’s the feeling I chase with these Pastel Sugar Cookie Sandwiches. If you’re a beginner who worries about rolling perfect dough or getting frosting just right, I hear you. This recipe is actually forgiving, quick, and kind to first-time bakers. If you like soft sugar cookies with a creamy filling, and you’ve enjoyed treats like cinnamon sugar cookies before, you’ll find these pastel sandwiches comforting and surprisingly easy.
##A Quick Look at This Pastel Sugar Cookie Sandwiches Recipe
These Pastel Sugar Cookie Sandwiches are built on simple pantry staples—butter and all-purpose flour take center stage. They’re a comforting, homemade treat that’s great for teatime, spring celebrations, or whenever you need a cozy baking win. The gentle pastel colors make them festive without being fussy, and the buttercream filling keeps them soft and sandwich-like. Perfect for home cooks and beginners because the dough is forgiving and the techniques are basic. Keep scrolling to see step-by-step tips, storage ideas, and small tricks that make them shine.
##Ingredients You’ll Need for Pastel Sugar Cookie Sandwiches
Here I’ll list every ingredient you need and explain why each one matters. I’ll also give optional extras and substitutions for common pantry situations.
Essentials
- 1 cup unsalted butter, softened — The foundation for a tender, buttery cookie. Softened (not melted) is key for creaming with sugar.
- 1 ½ cups granulated sugar — Sweetness and structure; creaming it with butter helps create a light cookie.
- 1 large egg — Adds richness and helps bind the dough.
- 2 teaspoons vanilla extract — Flavor backbone; use pure vanilla if you have it.
- 2 ¾ cups all-purpose flour — The main structure of the cookie. Measure accurately for consistent results.
- 1 teaspoon baking soda — A little lift so the cookies aren’t too dense.
- ½ teaspoon baking powder — Works with baking soda to give an even rise and tender crumb.
- ½ teaspoon salt — Balances sweetness and enhances flavor.
- 2 tablespoons milk — Makes the dough slightly softer and easier to scoop.
- Gel food coloring (pink, yellow, green, blue, and purple) — Gel colors give vibrant pastels without thinning the dough.
For the filling:
- ½ cup unsalted butter, softened (for filling) — Creates a creamy, spreadable base.
- 2 cups powdered sugar (for filling) — Sweetness and stability for the buttercream.
- 2 tablespoons heavy cream or milk (for filling) — Adjusts the frosting consistency.
- 1 teaspoon vanilla extract (for filling) — Flavor for the filling.
- Pinch of salt (for filling) — Keeps the buttercream from tasting overly sweet.
Optional add-ons
- 1–2 teaspoons lemon zest — Brightens the cookies (add with the vanilla).
- Almond extract (1/4 teaspoon) — For a nutty, bakery-style note—use sparingly.
- Sprinkles (jimmies or nonpareils) — Press a few into the cookie tops before baking for extra charm.
- A few drops of food-safe floral extracts (like orange blossom) — Very small amounts can make the cookies feel special.
- Cocoa powder (1–2 tablespoons) — Turn one of the colors into a chocolate version if you want contrast.
Substitutions and shortcuts
- Butter: You can use salted butter for both dough and filling; reduce added salt in the dough to 1/4 teaspoon and omit the pinch in the filling.
- Milk: Use any dairy or non-dairy milk (almond, oat) in place of regular milk—texture may vary slightly.
- Heavy cream for filling: If you don’t have heavy cream, whole milk or a splash of half-and-half works. For a richer filling, use cream.
- Egg: For egg-free, try a commercially available egg replacer following package directions; cookies will be slightly different in texture.
- Gel food coloring: You can use liquid food coloring at double the amount, but it may slightly soften the dough and alter color vibrancy.
- Powdered sugar: If you prefer less sweet filling, reduce powdered sugar to 1 3/4 cups and increase cream by 1 tablespoon.
- Shortcut for shaping: If you’re short on time, press the dough into a small cookie scoop and flatten slightly rather than rolling into perfect balls—results are still lovely.
##How to Make Pastel Sugar Cookie Sandwiches Step-by-Step
I’ll walk you through the entire process in a calm, beginner-friendly way. Take your time and enjoy each step—baking should feel cozy, not rushed.
- Prepare your workspace and oven
- Preheat your oven to 350°F (175°C). Line a baking sheet with parchment paper or a reusable silicone mat. I like to keep all my tools within reach: measuring cups, mixing bowls, spatula, and cookie scoop.
- Cream the butter and sugar
- In a large mixing bowl, add 1 cup softened unsalted butter and 1 ½ cups granulated sugar. Using a hand mixer or stand mixer fitted with a paddle, beat on medium speed for about 2 minutes until the mixture is light in color and fluffy. Scrape down the sides with a spatula as needed. This aeration helps yield a tender, slightly cakey cookie.
- Add the egg and vanilla
- Crack in 1 large egg and add 2 teaspoons vanilla extract. Mix until fully incorporated, about 20–30 seconds. The batter will look glossy and a bit loose—that’s expected.
- Combine the dry ingredients
- In a separate bowl, whisk together 2 ¾ cups all-purpose flour, 1 teaspoon baking soda, ½ teaspoon baking powder, and ½ teaspoon salt. Whisking ensures even distribution of the leaveners so the cookies bake uniformly.
- Mix dry into wet
- Gradually add the flour mixture to the butter-sugar mixture in two or three additions. Mix on low speed until just combined—stop when you don’t see streaks of flour. Overmixing develops gluten and can make cookies tough.
- Soften the dough with milk
- Stir in 2 tablespoons milk until the dough becomes slightly softer and scoopable. If your kitchen is warm and the dough looks too soft, chill for 10–15 minutes.
- Divide and color the dough
- Divide the dough into five roughly equal portions (you can do four or six if you prefer different colors). Place each portion in a small bowl. With gel food coloring, add small dots at a time (a toothpick’s worth) until you reach gentle pastel shades—pink, yellow, green, blue, and purple. Gel colors give you control; they won’t thin the dough the way liquid colors can.
- Scoop and shape
- Using a tablespoon-sized scoop or measuring spoon (about 1 tablespoon per cookie), scoop balls of dough and roll lightly between your palms to smooth. Place them 1 ½–2 inches apart on the prepared baking sheet. If you like perfectly round cookies, use a small scoop and then gently roll each scoop into a ball.
- Bake carefully
- Bake one sheet at a time in the preheated 350°F oven for 8–10 minutes. You’re aiming for set edges without browning. The centers will look soft but not raw. If a cookie shows small cracks but no browning, it’s done.
- Cool slightly and transfer
- Let the cookies cool on the baking sheet for 5 minutes. This short rest lets them set so they don’t break when moved. Transfer to a wire rack to cool completely—this is important so the filling doesn’t melt when applied.
- Make the filling
- In a clean bowl, beat ½ cup softened unsalted butter (for filling) on medium speed until smooth. Gradually add 2 cups powdered sugar, about ½ cup at a time, mixing on low to avoid a sugar cloud. Add 2 tablespoons heavy cream or milk, 1 teaspoon vanilla extract, and a pinch of salt. Beat on medium-high for 1–2 minutes until light and fluffy. Taste and, if needed, adjust: add another tablespoon of cream for spreadability or a touch more powdered sugar to firm up.
- Assemble your sandwiches
- Match cookies in pairs by size and color. Either pipe the filling using a piping bag with a round tip or spread about a tablespoon of frosting on one cookie then sandwich with the matching top cookie. Press gently so the filling spreads evenly to the edges.
- Let them rest and serve
- Let the finished sandwiches sit at room temperature for about 10 minutes. This helps the filling firm slightly and the cookies settle into that perfect sandwich texture. Serve on a cake stand or a cozy plate with tea or milk.
Extra tips while baking:
- If you want perfectly flat cookies, press each ball down slightly with the bottom of a glass dipped in sugar before baking.
- If your piping bag isn’t available, a zip-top bag with a trimmed corner works well.
- To keep colors distinct, use separate scoops or clean your scoop between colors.
##Common Mistakes to Avoid
Baking is a little science and a lot of love. A few small mistakes can change the texture or look of your cookies, but most are easy to fix once you know what to watch for. Below are the three most common pitfalls and how I handle them in my kitchen.
Mistake 1: Overmixing the dough
Overmixing after adding the flour develops gluten and leads to dense, tough cookies instead of soft sandwich cookies. Mix only until the flour disappears and you see a uniform dough. If you accidentally overmix, a short chill in the fridge (20–30 minutes) can help relax the dough and improve texture.
Mistake 2: Baking until browned
Because these cookies are meant to be soft, baking until they brown is a common error. Pull them when the edges look set and the centers are only slightly soft. They’ll continue to firm up on the baking sheet as they cool. Remember: color is not the only doneness signal—touch and time matter.
Mistake 3: Filling that’s too soft or too stiff
A filling that’s too soft will ooze out when sandwiched; too stiff makes the sandwiches hard to bite. If your buttercream seems runny, chill it for 10–15 minutes and then rewhip. If it’s too thick, add cream or milk one teaspoon at a time until spreadable. Measure powdered sugar and butter accurately to avoid this problem up front.
##Serving Suggestions for Pastel Sugar Cookie Sandwiches
These cookies are inherently charming and flexible—dress them up for holidays or keep them simple for everyday tea time. I like serving them with a hot drink on a quiet afternoon or arranging them on a platter for guests.
Tea time pairing
Pastel sugar cookie sandwiches are lovely with a light tea like chamomile or Earl Grey. The buttery cookie and sweet filling balance the gentle tannins of tea. For a modern twist, try a slightly floral tea like jasmine.
Party platter ideas
For showers, spring gatherings, or kid-friendly parties, arrange the cookies by color on a tiered tray. Add small bowls of extra sprinkles or edible glitter for guests to customize their cookies.
Make-ahead and gifting
Bake the cookies and freeze either the plain cookies or fully assembled sandwiches. To gift, layer them in an airtight container with parchment between layers. They make an adorable homemade gift for neighbors or teachers.
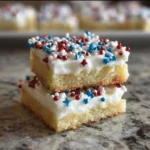
(If you like festive cookie bars too, I often pair these sandwiches with a batch of patriotic sugar cookie bars for variety on a dessert table.)

##Conclusion
I promise—making Pastel Sugar Cookie Sandwiches is easier than it looks. You don’t need precision baking experience to end up with soft, buttery cookies and a smooth, dreamy filling. The recipe is also wonderfully customizable: swap colors, add zest, or press sprinkles into the tops before baking. If you’re looking for a simple, cozy dessert that feels special, this is it. For more inspiration and a visual reference, I like keeping a few go-to tutorials open; one helpful guide is Pastel Sugar Cookie Sandwiches (Easy Easter Dessert Idea). Try them this weekend—you might find yourself baking them again and again.
##FAQs About Pastel Sugar Cookie Sandwiches
Q1: Can I make Pastel Sugar Cookie Sandwiches ahead of time?
A1: Yes—bake the cookies up to 3 days in advance and store them in an airtight container at room temperature. For longer storage, freeze the baked cookies (unfrosted) for up to 3 months. Assemble with the filling after thawing. Fully assembled sandwiches can be refrigerated for up to 3 days; bring to room temperature before serving.
Q2: How do I keep the colors pastel and not too bright for Pastel Sugar Cookie Sandwiches?
A2: Use gel food coloring and add it gradually—start with a tiny amount (a toothpick’s tip) and stir. You can always deepen the color, but you can’t take it away. Gel gives good color without thinning the dough. For very subtle pastels, use less color than you think you need.
Q3: Can I make gluten-free Pastel Sugar Cookie Sandwiches?
A3: You can—swap the all-purpose flour for a 1-to-1 gluten-free baking blend that contains xanthan gum. The texture will be slightly different but still delicious. Chill the dough a bit longer if it seems too soft when using gluten-free flour, as hydration can vary.
Q4: My Pastel Sugar Cookie Sandwiches spread too much—what went wrong?
A4: Spreading can happen if the dough is too warm or your butter was too soft or melted. Chill the dough briefly (10–20 minutes) before scooping, and make sure your butter is softened but not greasy. Also, check your leavening: too much baking soda or powder can increase spread.
Q5: How should I store leftovers of Pastel Sugar Cookie Sandwiches?
A5: Store assembled cookies in an airtight container at room temperature for up to 3 days. If you prefer a slightly firmer filling, refrigerate for up to 5 days and bring to room temperature before serving. For longer storage, freeze unfilled cookies or fully assembled sandwiches in a single layer until firm, then stack with parchment between layers in a freezer-safe container for up to 3 months.

Pastel Sugar Cookie Sandwiches
- Total Time: 40 minutes
- Yield: 24 sandwich cookies 1x
- Diet: Vegetarian
Description
Delicious soft sugar cookie sandwiches with a creamy buttercream filling, perfect for any celebration or cozy teatime.
Ingredients
- 1 cup unsalted butter, softened
- 1 ½ cups granulated sugar
- 1 large egg
- 2 teaspoons vanilla extract
- 2 ¾ cups all-purpose flour
- 1 teaspoon baking soda
- ½ teaspoon baking powder
- ½ teaspoon salt
- 2 tablespoons milk
- Gel food coloring (pink, yellow, green, blue, and purple)
- ½ cup unsalted butter, softened (for filling)
- 2 cups powdered sugar (for filling)
- 2 tablespoons heavy cream or milk (for filling)
- 1 teaspoon vanilla extract (for filling)
- Pinch of salt (for filling)
- Optional: 1–2 teaspoons lemon zest
- Optional: 1/4 teaspoon almond extract
- Optional: Sprinkles
- Optional: Food-safe floral extracts
- Optional: 1–2 tablespoons cocoa powder
Instructions
- Preheat your oven to 350°F (175°C) and prepare a baking sheet.
- Cream the butter and sugar until fluffy.
- Add the egg and vanilla extract, mix until incorporated.
- Combine flour, baking soda, baking powder, and salt in a separate bowl.
- Mix dry ingredients into the wet mixture until just combined.
- Stir in milk until dough is slightly softer.
- Divide the dough and color with gel food coloring.
- Scoop balls of dough and place on prepared baking sheet.
- Bake for 8–10 minutes until edges are set.
- Cool on the baking sheet before transferring to a wire rack.
- Beat the filling ingredients until fluffy.
- Assemble sandwiches by matching cookies and spreading or piping filling.
- Let sit for 10 minutes before serving.
Notes
Press cookie balls lightly before baking for flatter cookies. Use a high-quality gel food coloring for best results.
- Prep Time: 30 minutes
- Cook Time: 10 minutes
- Category: Dessert
- Method: Baking
- Cuisine: American
Nutrition
- Serving Size: 1 sandwich cookie
- Calories: 150
- Sugar: 12g
- Sodium: 150mg
- Fat: 7g
- Saturated Fat: 4g
- Unsaturated Fat: 2g
- Trans Fat: 0g
- Carbohydrates: 20g
- Fiber: 0g
- Protein: 2g
- Cholesterol: 25mg
Keywords: sugar cookies, cookie sandwiches, pastel cookies, baking, dessert