Last updated on June 8, 2025
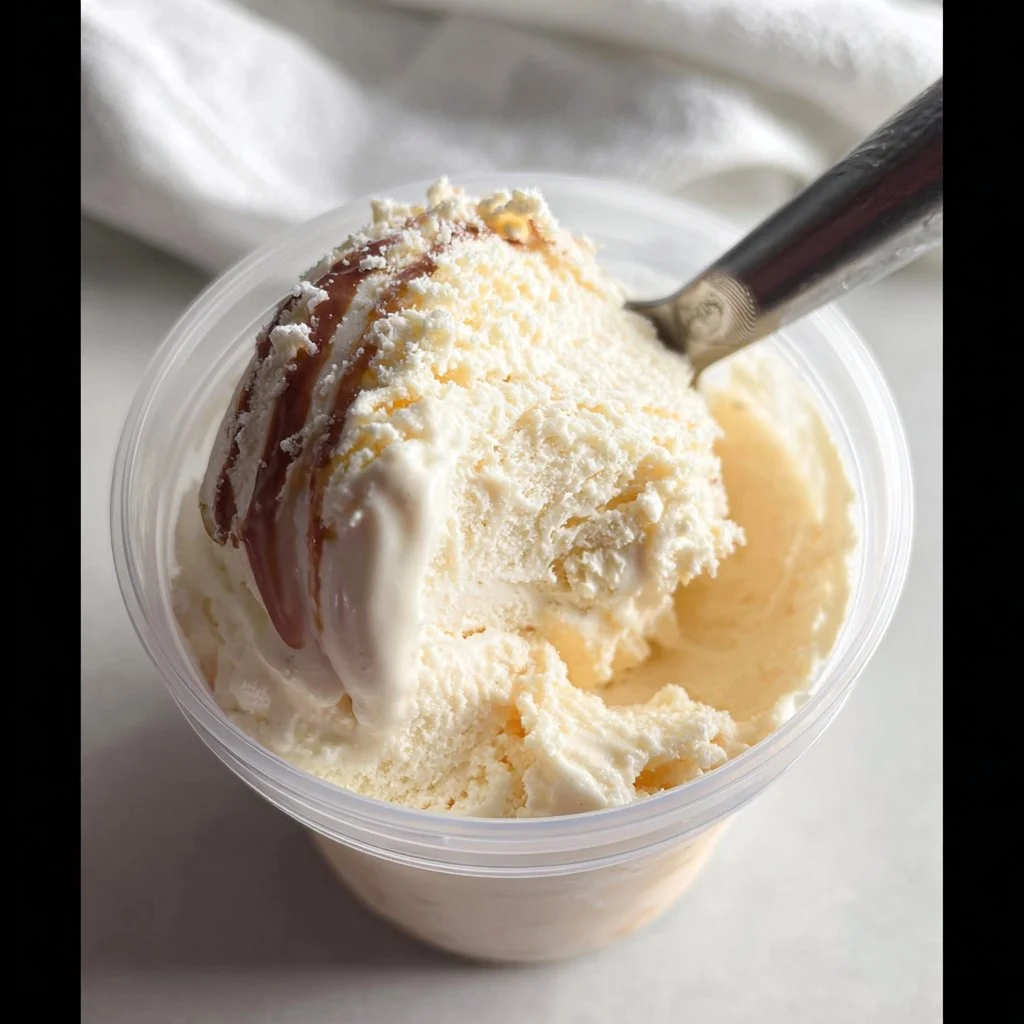
When the weather heats up or when you’re just in need of a sweet treat, nothing beats a bowl of creamy homemade vanilla ice cream. This Vanilla Ice Cream recipe using the Ninja Creami is not only easy to make but also allows you to enjoy a classic favorite in the comfort of your own home. With simple ingredients and straightforward steps, you’ll find yourself cooling off with a scoop of deliciousness in no time.
Table of Contents
Why You’ll Love This Vanilla Ice Cream
There are many reasons why this Vanilla Ice Cream will quickly become your go-to recipe. First, it captures the essence of traditional homemade ice cream with a rich and creamy texture, thanks to the combination of whole milk, heavy cream, and cream cheese. The vanilla bean paste adds a depth of flavor that elevates the ice cream beyond store-bought brands.
Making ice cream at home gives you total control over the ingredients, ensuring that every scoop is made to your liking. Plus, using the Ninja Creami makes the process quick and straightforward. Whether you’re serving it at a summer barbecue, enjoying a quiet night in, or finding a delightful treat for the kids, this ice cream is perfect for any occasion.
Print
Vanilla Ice Cream Ninja Creami
- Total Time: 24 hours 5 minutes (includes freezing time)
- Yield: 4 servings 1x
- Diet: Vegetarian
Description
A rich and creamy vanilla ice cream made in the Ninja Creami with a touch of cream cheese and vanilla bean paste for an indulgent texture and flavor.
Ingredients
- 1 cup (240ml) whole milk
- 3/4 cup (180ml) heavy cream
- 1 tablespoon cream cheese, softened
- 1 teaspoon vanilla bean paste
- 1/3 cup (67g) granulated sugar
- Optional: chocolate chips, crushed nuts, fruit purees, cinnamon or nutmeg
Instructions
- In a blender or mixing bowl, combine whole milk, heavy cream, cream cheese, vanilla bean paste, and sugar.
- Blend until completely smooth and sugar is dissolved.
- Pour the mixture into a Ninja Creami pint container, ensuring it does not exceed the max fill line.
- Place the lid on and freeze on a level surface for 24 hours.
- Once frozen solid, insert the pint into the Ninja Creami machine and use the ‘Ice Cream’ function.
- If the texture is crumbly after the first spin, use the ‘Re-spin’ function for a smoother result.
- Add any optional mix-ins like chocolate chips or fruit purees and use the ‘Mix-in’ function if desired.
- Serve immediately or refreeze for later enjoyment.
Notes
- Ensure the cream cheese is softened for easy blending.
- Freeze the base for a full 24 hours for optimal texture.
- Use re-spin for a smoother, creamier finish if needed.
- Customize with your favorite mix-ins or spices for variety.
- Prep Time: 5 minutes
- Cook Time: 0 minutes
- Category: Dessert
- Method: No-cook, Frozen
- Cuisine: American
Nutrition
- Serving Size: 1/2 cup
- Calories: 230
- Sugar: 18g
- Sodium: 35mg
- Fat: 16g
- Saturated Fat: 10g
- Unsaturated Fat: 5g
- Trans Fat: 0g
- Carbohydrates: 19g
- Fiber: 0g
- Protein: 2g
- Cholesterol: 50mg
Keywords: Ninja Creami, vanilla ice cream, homemade ice cream, vanilla bean, creamy dessert
Ingredients You’ll Need for Vanilla Ice Cream:
To whip up this creamy delight, gather the following ingredients:
Essential Ingredients:
- 1 cup (240ml) of whole milk: Provides a smooth and creamy base.
- 3/4 cup (180ml) of heavy cream: Adds richness and helps achieve a luxurious texture.
- 1 tablespoon of cream cheese: Makes the ice cream extra creamy and gives it a slight tang.
- 1 teaspoon of vanilla bean paste: Imparts an authentic vanilla flavor with flecks seen in the ice cream.
- 1/3 cup (67g) of sugar: Sweetens the mixture and balances the flavors.
Optional Add-Ons:
- Chocolate Chips: For a bit of extra sweetness and texture.
- Crushed Nuts: Add crunch and flavor.
- Fruit Purees: Mix in for a fruity twist, such as strawberry or mango.
- Spices: Consider a pinch of cinnamon or nutmeg for a unique flavor blend.
How to Make Vanilla Ice Cream Step by Step
Creating your own Vanilla Ice Cream with the Ninja Creami is a delightful experience. Follow these detailed steps, and you’ll be enjoying your homemade treat in no time!
Starting with Cream Cheese: Place the cream cheese in a large mixing bowl. To soften it and make it easier to mix, heat it in the microwave for about 10 seconds. This will help create a smoother blend.
Mix in the Sugar: Add the sugar to the softened cream cheese. Using a whisk or a spatula, thoroughly combine the two until they form a creamy, smooth mixture.
Add Dairy Ingredients: Slowly drizzle in the whole milk and heavy cream while continuously stirring. Make sure to blend everything well until you have a uniform mixture with no lumps. This step ensures that the sugar dissolves completely and that the cream cheese integrates perfectly into the dairy.
Incorporate the Vanilla: Next, add the vanilla bean paste to the mixture. Stir well to ensure the flavor is evenly distributed throughout the base.
Prepare for Freezing: Pour the vanilla ice cream mixture into your Ninja Creami container. Make sure not to exceed the fill line. Secure the lid tightly.
Freeze the Mixture: Place the container flat in the freezer, and let it freeze for a full 24 hours. This step is crucial as it makes sure the ice cream has adequate time to set.
Processing the Ice Cream: After freezing, remove the container from the freezer and take off the lid. Follow the setup instructions provided in your Ninja Creami guide to attach it properly to the base of the machine.
Churn the Ice Cream: Select the “Ice Cream” button on your Ninja Creami. The machine will begin processing, transforming your icy mixture into creamy ice cream goodness. Once it’s finished, check the consistency. If it’s not quite creamy enough, you can re-spin it until you reach the desired texture.
Serve Immediately: Carefully remove the ice cream from the Ninja Creami. Serve it into bowls or cones right away for the freshest experience. Enjoy your delicious homemade vanilla ice cream!
Serving Suggestions for Vanilla Ice Cream
Vanilla ice cream is incredibly versatile and can be enjoyed in a variety of ways. Here are some delightful serving suggestions:
- Classic Scoop: Sometimes, simplicity is best. Serve a generous scoop in a bowl or a cone.
- Ice Cream Sundae: Top with chocolate or caramel sauce, whipped cream, and sprinkles for an indulgent treat.
- Milkshake: Blend a scoop or two with some milk and your favorite flavoring for a refreshing milkshake.
- Ice Cream Sandwich: Use two cookies (chocolate chip, oatmeal, or any favorite) and sandwich a scoop of the vanilla ice cream in between for a fun dessert.
- With Fresh Fruit: Add slices of strawberries, bananas, or peaches on top for a fresh twist.
Pro Tips for Perfecting Your Vanilla Ice Cream
To take your ice cream-making skills to the next level, consider these handy tips:
- Quality Ingredients: The better the ingredients, the better the ice cream. Use high-quality vanilla bean paste and dairy for the best flavor.
- Chill Your Tools: For an ultra-smooth mix, chill your mixing bowl and spatula beforehand. This helps maintain the cold temperature of the mixture while you’re working with it.
- Add-ins Timing: If you’re including mix-ins, such as chocolate chips or nuts, fold them in after processing for even distribution without breaking them apart.
- Taste as You Go: Before freezing, taste the base mixture and adjust the sweetness or flavoring if needed.
- Experiment: Don’t hesitate to play around with flavors. Try using different extracts or infusing the cream with spices for a variety of delightful ice cream experiences.
Easy Variations for Vanilla Ice Cream
While this vanilla ice cream is fantastic on its own, you can easily put your unique spin on it. Here are a few fun variations to try:
- Chocolate Swirl Vanilla: After processing, swirl in some chocolate sauce for a delightful contrast.
- Mint Chocolate Chip: Add a few drops of peppermint extract and chocolate chips for a delicious minty treat.
- Peanut Butter Swirl: Warm up some peanut butter until it’s pourable, and swirl it into the ice cream after processing.
- Cookies and Cream: Crush up some chocolate sandwich cookies and fold them in after processing for a fun texture and flavor.
- Caramel Swirl: Drizzle caramel sauce into the ice cream base before freezing for a sweet surprise.
Storage Tips to Store Vanilla Ice Cream
Once you’ve made your ice cream, you might want to store it for later. Here are some tips to keep it fresh:
- Airtight Container: Store the ice cream in an airtight container. This prevents freezer burn and preserves the ice cream’s creamy texture.
- Cover with Plastic Wrap: For extra protection, press a sheet of plastic wrap directly onto the surface of the ice cream before sealing the container. This minimizes air exposure.
- Storage Duration: Homemade vanilla ice cream is best enjoyed within 1-2 weeks of making it. However, it can last up to a month for optimal flavor and texture.
- Thaw Before Re-scooping: If your ice cream hardens too much, let it sit at room temperature for 5-10 minutes before scooping, making it easier to serve.
Conclusion
Making homemade vanilla ice cream with the Ninja Creami is not just about enjoying a delicious treat; it’s also a rewarding experience that brings a sense of joy to anyone who loves cooking or baking. With just a handful of quality ingredients, some simple steps, and a little patience, you can create a dessert that rivals any ice cream shop.
Whether you serve it plain, mix in some delightful add-ins, or try one of the fun variations, this vanilla ice cream recipe is bound to become a staple in your home. So grab your Ninja Creami, gather your ingredients, and start churning — your perfect scoop of vanilla heaven is just a few steps away!
FAQs About Vanilla Ice Cream
1. Can I use low-fat milk instead of whole milk?
While you can use low-fat milk, whole milk is recommended for the best creamy texture. The fat content in whole milk contributes to the ice cream’s richness.
2. How can I make my ice cream softer?
If you find your ice cream too hard after freezing, you can mix in a bit more heavy cream or let it sit at room temperature for a few minutes to soften before serving.
3. Can I add fruits to this recipe?
Yes! You can add fruit purees or fresh fruit pieces after processing the ice cream. Just make sure to fold them in gently to keep the creamy texture.
4. What’s the best way to clean my Ninja Creami?
Follow the manufacturer’s instructions for cleaning. Generally, it’s best to disassemble the components and wash them in warm soapy water. Avoid abrasive cleaners to keep the machine in good shape.
5. Is homemade ice cream healthier than store-bought?
Homemade ice cream allows you to control the ingredients and sweetness. You can use natural sweeteners and avoid preservatives found in many store-bought varieties, making it a healthier option overall.
Looking for more delicious recipes? Follow us on Pinterest and Facebook!