Last updated on April 7, 2026
A Cozy Start
Do you ever find yourself craving something chocolatey that feels like a hug but doesn’t require hours in the kitchen? I sure do—one rainy afternoon I wanted dessert without the fuss, and this Brownie Refrigerator Cake saved the day. If you’re a beginner who worries about layers or fancy techniques, I promise this is forgiving and low-stress. For another playful twist on brownies and cheesecake flavors, I like to peek at recipes like cherry cheesecake brownies when I want inspiration.
A Quick Look at This Brownie Refrigerator Cake Recipe
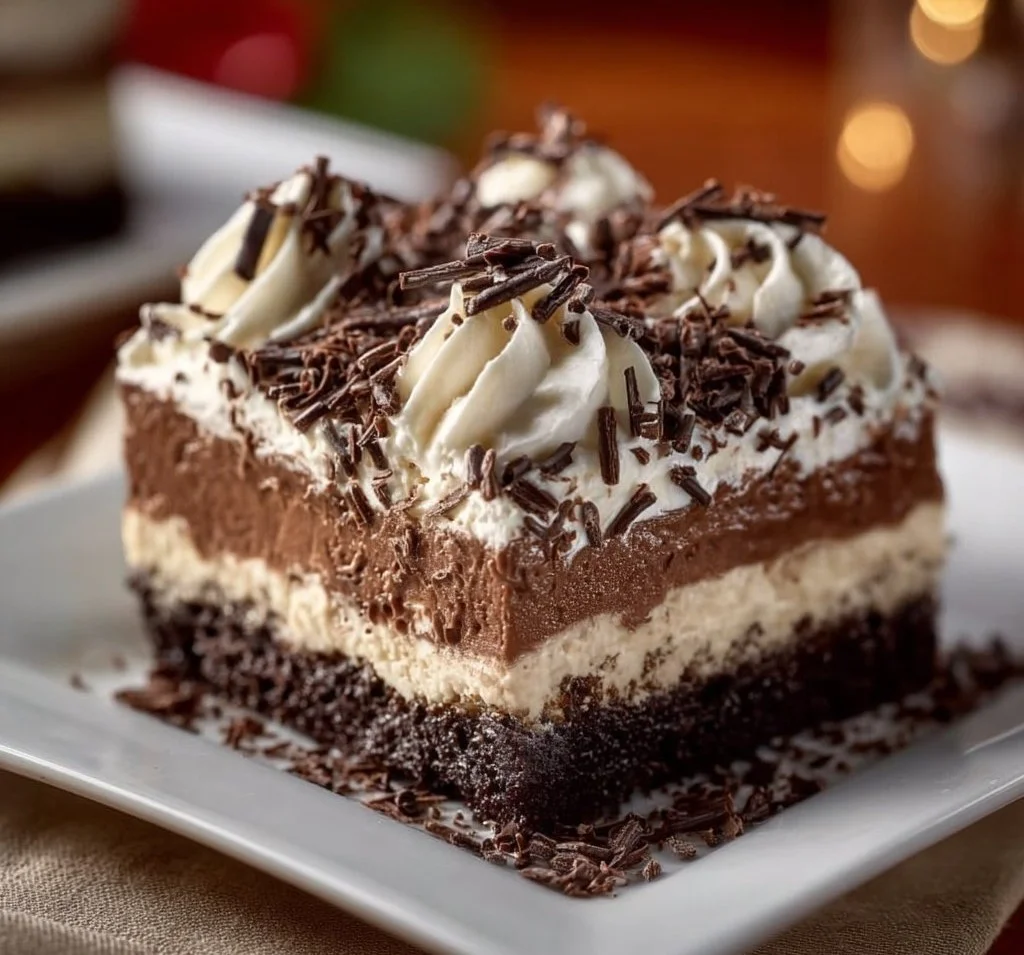
This Brownie Refrigerator Cake is built on two star ingredients: a fudgy boxed brownie base and a silky cream cheese-whipped cream filling. It’s comforting, quick to pull together, and perfect for feeding a crowd or satisfying a midnight craving. The convenience comes from using a boxed mix for perfectly fudgy brownies every time and a no-bake cream layer that sets in the fridge. Great for home cooks and beginners because it doesn’t require fancy baking skills—just basic mixing and layering. Keep reading to learn how simple swaps and assembly details make this a reliable go-to dessert.
Ingredients You’ll Need for Brownie Refrigerator Cake
Essentials
- 1 package brownie mix (follow the package size on the box; most are 15–18 ounces)
- 1/2 cup water
- 1/3 cup vegetable oil
- 2 large eggs
- 1 package (8 oz) cream cheese, softened
- 1 cup powdered sugar (confectioners’ sugar)
- 1 cup heavy whipping cream
- 1 teaspoon vanilla extract
- Chocolate shavings or sprinkles for topping
- A lightly greased 9×13-inch pan (or similar size casserole dish) for baking and assembling
These items form the backbone of the Brownie Refrigerator Cake: fudgy brownies, sweetened cream cheese, and airy whipped cream.
Optional add-ons
- Chopped nuts (walnuts, pecans, or almonds) for crunch
- Fresh berries (strawberries, raspberries, or blueberries) for a bright contrast
- Mini chocolate chips for extra texture in the layers
- Chocolate or caramel sauce to drizzle on top
- Flaky sea salt for a salty-sweet finish
- Cocoa powder or sifted powdered sugar to dust the top
Optional add-ons let you customize the cake for holidays, potlucks, or picky family members.
Substitutions and shortcuts
- Brownie mix: Use gluten-free boxed brownie mix if you need a gluten-free option. If you prefer homemade, any reliable brownie recipe will work—just bake in the same size pan.
- Water: Swap the water for brewed coffee (cooled) to intensify the chocolate flavor—still no alcohol.
- Vegetable oil: Substitute melted coconut oil or neutral-tasting canola oil if you prefer.
- Cream cheese: For a lighter filling, use 1/2 cup full-fat Greek yogurt mixed with 1/2 cup cream cheese (adjust powdered sugar to taste).
- Powdered sugar: Use a sugar substitute labeled for baking in a 1:1 ratio if needed, but texture may vary.
- Heavy whipping cream: Use refrigerated whipping cream that’s at least 30% fat for best stability. You can use pre-made stabilized whipped topping in a pinch, but the texture will be slightly different.
- Make-ahead shortcut: Bake the brownies a day ahead and store them covered at room temperature; assemble on the day you’ll serve to save time.
- Pan size: If you only have an 8×8 pan, reduce brownie batter and cream filling proportions or use a shallower layer—assembly instructions remain the same.
These substitutions keep the recipe flexible while maintaining the cozy, creamy profile of the Brownie Refrigerator Cake.
How to Make Brownie Refrigerator Cake Step-by-Step
I’ll walk you through each step like I’m standing next to you in the kitchen. No special equipment required—just a mixing bowl, whisk or electric mixer, spatula, and your baking pan.
Preheat and prep the pan
- Preheat your oven to the temperature listed on the brownie mix box (usually 325°F–350°F). Lightly grease a 9×13-inch pan with butter or nonstick spray, and optionally line it with parchment for easier removal and cleaner edges.
Mix the brownie batter
- In a medium bowl, combine the boxed brownie mix with 1/2 cup water, 1/3 cup vegetable oil, and 2 large eggs. Stir with a spatula until just combined—don’t overmix. A few streaks are okay; overmixing can make brownies cakier instead of fudgy.
Bake the brownies
- Pour the batter into the prepared pan and spread it evenly. Bake according to the package directions. I usually start checking a few minutes before the shorter time listed—insert a toothpick; you’re aiming for a few moist crumbs rather than a completely dry toothpick for fudgier brownies.
Cool completely
- Remove the brownies from the oven and let them cool in the pan on a wire rack. This is crucial: the cream layers need the brownies to be fully cooled so the filling stays smooth and the dessert sets properly. If you’re short on time, chill the pan in the fridge for 30–45 minutes to speed things up.
Make the cream cheese filling
- In a medium bowl, beat 1 package (8 oz) softened cream cheese with 1 cup powdered sugar until smooth and lump-free. Use a hand mixer or stand mixer for easiest results. Scrape down the sides so everything is evenly mixed.
Whip the cream
- In a separate chilled bowl, pour 1 cup heavy whipping cream and add 1 teaspoon vanilla extract. Beat on medium-high speed until soft, then stiff peaks form. The whipped cream should hold its shape but still be creamy—don’t overbeat to the point of grainy texture.
Fold the mixtures together
- Gently fold the whipped cream into the cream cheese mixture in two additions. Use a spatula and fold with a motion that keeps air in the whipped cream. The goal is a light, spreadable filling—if you overmix, it can deflate.
Decide on your brownie texture: layers or crumbs
- Option A: Slice the cooled brownies into even layers (2–3 layers depending on depth). I usually slice the pan horizontally if I baked thicker brownies, or simply cut into squares and layer them in an assembled dish.
- Option B: Crumble the brownies into large chunks for a more rustic look and easier layering. Either method works and changes the final texture.
Layer the dessert
- In your serving dish (the same 9×13 pan works fine, or use a trifle bowl for a pretty presentation), spread a thin layer of the cream mixture on the bottom to act as a “glue.” Place a layer of brownies (slices or crumbles), then spread a layer of cream on top. Repeat until you finish with a generous layer of cream on top. I like to reserve some large brownie crumbles for the final garnish.
Add toppings
- Sprinkle chocolate shavings, mini chips, sprinkles, chopped nuts, or a drizzle of chocolate/caramel sauce over the top. A pinch of flaky sea salt can be lovely if you like sweet-and-salty contrasts.
Chill to set
- Cover the assembled Brownie Refrigerator Cake with plastic wrap and chill for at least 2 hours, though overnight is best. Chilling lets the filling firm up and the layers meld—this is what makes it a refrigerator cake rather than a traditional layered cake.
Slice and serve
- For clean slices, use a sharp knife warmed under hot water and wiped dry between cuts. Serve chilled and enjoy. Leftovers keep covered in the refrigerator for 3–4 days.
I sometimes add a personal touch—fresh berries between layers in spring, or a sprinkle of espresso powder in the brownie batter for extra depth. If you want a mashup inspiration, I’ve also adapted the concept in ways similar to a caramel-brownie-cheesecake dish I love, which you can peek at for creative ideas: caramel brownie cheesecake inspirations.
Common Mistakes to Avoid
Even the coziest recipes have a few common slip-ups. I’ll point them out so you can avoid frustration and get reliable results every time.
Mistake 1: Assembling while the brownies are still warm
If you layer warm brownies with cream, the filling will melt and become runny. Always cool brownies completely—if you’re impatient, pop the pan in the refrigerator for a little while. Proper chilling helps the final texture set nicely.
Mistake 2: Overwhipping the cream or overmixing the filling
Overwhipped cream becomes grainy and can collapse; overmixing the cream cheese mixture can make it dense. Beat the cream to stiff peaks but stop as soon as it holds its shape, and fold gently into the cream cheese so the filling stays airy.
Mistake 3: Using low-fat or runny substitutions without adjustments
Using low-fat cream or softened cream cheese substitutes may give you a runnier filling that doesn’t set well. If you must use lighter products, add a stabilizer like 1 tablespoon instant pudding mix (vanilla) to the filling or use a little gelatin to help it hold up.
Serving Suggestions for Brownie Refrigerator Cake
This dessert is versatile—serve it at a casual family dinner or dress it up for a holiday spread. The cool, creamy layers pair beautifully with warm beverages and seasonal fruits.
Family-style platter
Serve the Brownie Refrigerator Cake right from the pan for an informal setting. Let everyone spoon generous portions onto plates—this is a dessert meant to be shared.
Individual servings
Portion the dessert into small trifle cups or mason jars for a pretty presentation and easy transport to potlucks. Layer brownies and filling into jars and chill; they’re adorable and portable.
Paired with drinks
Offer coffee, hot chocolate, or a simple glass of cold milk. The richness of the cake pairs especially well with a strong cup of coffee or an espresso-based drink for contrast.

Conclusion
I hope you’ll try this cozy Brownie Refrigerator Cake the next time you want a fuss-free yet showstopping dessert—I always keep the ingredients on hand for emergencies. If you want a tested recipe to compare notes with or to use as a starting point, I like the Brownie Refrigerator Cake recipe on Just A Pinch because it mirrors this easy, layered approach and gives a few extra tips for assembly: Brownie Refrigerator Cake on Just A Pinch Recipes.
FAQs About Brownie Refrigerator Cake
Q1: How long does Brownie Refrigerator Cake last in the fridge?
A1: Brownie Refrigerator Cake will keep well covered in the refrigerator for 3–4 days. The texture may soften a bit over time, but it’s still delicious. If you’ve added fresh berries, aim to eat it within 2–3 days for optimal freshness.
Q2: Can I freeze Brownie Refrigerator Cake?
A2: Yes, you can freeze Brownie Refrigerator Cake, but note the texture may change slightly. For best results, freeze individual slices wrapped tightly in plastic and then foil; thaw overnight in the refrigerator before serving. The filling can separate a little with freezing and thawing, so chilling overnight after thawing helps it firm up.
Q3: Is Brownie Refrigerator Cake suitable for kids’ parties?
A3: Absolutely. Brownie Refrigerator Cake is a kid-friendly dessert because it’s creamy, chocolatey, and easy to serve. You can decorate the top with sprinkles, mini chocolate chips, or fruit to match a party theme.
Q4: Can I make Brownie Refrigerator Cake without a boxed mix?
A4: Yes — a homemade fudgy brownie recipe works just fine. The boxed mix is a convenience that gives consistent results quickly, but any baked brownie layer can be used. Just make sure the brownies are cooled completely before assembling.
Q5: How can I stabilize the filling for warmer climates?
A5: If you live somewhere warm or need the dessert to hold up longer out of the fridge, stabilize the whipped cream by adding 1–2 tablespoons of instant vanilla pudding mix to the cream cheese mixture or folding in a teaspoon of unflavored gelatin dissolved in two tablespoons of warm water. This helps the filling keep its shape a bit better when it’s not constantly chilled.
I’m always excited to hear about how readers personalize this dessert—leave a note about your favorite add-ins or a photo if you try it. Happy baking!
Print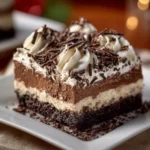
Brownie Refrigerator Cake
- Total Time: 2 hours 40 minutes
- Yield: 12 servings 1x
- Diet: Vegetarian
Description
A quick and comforting dessert made with fudgy brownies and a silky cream cheese-whipped cream filling, perfect for any occasion.
Ingredients
- 1 package brownie mix (15–18 ounces)
- 1/2 cup water
- 1/3 cup vegetable oil
- 2 large eggs
- 1 package (8 oz) cream cheese, softened
- 1 cup powdered sugar
- 1 cup heavy whipping cream
- 1 teaspoon vanilla extract
- Chocolate shavings or sprinkles for topping
Instructions
- Preheat your oven to the temperature listed on the brownie mix box (usually 325°F–350°F). Lightly grease a 9×13-inch pan with butter or nonstick spray.
- Mix the brownie mix with 1/2 cup water, 1/3 cup vegetable oil, and 2 large eggs in a medium bowl. Stir until just combined.
- Bake the batter in the prepared pan according to package directions.
- Cool the brownies completely in the pan on a wire rack.
- Make the cream cheese filling by beating 1 package softened cream cheese with 1 cup powdered sugar until smooth.
- Whip 1 cup heavy whipping cream with 1 teaspoon vanilla extract until soft peaks form.
- Fold the whipped cream into the cream cheese mixture gently.
- Layer the dessert in a serving dish with brownie layers and cream filling, finishing with a layer of cream.
- Add toppings like chocolate shavings before chilling.
- Chill the assembled cake for at least 2 hours before serving.
Notes
Chill overnight for best flavor. Use a sharp knife warmed under hot water for clean slices.
- Prep Time: 15 minutes
- Cook Time: 25 minutes
- Category: Dessert
- Method: No-Bake Layering
- Cuisine: American
Nutrition
- Serving Size: 1 slice
- Calories: 300
- Sugar: 28g
- Sodium: 200mg
- Fat: 22g
- Saturated Fat: 10g
- Unsaturated Fat: 10g
- Trans Fat: 0g
- Carbohydrates: 30g
- Fiber: 1g
- Protein: 4g
- Cholesterol: 60mg
Keywords: brownies, dessert, no-bake, cake, chocolate