Last updated on February 4, 2026
##Introduction
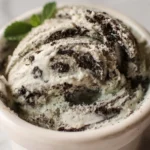
Do you ever find yourself craving something cold, chocolatey, and a little crunchy after dinner—something that takes you right back to childhood summers or late-night ice cream runs? I do, and that’s exactly how this Chocolate Ice Cream and Oreo Cookies layered dessert was born in my kitchen: a small craving, a freezer rescue, and a big smile. If you’re new to no-bake frozen desserts, you might worry about melting, soggy cookies, or tricky assembly, but I promise this recipe is forgiving and easy to follow. I often keep a box of ice cream sandwiches on hand and a tub of whipped topping, and that habit has saved many last-minute gatherings—if you want to see other simple chocolate swaps I like, check out my go-to dairy-free chocolate options for inspiration.
##A Quick Look at This Chocolate Ice Cream and Oreo Cookies Recipe
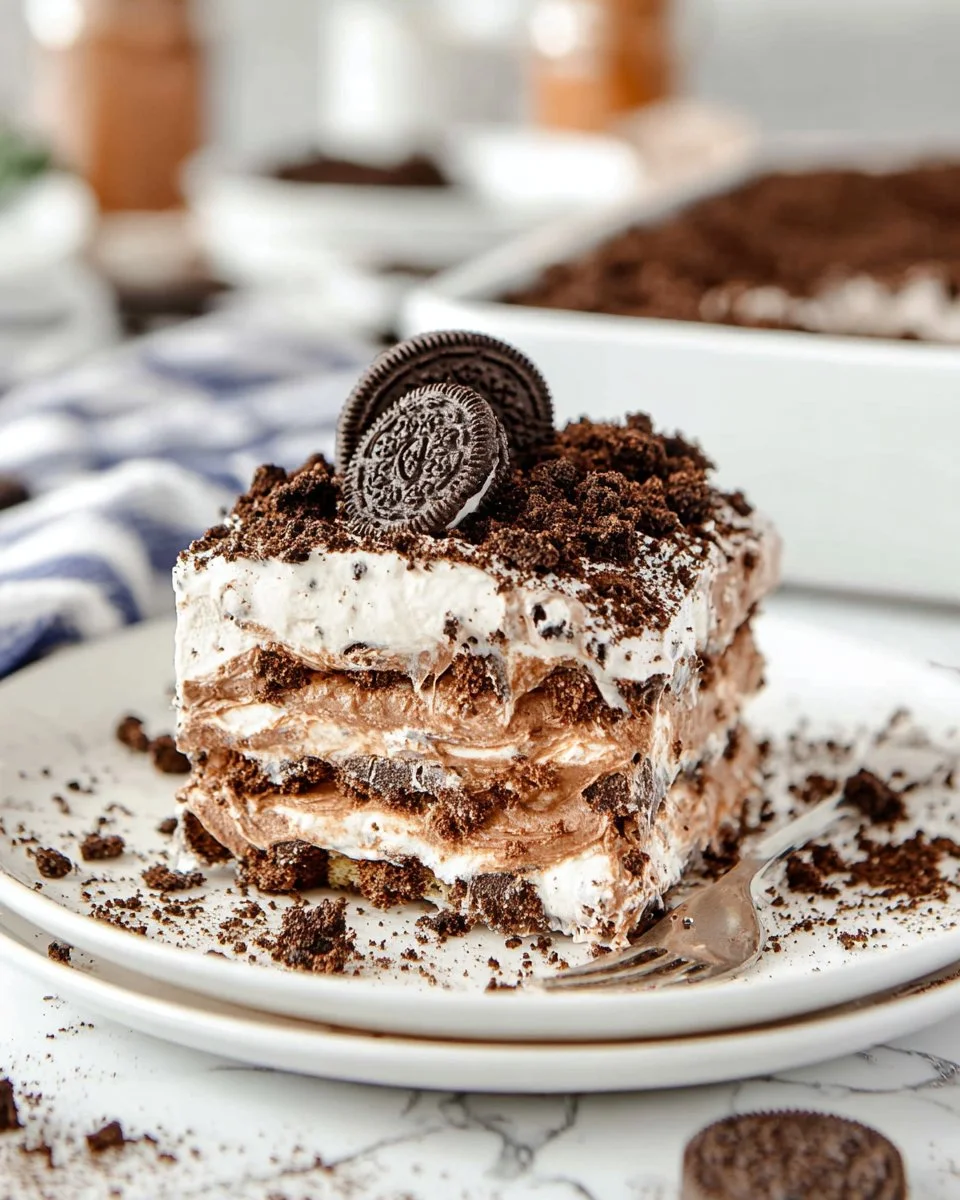
This Chocolate Ice Cream and Oreo Cookies dessert layers chocolate ice cream sandwiches, whipped topping, chocolate sauce, and crushed Oreos into a simple 9×13 pan. The main ingredients—chocolate ice cream sandwiches and Oreo cookies—make it irresistible and easy to assemble. It’s a great convenience recipe for weeknight treats or last-minute parties because it takes minimal hands-on time and a few hours to chill. Beginners will appreciate the forgiving nature: no baking, no complicated tempering—just layering. Keep scrolling for tips, helpful swaps, and a step-by-step guide so your tray comes out perfect every time.
##Ingredients You’ll Need for Chocolate Ice Cream and Oreo Cookies
Essentials
- 24 chocolate ice cream sandwiches (you’ll use 12 per layer in a 9×13-inch pan, then repeat)
- 450 grams thawed frozen whipped topping (like Cool Whip)
- 120 milliliters chocolate sauce (store-bought or homemade)
- 20 chocolate sandwich cookies (Oreos), crushed, plus extra for garnish
- A 9×13-inch baking dish (or similar)
- A serrated knife (for trimming sandwiches to fit)
- Plastic wrap or foil to cover while freezing
Optional add-ons
- A handful of mini chocolate chips for extra crunch
- Toasted chopped nuts (almonds or pecans) for a nutty contrast
- A sprinkle of flaky sea salt for balance on top of the chocolate sauce
- Fresh berries (strawberries or raspberries) served on the side for brightness
- A drizzle of caramel sauce instead of or alongside the chocolate sauce
Substitutions and shortcuts
- Whipped topping: If you don’t have store-bought thawed Cool Whip, you can use homemade stabilized whipped cream. Whip 2 cups heavy cream with 3 tablespoons powdered sugar and 1 teaspoon vanilla until stiff peaks form, then fold in 1 tablespoon of gelatin dissolved in 2 tablespoons warm water for stability before freezing. If you want plant-based, many dairy-free whipped toppings will work—see some dairy-free chocolate pairing ideas in this helpful resource if you’re exploring non-dairy swaps elsewhere in your kitchen.
- Chocolate sauce: Use hot fudge from the jar, warm chocolate syrup, or homemade sauce (melt equal parts chocolate and heavy cream for a quick ganache-style topping).
- Oreos: Any chocolate sandwich cookie works. For a gluten-free version, use a certified gluten-free chocolate sandwich cookie.
- Ice cream sandwiches: If you can’t find the rectangular kind, use square or round ones—trim to fit and pack them tightly. As a shortcut, buy two smaller packs and layer in the same way.
- Pan size: If you don’t have a 9×13-inch dish, use a similar-size baking pan; you may need to trim and rearrange the sandwiches to fit snugly.
##How to Make Chocolate Ice Cream and Oreo Cookies Step-by-Step
I like to set everything out before I start—my ingredients, a clean knife, and a damp towel. It makes the steps feel relaxed rather than rushed. You’ll be working fairly quickly so the ice cream sandwiches don’t soften too much, but nothing here is tricky.
Prepare your pan and ice cream sandwiches
- Take a 9×13-inch baking dish and make sure it’s clean and dry. If you prefer easier removal, line it with parchment paper with a bit of overhang on two sides.
- Unwrap 12 of the ice cream sandwiches. Arrange them in a single layer across the bottom of the pan. If the sandwiches don’t sit flush against the pan edges, use a serrated knife to trim them gently—press the knife through slowly to avoid scraping off too much filling. Aim for a flat, even surface so the next layers sit nicely.
Add the first whipped topping layer
- Spoon about half of the thawed whipped topping (roughly 225 grams) onto the arranged ice cream sandwiches. I like to dollop it in several places, then spread it carefully with an offset spatula or the back of a spoon until it’s evenly coated. Don’t press too hard—light, even strokes keep the layer fluffy.
Drizzle the first chocolate sauce layer
- Measure 60 milliliters of chocolate sauce and pour it evenly over the whipped topping. If your sauce is a bit thick, warm it slightly so it flows easily; a quick 10-second zap in the microwave usually does the trick. Drizzle in a zigzag pattern so it covers as much surface as possible without pooling.
Sprinkle the first Oreo layer
- Take about half of the crushed Oreos (10 cookies’ worth) and scatter them evenly over the chocolate sauce. You want a generous sprinkle but nothing too thick—this layer adds texture and that classic Oreo flavor throughout.
Repeat the layers
- Unwrap the remaining 12 ice cream sandwiches and place them as a second layer on top of the crushed Oreos. Trim any that don’t fit, just like the first layer.
- Spread the remaining whipped topping (the other 225 grams) evenly over the second layer of sandwiches.
- Pour the last 60 milliliters of chocolate sauce over the top layer. If you like, warm the sauce briefly again for easy pouring.
Finish with extra Oreos and chill
- Sprinkle any extra crushed Oreos over the top for a pretty finish. If you want to get fancy, add a few reserved cookie halves or mini chocolate chips.
- Cover the dish tightly with plastic wrap or aluminum foil, pressing gently so the cover doesn’t touch the top if you’re concerned about sticking. Freeze for at least 3 to 4 hours, but overnight is even better if you have the time.
Slice and serve
- To serve, remove the dish from the freezer and let it sit for 5–10 minutes so the layers are easier to slice. Use a sharp knife, warming the blade under hot water and wiping it dry between cuts for clean slices. Cut into bars or squares—this recipe yields about 12 to 16 generous portions depending on how you slice.
- Serve straight from the freezer with a small scoop of extra whipped topping or a drizzle of warm chocolate sauce if you like.
A few hands-on tips I’ve learned: keep the whipped topping chilled until you’re ready to spread, work quickly with the ice cream sandwiches, and use a warmed knife for tidy slices. If you’re making this for a party, assemble earlier in the day and let it freeze overnight.
##Common Mistakes to Avoid
Even though this recipe is simple, a couple of common slip-ups can affect the final texture and presentation. Once you know them, they’re easy to avoid.
Mistake 1: Using warm, melting ice cream sandwiches
If the ice cream sandwiches are too soft when you assemble, the layers will become sloppy and the final dessert may freeze together in an uneven way. Always work from frozen to lightly softened—take them out just long enough to unwrap, not to sit at room temperature.
Mistake 2: Overworking the whipped topping
Spreading whipped topping too aggressively can deflate it and make the layers dense. Use light, gentle strokes with an offset spatula and spread just enough to cover. If you need a smoother finish, chill the dish briefly between spreading the layers.
Mistake 3: Skipping the resting time before slicing
Cutting straight from the freezer without letting the tray sit for a few minutes often results in cracked edges and messy slices. Warm your knife and let the tray rest 5–10 minutes for cleaner cuts and prettier serving pieces.
##Serving Suggestions for Chocolate Ice Cream and Oreo Cookies
This layered treat is a crowd-pleaser and very adaptable. I often serve it as a casual dessert for gatherings or as a fun family weekend treat. Here are a few ideas to elevate or vary the presentation that are still easy enough for home cooks.
Family-style for casual nights
Cut the slab into squares and set it on a platter with small dessert forks. Add a bowl of fresh berries on the side for anyone who wants a bright contrast to the rich chocolate and Oreo flavors. If you love simple sweet pairings, consider a side of warm caramel sauce for extra indulgence.
Party-ready plated dessert
For a slightly fancier look, place a square on a chilled plate, add a small scoop of vanilla ice cream or whipped cream, and drizzle a little warm chocolate sauce around the plate. A mint leaf or a few whole Oreos on the plate gives an attractive finish without much effort.
Kid-friendly toppings bar
Let kids help decorate their squares: set out bowls of mini chocolate chips, sprinkles, crushed candies, and extra cookie crumbs so they can personalize each serving. If you’re looking for savory-sweet pairing ideas, you might find inspiration from savory recipe techniques over at this sweet chili and lime dish—it’s fun to see flavor balancing across savory and sweet in different recipes.
##Storage, Make-Ahead, and Leftover Ideas
I love desserts I can prep ahead, and this one is ideal for that. Store the assembled dish in the freezer, covered tightly, for up to 2 weeks. For best texture, consume within the first week. If you have leftovers, keep sliced portions in an airtight container with parchment between layers to prevent sticking. Leftover pieces also make fantastic milkshake bases—blend a piece with cold milk and a scoop of vanilla ice cream for a quick Oreo-chocolate shake.
##Variations to Try
If you want to riff on the base idea, here are a few variations I often experiment with:
- Mint Oreo version: Use mint-flavored ice cream sandwiches or add a few drops of peppermint extract to the whipped topping and use mint Oreos.
- Peanut butter twist: Swirl peanut butter into the whipped topping and add chopped peanut butter cups between layers.
- Fruit and cream: Add a thin layer of raspberry jam between one set of layers for a chocolate-and-berry pairing.
- Coffee kick: Stir a tablespoon of instant espresso into the chocolate sauce for a mocha touch.
##Tips for Beginners
I always tell beginners: don’t panic, and read the whole recipe before you start. Keep a damp towel nearby to wipe your hands and knife, work in short bursts so the ice cream sandwiches don’t soften too much, and use a warmed knife for slicing. If you’re serving guests, assemble the night before so you’re not rushing on the day. If you want a richer topping, swap part of the whipped topping with mascarpone or stabilized whipped cream (see the Substitutions section for a quick method).

##Conclusion
I love how this Chocolate Ice Cream and Oreo Cookies tray dessert feels like nostalgia on a plate—easy, comforting, and endlessly adaptable. It’s much easier than it looks: simple layers, no baking, and forgiving assembly. You can customize it with mix-ins, different sauces, or toppings to match your crowd and pantry. If you want a last-minute treat with big impact, make it the night before and slice right before guests arrive. For a local twist or to order specialty chocolate garnishes, I sometimes browse specialty shops like HolyChoco 366 Rue Sherbrooke Est – Order Online for inspiration or ready-made sauces.
##FAQs About Chocolate Ice Cream and Oreo Cookies
Q1: How long does Chocolate Ice Cream and Oreo Cookies need to freeze before serving?
A: Chocolate Ice Cream and Oreo Cookies should freeze for at least 3 to 4 hours to set well, but overnight is best for the cleanest slices and firmer texture.
Q2: Can I make Chocolate Ice Cream and Oreo Cookies ahead of time for a party?
A: Yes—Chocolate Ice Cream and Oreo Cookies is a great make-ahead dessert. Assemble it up to 24 hours in advance and keep it covered in the freezer until serving day.
Q3: Can I use homemade whipped cream in Chocolate Ice Cream and Oreo Cookies instead of store-bought topping?
A: Absolutely. For Chocolate Ice Cream and Oreo Cookies, use stabilized whipped cream (whip heavy cream with powdered sugar and a little gelatin or use cream stabilized with mascarpone) so it holds up in the freezer without becoming icy.
Q4: Are there gluten-free options for Chocolate Ice Cream and Oreo Cookies?
A: Yes, you can make Chocolate Ice Cream and Oreo Cookies gluten-free by using certified gluten-free ice cream sandwiches and gluten-free chocolate sandwich cookies. The rest of the ingredients are naturally gluten-free.
Q5: How should I slice Chocolate Ice Cream and Oreo Cookies for neat pieces?
A: To slice Chocolate Ice Cream and Oreo Cookies cleanly, let the dish sit at room temperature for 5–10 minutes, warm a sharp knife under hot water and dry it, then cut in straight, decisive strokes; wipe the blade between slices for the best presentation.
Chocolate Ice Cream and Oreo Cookies Layered Dessert
- Total Time: 255 minutes
- Yield: 12-16 servings 1x
- Diet: Vegetarian
Description
An irresistible no-bake dessert featuring layers of chocolate ice cream sandwiches, whipped topping, chocolate sauce, and crushed Oreos.
Ingredients
- 24 chocolate ice cream sandwiches
- 450 grams thawed frozen whipped topping
- 120 milliliters chocolate sauce
- 20 chocolate sandwich cookies (Oreos), crushed
- Extra Oreos for garnish
- A handful of mini chocolate chips (optional)
- Toasted chopped nuts (optional)
- A sprinkle of flaky sea salt (optional)
- Fresh berries (optional)
- A drizzle of caramel sauce (optional)
Instructions
- Prepare your pan by ensuring it’s clean and dry. Optionally, line it with parchment paper for easier removal.
- Unwrap 12 ice cream sandwiches and arrange them in a single layer in the pan. Trim them as necessary for a flat surface.
- Spoon half of the thawed whipped topping over the ice cream sandwiches and spread evenly.
- Drizzle 60 milliliters of chocolate sauce evenly over the whipped topping.
- Sprinkle half of the crushed Oreos over the chocolate sauce.
- Repeat the layering process with the remaining 12 ice cream sandwiches, followed by the rest of the whipped topping and the remaining chocolate sauce.
- Finish by sprinkling any extra crushed Oreos on top.
- Cover the dish tightly with plastic wrap or aluminum foil and freeze for at least 3-4 hours or overnight for best results.
- Let the dessert sit for 5-10 minutes after removing from the freezer before slicing and serving.
Notes
Work quickly to prevent the ice cream sandwiches from becoming too soft. Chill whipped topping until ready to use for best results.
- Prep Time: 15 minutes
- Cook Time: 240 minutes
- Category: Dessert
- Method: No-Bake
- Cuisine: American
Nutrition
- Serving Size: 1 square
- Calories: 250
- Sugar: 20g
- Sodium: 150mg
- Fat: 10g
- Saturated Fat: 5g
- Unsaturated Fat: 5g
- Trans Fat: 0g
- Carbohydrates: 34g
- Fiber: 1g
- Protein: 3g
- Cholesterol: 15mg
Keywords: chocolate dessert, no-bake dessert, ice cream, Oreo