Last updated on February 11, 2026
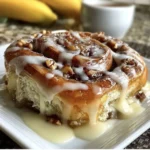
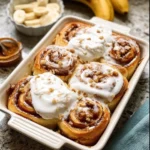
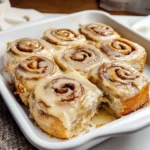
There’s something about the smell of warm butter and sugar that pulls me back to a lazy Sunday morning—sometimes I’ll catch myself craving that pillowy, slightly sweet bite and decide to bake. If you’re new to bread baking, the idea of kneading and rising might feel intimidating, but this Classic Ensaymada Bread is forgiving and cozy; I promise it’s simpler than it looks. If you want a softer rolling technique to practice while the dough rests, I often compare shaping to a cinnamon-roll approach I use in another recipe I love, like this banana bread cinnamon rolls, which can help if you enjoy a familiar shaping routine.
A Quick Look at This Classic Ensaymada Bread Recipe
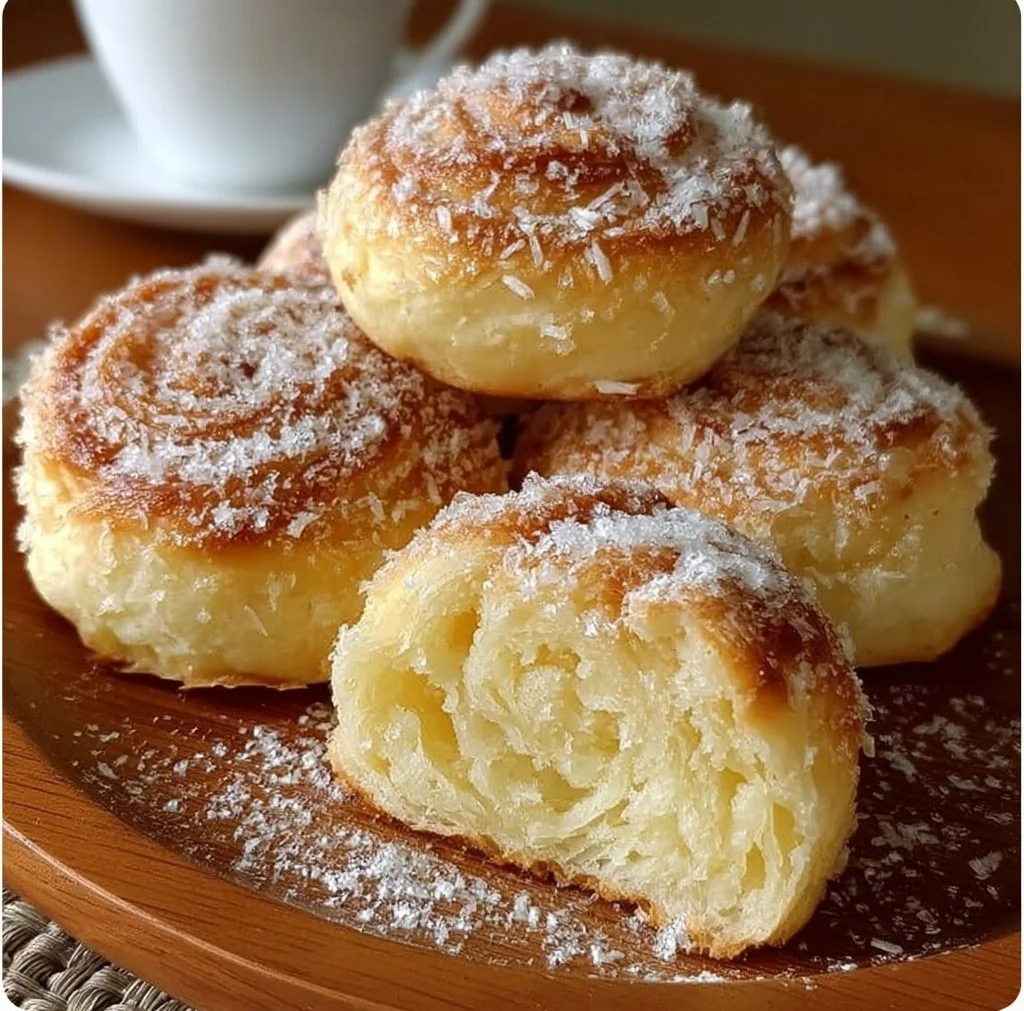
Classic Ensaymada Bread is a soft, enriched bread defined by two main ingredients: flour and butter (with eggs to make it tender). It’s comforting and slightly sweet—perfect for breakfast or an afternoon treat—and one key benefit is how well it freezes, making it convenient for busy home cooks who want to bake ahead. The method uses everyday pantry items and simple rises, so beginners can get great results without special equipment. Scroll down to find clear step-by-step instructions, tips for perfect texture, and ways to make it your own.
Ingredients You’ll Need for Classic Ensaymada Bread
Essentials
- 3 1/4 cups all-purpose flour, sifted (plus extra for dusting)
- 7 g instant yeast (1 pack)
- 4 tablespoons granulated sugar
- 1/2 teaspoon salt
- 2 eggs, beaten
- 1/4 cup warm milk (about 100–110°F / 37–43°C)
- 1/3 cup warm water (about 110°F / 43°C)
- 3 tablespoons melted butter (for the dough)
- Softened butter (for spreading inside the rolls; about 4–6 tablespoons)
Optional add-ons
- Granulated sugar for dusting (classic and simple)
- Grated mild cheese (like Edam, cheddar, or a Filipino kesong puti alternative) for a savory-sweet finish
- A light dusting of powdered sugar for an extra-special look
- Vanilla extract (1/2 teaspoon) or a pinch of nutmeg for subtle flavor warmth
- Melted butter glaze or a thin custard for brushing after baking
Substitutions and shortcuts
- Milk substitutes: Use whole milk for richer dough, or a nut milk (almond or oat) for a dairy-light version—expect a slightly different crumb.
- Yeast options: I use instant yeast for speed (add directly to flour). If you only have active dry yeast, proof it in the warm water with a pinch of sugar for 5–10 minutes before mixing.
- Butter swap: Melted butter in the dough gives tenderness; you can use softened margarine in a pinch, though flavor will be different.
- Quick method: If you’re in a hurry, you can do a warm-rise trick—place the covered dough in an oven with just the light on, but don’t exceed about 90°F/32°C to avoid over-proofing.
- Flour: Bread flour will make a slightly chewier ensaymada; all-purpose keeps it soft and tender as intended.
How to Make Classic Ensaymada Bread Step-by-Step
I like to treat this recipe like a friendly conversation between ingredients—move slowly, trust the dough, and don’t be afraid to touch it. Below is a detailed, beginner-friendly walk-through.
Prepare your workspace and ingredients
- Pull out a large mixing bowl, a measuring cup, and a clean surface for kneading. Sift the flour to remove lumps and to make the dough lighter. Make sure your milk and water are warm but not hot—roughly 100–110°F (37–43°C) for milk and 110°F (43°C) for water. Warm liquids help the yeast activate without killing it.
Combine the dry ingredients
- In a large bowl, whisk together the sifted all-purpose flour, instant yeast, granulated sugar, and salt. Keep the yeast and salt on opposite sides of the bowl at first if you’re nervous about direct contact—salt can slow yeast if placed directly on it before mixing.
Mix the wet ingredients
- In a separate bowl, whisk the beaten eggs, warm milk, and warm water until combined. If you’re adding vanilla, add it here. Create a small well in the center of the dry ingredients and pour in the wet mixture.
Bring the dough together
- Use a wooden spoon or your hand to mix until a shaggy dough forms. The dough will be slightly sticky but should pull away from the sides of the bowl. If it seems too dry, add 1 tablespoon of warm water at a time; if too wet, dust with a little flour.
Knead the dough (first phase)
- Turn the dough onto a lightly floured surface. Knead by hand for about 8–10 minutes: fold, push with the heel of your hand, rotate, and repeat. You’re aiming for a smooth, elastic texture. If you’re using a stand mixer, knead on medium speed with a dough hook for about 6–8 minutes.
Add the melted butter and continue kneading
- Flatten the dough slightly and pour the 3 tablespoons of melted (but not hot) butter over it. The dough will soften as the butter is incorporated—this is normal. Knead for another 4–5 minutes until the butter is fully worked in and the dough looks glossy and supple.
First rise: proof the dough
- Lightly grease a bowl with oil or butter. Place the dough in the bowl, turning it so all sides have a light coat. Cover the bowl with plastic wrap or a clean kitchen towel and let it rise in a warm, draft-free spot for 1 hour, or until it has roughly doubled in size. I like to set mine on top of a turned-off oven with the light on.
Shape the ensaymada
- Gently punch down the dough to release large bubbles. Turn it out onto a floured surface and roll it into a large rectangle, about 12 x 16 inches (30 x 40 cm) and roughly 1/4 inch thick. Spread softened butter evenly across the rectangle—be generous for rich flavor and softness.
Roll and cut
- Starting from a long edge, roll the dough tightly into a log (like a jelly roll). Pinch the seam to seal. Using a sharp knife or dental floss, cut the log into 8–10 equal pieces, depending on how large you like your ensaymadas.
Arrange for second rise
- Place each piece into a greased baking dish or into individual paper-lined muffin cups for neat rounds, leaving room for expansion. Cover loosely with plastic wrap or a towel and let rise for about 30 minutes, until puffy.
Preheat the oven and bake
- While the pieces are taking their second rise, preheat the oven to 350°F (175°C). Bake the ensaymadas for 20–25 minutes, or until they are golden brown on top. Keep an eye on them—because they’re rich with butter, timings can vary slightly.
Cool and finish
- Let the ensaymadas cool in the pan for 5–10 minutes, then transfer to a wire rack. Traditionally, they’re brushed with a little melted butter and dusted with sugar or topped with grated cheese while still warm. Allow to cool slightly and enjoy.
Step-by-step tips I often use:
- If your dough feels sticky after the initial knead, don’t add too much flour. The butter will absorb and the dough will firm up as you continue kneading and during the rests.
- For a neat presentation, place each roll in a small paper liner or buttered ramekin to maintain shape.
- If you want a more complex flavor, brush with a thin vanilla-sugar syrup right after baking.
I also like to reference different shaping and filling ideas while baking—some ideas are similar to the technique used in playful breadsticks like these cheesy Halloween breadstick bones, where simple shaping yields impressive results.
Common Mistakes to Avoid
Baking enriched breads like Classic Ensaymada Bread is forgiving, but a few common missteps can affect texture and flavor. A little attention to temperature, timing, and handling will get you the soft, buttery rolls you’re imagining.
Mistake 1: Using liquids that are too hot or too cold
Hot liquids can kill the yeast and cold liquids won’t activate it. Aim for the warm range (100–110°F / 37–43°C). If you don’t have a thermometer, the liquids should feel comfortably warm to the touch, not scalding.
Mistake 2: Over-flouring during kneading
It’s tempting to keep adding flour if the dough feels sticky, but too much flour makes ensaymada dense and dry. Work with lightly floured hands and a dusting on the surface, and remember the dough will firm up as it rests and absorbs butter.
Mistake 3: Rushing the rises or skipping the second rise
Both the first and second rises develop flavor and the tender crumb. Skipping either will result in tighter, heavier rolls. Give the dough the time it needs—an extra 10–15 minutes often makes a noticeable difference.
Serving Suggestions for Classic Ensaymada Bread
This bread is lovely warm, slightly sweet, and incredibly versatile. Serve it simply or dress it up—either way, it’s a cozy crowd-pleaser.
Morning companion
Warm a roll and serve it with a cup of coffee or milky tea for a comforting breakfast. The buttery crumb pairs beautifully with fruit jams or a smear of butter.
Party platter centerpiece
Arrange ensaymadas on a platter with fresh fruit, sliced cheeses, and a jar of honey for a casual brunch spread. They’re elegant yet homey—easy to make ahead and reheat.
Sweet or savory twist
Top with powdered sugar and a dust of cinnamon for dessert, or add a sprinkle of grated cheese on top after baking for a Filipino-style savory-sweet version. Both approaches work equally well and make lovely variations.

Conclusion
I hope you feel excited to try this Classic Ensaymada Bread at home—it’s friendlier than it looks, and you can customize it to suit morning coffee runs, a cozy dessert, or a make-ahead freezer stash. If you want a reference for a traditional take while you compare techniques, I often look at a trusted version like this Classic Ensaymada recipe on Pinoy Cooking Recipes for inspiration and serving ideas. When you bake these, take a moment to breathe in that buttery aroma—it’s one of the best parts.
FAQs About Classic Ensaymada Bread
Q1: How long does Classic Ensaymada Bread stay fresh?
A1: Classic Ensaymada Bread stays fresh at room temperature for 1–2 days when stored in an airtight container. For longer storage, freeze the cooled rolls (individually wrapped) for up to 2 months. Thaw at room temperature and warm slightly before serving.
Q2: Can I make Classic Ensaymada Bread without eggs?
A2: You can experiment with an egg-free version, but eggs contribute to the dough’s richness and structure. If you need an egg substitute, try using 1/4 cup applesauce plus a tablespoon of oil per egg as a starting point, though the texture will be slightly different.
Q3: How do I make Classic Ensaymada Bread softer and more tender?
A3: To keep your Classic Ensaymada Bread tender, avoid adding excess flour, use full-fat milk, and make sure to properly incorporate the melted butter. Allowing the dough to rest and complete both rises also contributes to a softer crumb.
Q4: Can I use active dry yeast for Classic Ensaymada Bread instead of instant yeast?
A4: Yes—if using active dry yeast, proof it first in the warm water with a teaspoon of sugar for 5–10 minutes until foamy. Then add it to the dry ingredients. Expect similar results, though the timing of rises may be slightly longer.
Q5: What’s the best way to reheat leftover Classic Ensaymada Bread?
A5: Reheat leftover Classic Ensaymada Bread in a 300°F (150°C) oven for 5–8 minutes, or microwave individually for 10–15 seconds for a quick warm-up. Brushing with a little melted butter before reheating restores the fresh-baked shine.

Classic Ensaymada Bread
- Total Time: 85 minutes
- Yield: 8 servings 1x
- Diet: Vegetarian
Description
Classic Ensaymada Bread is a soft, enriched bread that’s slightly sweet and perfect for breakfast or an afternoon treat. This forgiving recipe is easy for beginners and yields deliciously fluffy rolls.
Ingredients
- 3 1/4 cups all-purpose flour, sifted (plus extra for dusting)
- 7 g instant yeast (1 pack)
- 4 tablespoons granulated sugar
- 1/2 teaspoon salt
- 2 eggs, beaten
- 1/4 cup warm milk (about 100–110°F / 37–43°C)
- 1/3 cup warm water (about 110°F / 43°C)
- 3 tablespoons melted butter (for the dough)
- 4–6 tablespoons softened butter (for spreading inside the rolls)
- Granulated sugar for dusting (optional)
- Grated mild cheese (optional)
- A light dusting of powdered sugar (optional)
- 1/2 teaspoon vanilla extract or a pinch of nutmeg (optional)
- Melted butter glaze or thin custard (optional)
Instructions
- Prepare your workspace and ingredients: Sift flour, warm milk and water.
- Combine the dry ingredients: Whisk together flour, yeast, sugar, and salt in a bowl.
- Mix the wet ingredients: Whisk eggs, warm milk, and water; add to the dry mixture.
- Bring the dough together: Mix until shaggy and slightly sticky dough forms.
- Knead the dough (first phase): Knead by hand for about 8–10 minutes until smooth.
- Add melted butter: Incorporate the melted butter and knead for another 4–5 minutes.
- First rise: Grease a bowl, place the dough inside, cover, and let it rise for 1 hour.
- Shape the ensaymada: Roll the dough into a rectangle, spread butter, and roll tightly.
- Roll and cut: Cut the log into 8–10 pieces.
- Arrange for second rise: Place rolls in a baking dish, cover, and let rise for 30 minutes.
- Preheat the oven and bake: Bake in a preheated oven at 350°F (175°C) for 20–25 minutes.
- Cool and finish: Let cool slightly, then brush with melted butter and dust with sugar or cheese.
Notes
Best enjoyed warm or at room temperature. Freezes well for up to 2 months.
- Prep Time: 60 minutes
- Cook Time: 25 minutes
- Category: Bread
- Method: Baking
- Cuisine: Filipino
Nutrition
- Serving Size: 1 roll
- Calories: 250
- Sugar: 10g
- Sodium: 350mg
- Fat: 10g
- Saturated Fat: 5g
- Unsaturated Fat: 4g
- Trans Fat: 0g
- Carbohydrates: 30g
- Fiber: 1g
- Protein: 6g
- Cholesterol: 30mg
Keywords: ensaymada, bread, Filipino bread, soft bread, baking recipe