Last updated on May 4, 2026
There’s something magical about summer afternoons spent chasing ice cream trucks or crafting frozen treats in our own kitchens, isn’t there? I still remember the thrill of pulling apart a popsicle wrapped in its colorful packaging, anticipation bubbling inside me as I took the first bite. If you’ve ever dreamt of recreating that nostalgic moment, let me assure you: making your own Coconut Popsicles (Paletas de Coco) is easier than you might think. Are you up for a fun, relaxing kitchen adventure? You’ll be pleasantly surprised at how stress-free this recipe is, even for beginner cooks just starting their culinary journey!
Table of Contents
A Quick Look at This Coconut Popsicles (Paletas de Coco) Recipe
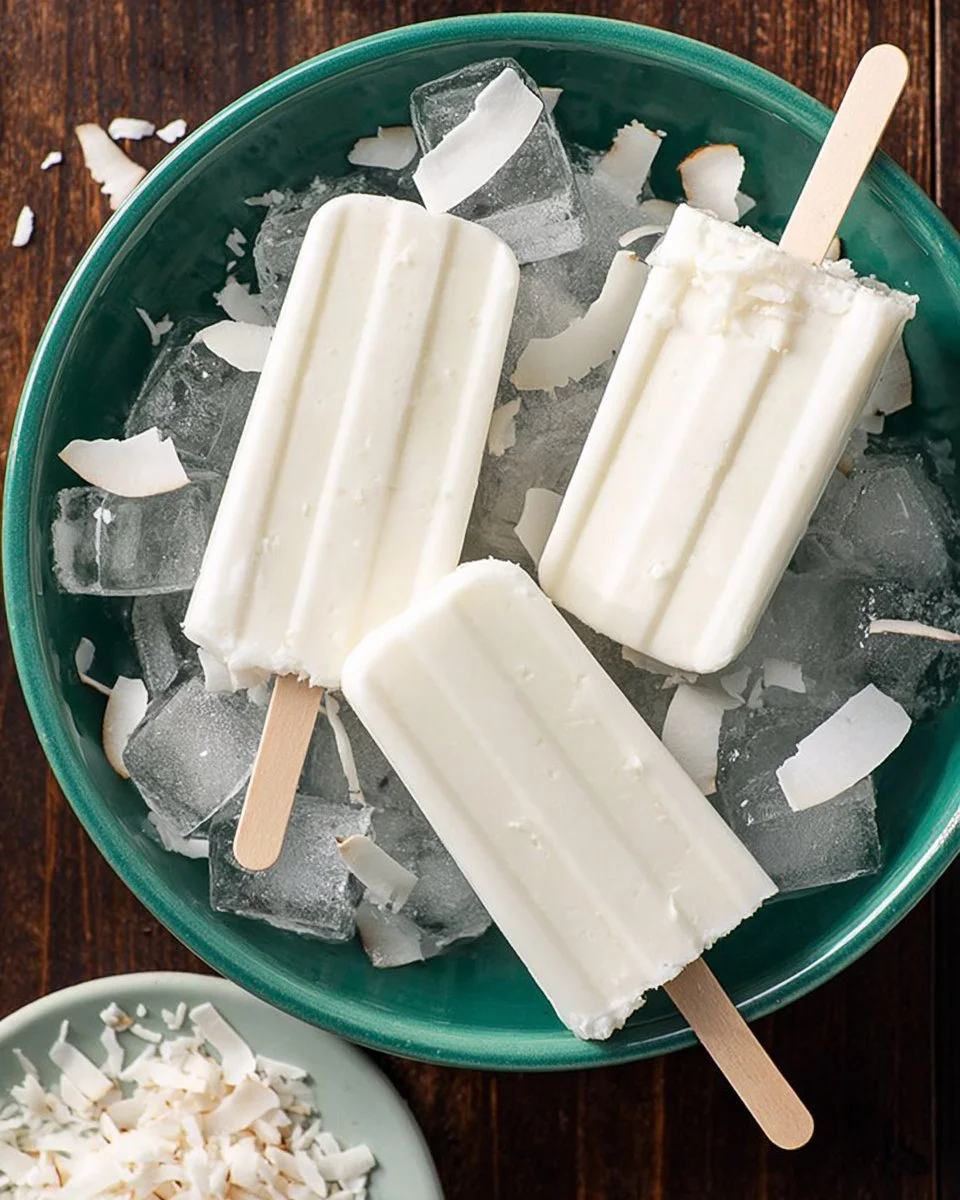
These Coconut Popsicles (Paletas de Coco) are the perfect treat for warm days, featuring the vibrant flavors of coconut milk and creamy goodness. Not only are they incredibly refreshing, but they also provide a rich, delightful balance of creaminess and sweetness that’s hard to resist. This recipe is ideal for aspiring home cooks, as it requires minimal ingredients and straightforward steps. Curious about how to make these delightful frozen treats? Keep reading to unlock the secrets of crafting your own delicious popsicles at home!
Ingredients You’ll Need for Coconut Popsicles (Paletas de Coco)
To create your own heavenly Coconut Popsicles (Paletas de Coco), you’ll need a handful of essential ingredients that contribute to their delightful flavor and texture. Here’s a breakdown:
Essentials
Canned Coconut Milk: You’ll need 1½ cups, which is about one 14-fl oz can. This creamy base is what gives the popsicles that luscious tropical flavor.
Whole Milk: ¾ cup of whole milk adds a richness that balances the coconut’s natural sweetness.
Heavy Cream: Another ¾ cup of heavy cream works to create that desired creamy texture.
Sweetened Condensed Milk: You will use ¼ cup plus 1 tablespoon of sweetened condensed milk to enhance the sweetness and smoothness of your popsicles.
Light Corn Syrup: Similarly, ¼ cup plus 1 tablespoon of light corn syrup ensures a nice, smooth blend and helps prevent ice crystals from forming.
Sweetened Coconut Flakes: Finally, 2½ tablespoons of sweetened coconut flakes add a delightful chewiness and texture.
Optional Add-Ons
Feel free to experiment with flavors! Here are a couple of ideas:
Vanilla Extract: A splash of vanilla extract can bring an extra warm note to your popsicles.
Fruit Purees: Consider adding a layer of fruit puree, such as mango or strawberry, for a pop of color and flavor.
Substitutions and Shortcuts
If you’re missing an ingredient or looking to make substitutions, here are a few ideas:
Nut Milk: Instead of regular milk, almond or oat milk can be used for a dairy-free version.
Full-Fat Coconut Cream: For a richer and thicker texture, opt for full-fat coconut cream instead of coconut milk.
Agave Nectar or Honey: If you don’t have corn syrup, agave nectar or honey can serve as a sweet alternative, adding a new flavor dimension.
How to Make Coconut Popsicles (Paletas de Coco) Step-by-Step
Let’s dive into the simple, yet rewarding process of making your own Coconut Popsicles (Paletas de Coco):
Mix the Base: In a large mixing bowl, combine the 1½ cups of canned coconut milk, ¾ cup of whole milk, ¾ cup of heavy cream, ¼ cup plus 1 tablespoon of sweetened condensed milk, and ¼ cup plus 1 tablespoon of light corn syrup. Whisk together until well blended.
Incorporate Coconut Flakes: After the mixture is smooth, stir in 2 tablespoons of sweetened coconut flakes, setting aside the remaining flakes for later.
Fill the Molds: Pour the creamy mixture into popsicle molds, leaving about 1/8 inch of space at the top for expansion.
Add Coconut Flakes: Sprinkle the remaining coconut flakes evenly into the molds over the mixture, giving the popsicles that beautiful texture.
Freeze: If you’re using molds with built-in sticks, cover them and place them in the freezer. For small cups, freeze the mixture until it begins to set, which will take about 45 minutes. Then, insert wooden sticks and return them to the freezer.
Long Freeze: Allow the popsicles to freeze for at least 8 hours, ensuring they are completely solid.
Remove from Molds: If you find the popsicles are stuck in the molds, dip them quickly in warm water for about 10 seconds. Then gently pull them out.
Enjoy or Store: Serve your popsicles right away, or if you’re saving them for later, place them on a large plate or small baking sheet lined with wax paper. Cover with another piece of wax paper and refreeze them for a couple more hours.
Common Mistakes to Avoid
Creating your Coconut Popsicles (Paletas de Coco) should be a delightful experience, but here are a few pitfalls to watch out for:
Mistake 1: Not Mixing Enough
It’s vital to whisk your ingredients thoroughly to ensure an even consistency. If you leave clumps, it can affect the final texture of your popsicles.
Mistake 2: Skipping the Waiting Period
Patience is key! Freezing the popsicles for at least 8 hours is crucial for a perfectly solid treat; otherwise, they won’t hold their shape.
Mistake 3: Overfilling the Molds
Leaving that little 1/8 inch of space at the top is essential to allow room for expansion. Overfilling can create mess and lead to improperly formed popsicles.
Serving Suggestions for Coconut Popsicles (Paletas de Coco)
Once your popsicles are ready, you’ll want to present them beautifully. Here are a few delightful serving suggestions:
Flavor Pairings
Serve your Coconut Popsicles (Paletas de Coco) with a drizzle of chocolate sauce or a side of fresh fruit for a refreshingly sweet contrast.
Customized Displays
Create an inviting platter of popsicles in various flavors, allowing everyone to choose their favorite. It’s a fun way to engage guests or family members during gatherings.
Special Occasions
Consider placing these popsicles in a festive glass filled with crushed ice for special celebrations, adding a fun visual twist to your treat.
Conclusion
Making Coconut Popsicles (Paletas de Coco) is a cozy culinary adventure that’s easier than it looks. These delightful treats are highly customizable, allowing you to play around with flavors and textures. Whether you’re whipping them up for a summer party or simply indulging in a nostalgic treat, creating your own popsicles is beginner-approved and wonderfully satisfying. So why not gather your ingredients and create your own popsicle moment today?
If you’re looking for more inspiration for your summer treats, check out this guide on Paletas de Coco (Mexican Coconut Popsicles)!
FAQs About Coconut Popsicles (Paletas de Coco)
What is the best way to store Coconut Popsicles (Paletas de Coco)?
The best way to store your Coconut Popsicles (Paletas de Coco) is to wrap them in wax paper and place them in a freezer-safe container. This helps prevent freezer burn and keeps them fresh for longer.
Can I make Coconut Popsicles (Paletas de Coco) without heavy cream?
Yes! You can substitute heavy cream with coconut cream for a dairy-free and richer alternative that still captures the essence of these popsicles.
How long do Coconut Popsicles (Paletas de Coco) last in the freezer?
Coconut Popsicles (Paletas de Coco) can last in the freezer for up to two months. However, for the best taste, try to enjoy them within a month.
Can I add other flavors to Coconut Popsicles (Paletas de Coco)?
Absolutely! You can mix in fruit purees, extracts, or even chocolate chunks to create your unique variation of Coconut Popsicles (Paletas de Coco).
Are Coconut Popsicles (Paletas de Coco) suitable for kids?
Yes, these popsicles are a kid-friendly treat! Their creamy texture and sweet flavor are sure to please little ones, making them a great summer snack.
Coconut Popsicles (Paletas de Coco)
- Total Time: 495 minutes
- Yield: 8 servings 1x
- Diet: Vegetarian
Description
Delightfully creamy and refreshing, these Coconut Popsicles are the perfect summer treat, combining rich coconut flavors with sweet creaminess.
Ingredients
- 1½ cups canned coconut milk
- ¾ cup whole milk
- ¾ cup heavy cream
- ¼ cup plus 1 tablespoon sweetened condensed milk
- ¼ cup plus 1 tablespoon light corn syrup
- 2½ tablespoons sweetened coconut flakes
- Optional: Vanilla extract and fruit purees for added flavor
Instructions
- Mix the base: In a large mixing bowl, combine the coconut milk, whole milk, heavy cream, sweetened condensed milk, and light corn syrup. Whisk together until well blended.
- Incorporate the coconut flakes: Stir in 2 tablespoons of sweetened coconut flakes, setting aside the remaining flakes.
- Fill the molds: Pour the creamy mixture into popsicle molds, leaving about 1/8 inch of space at the top for expansion.
- Add coconut flakes: Sprinkle the remaining coconut flakes evenly into the molds over the mixture.
- Freeze: Cover the molds and place them in the freezer. For small cups, freeze the mixture until it begins to set, about 45 minutes, then insert wooden sticks and return them to freeze.
- Long freeze: Allow to freeze for at least 8 hours until completely solid.
- Remove from molds: If stuck, dip the molds in warm water for about 10 seconds, then gently pull out.
- Enjoy or store: Serve immediately or store wrapped in wax paper in a freezer-safe container.
Notes
For a dairy-free version, substitute regular milk with nut milk and coconut cream for heavy cream. It’s important to whisk ingredients thoroughly for even consistency.
- Prep Time: 15 minutes
- Cook Time: 480 minutes
- Category: Dessert
- Method: Freezing
- Cuisine: Mexican
Nutrition
- Serving Size: 1 popsicle
- Calories: 160
- Sugar: 15g
- Sodium: 50mg
- Fat: 8g
- Saturated Fat: 5g
- Unsaturated Fat: 3g
- Trans Fat: 0g
- Carbohydrates: 21g
- Fiber: 1g
- Protein: 2g
- Cholesterol: 30mg
Keywords: coconut popsicles, paletas de coco, summer treats, frozen desserts