Last updated on April 7, 2026
A Cozy Start
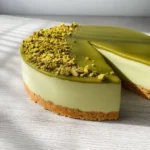
Do you ever get a sudden late-night craving for something sweet and nostalgic—maybe the sound of a cookie crunching with a creamy bite brings you back to childhood? I had that exact urge one rainy evening, and these Oreo No-Bake Cheesecake Cups saved the night. If you’re a beginner who worries about fancy techniques or a long oven time, I promise this recipe is forgiving and delightfully low-stress. For other simple, no-bake ideas that pair well with this treat, I sometimes look back at my favorite no-bake pistachio cheesecake for inspiration.
A Quick Look at This Oreo No-Bake Cheesecake Cups Recipe
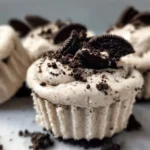
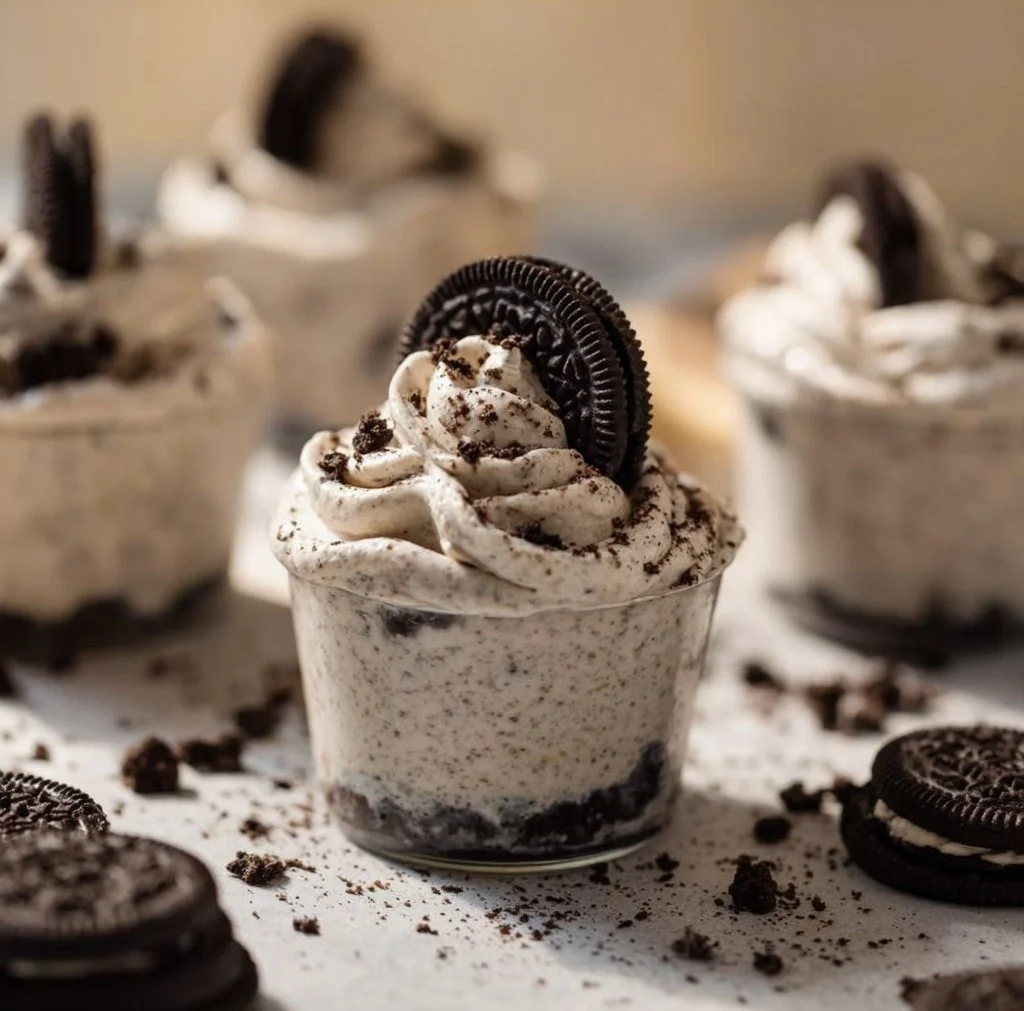
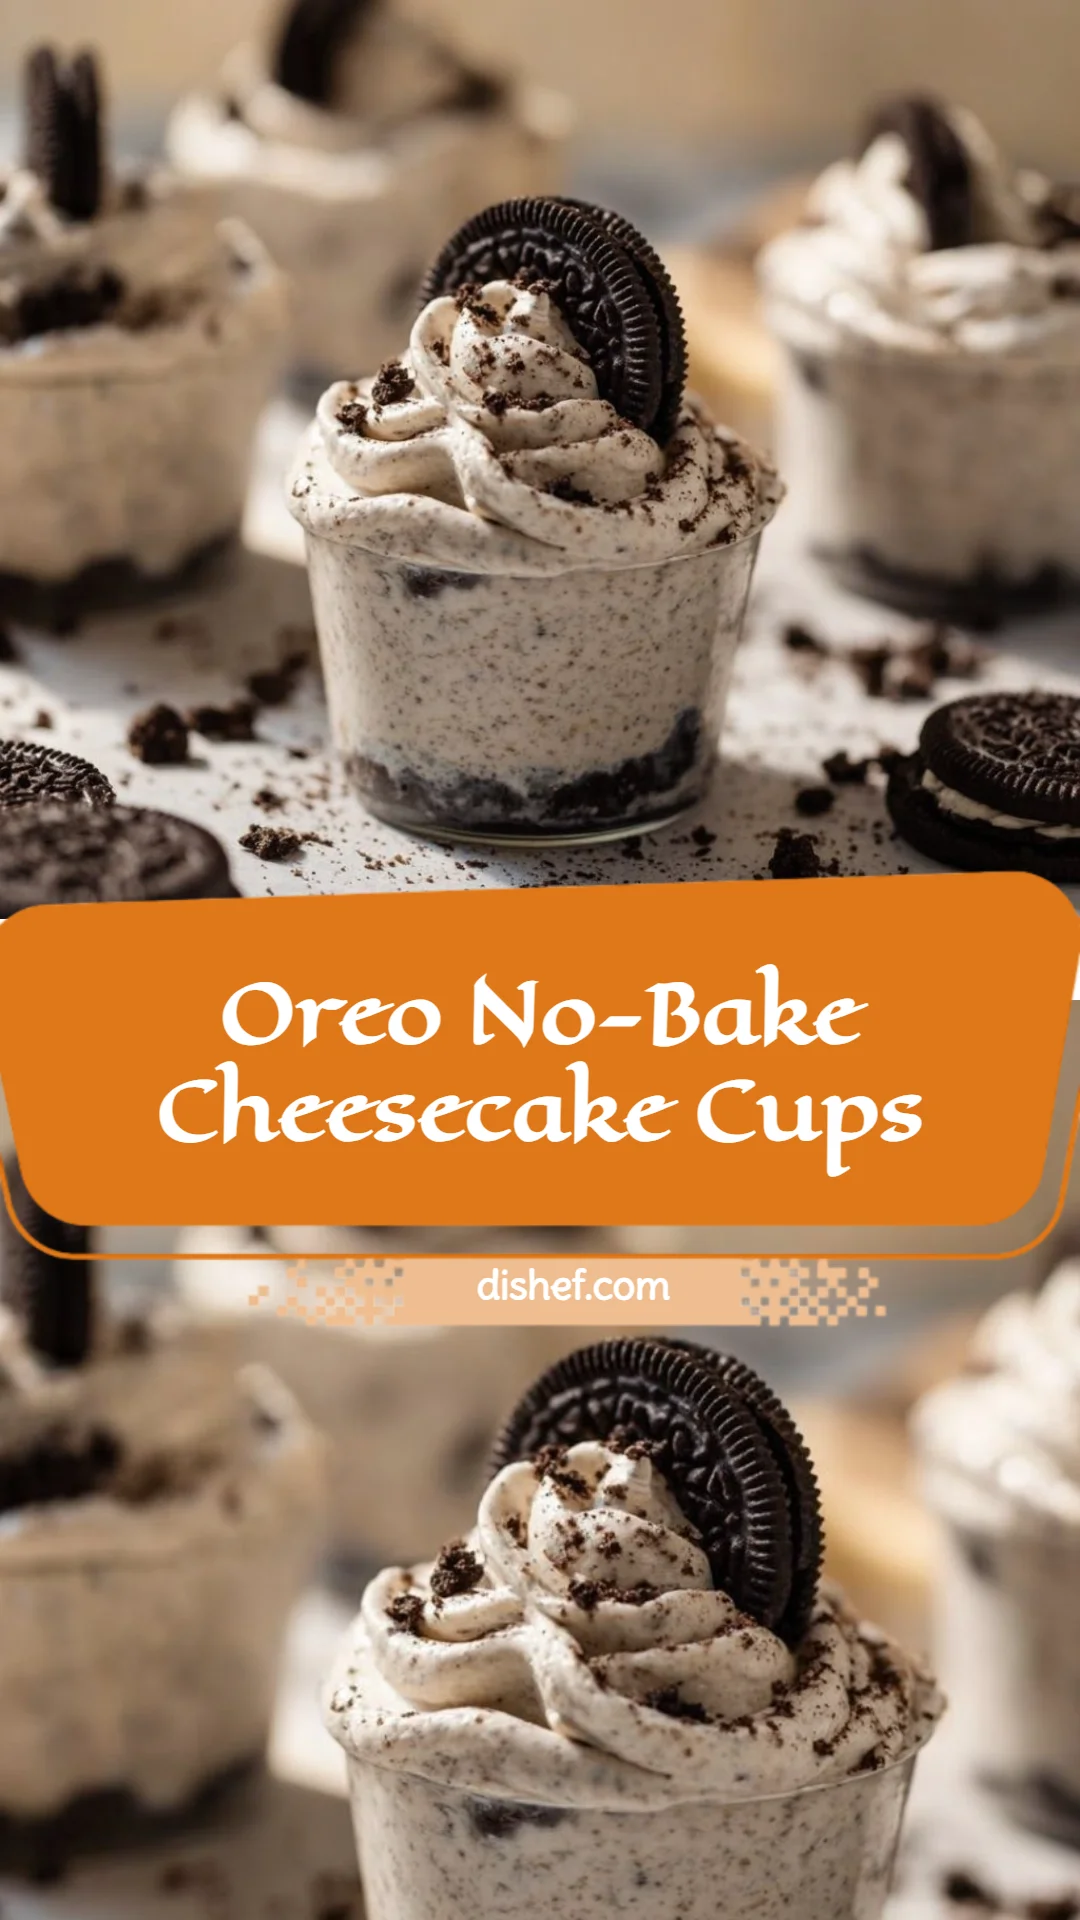
This recipe centers on two main players: softened cream cheese and crushed Oreo cookies. It’s a quick, no-bake dessert that gives you rich cheesecake flavor without turning on the oven. The convenience is a huge win—ready in about an hour with mostly hands-off chilling time—making it perfect for busy weeknights, potlucks, or when you want a fuss-free dessert. It’s also beginner-friendly: if you can beat cream cheese smooth and fold whipped topping, you’re golden. Keep scrolling for a step-by-step guide and a few easy tweaks to make it your own.
Ingredients You’ll Need for Oreo No-Bake Cheesecake Cups
Essentials
- 1 (8 oz) block cream cheese, softened — this gives the cheesecake its classic tang and creamy body. Bring it to room temperature for the smoothest filling.
- 1 (8 oz) Cool Whip or similar whipped topping — lightens the filling and keeps this a no-bake, quick recipe.
- 2/3 cup powdered sugar — sweetens and helps stabilize the cream cheese without a grainy texture.
- 1 teaspoon vanilla extract — a little goes a long way to round out flavor.
- 24–26 Oreo cookies, crushed — reserve some for the base and fold the rest into the filling for pockets of cookie in every bite.
- Small dessert dishes or cups (6), each at least 3/4 to 1 cup capacity — any small ramekins, mason jars, or pretty glass cups will work.
Optional add-ons
- Extra whipped cream for topping — adds a pretty, light finish.
- Mini chocolate chips — for texture and extra chocolate hits.
- Fresh berries — strawberries, raspberries, or blueberries add a bright contrast and make the cups feel lighter.
- Peanut butter drizzle — warm slightly and drizzle for a sweet-salty boost that pairs beautifully with Oreos.
- Crushed chocolate sandwich cookies of a different flavor — switch up the cookie base for a fun twist (mint Oreos, golden Oreos, etc.).
Substitutions and shortcuts
- Cream cheese substitute: If you want a slightly lighter filling, you can use Neufchâtel cheese or reduce the cream cheese to 6 oz and add 2 oz of Greek yogurt; the texture will be a touch softer.
- Whipped topping substitute: Use homemade whipped cream (about 1 cup heavy cream whipped with 2 tablespoons powdered sugar) if you prefer cleaner ingredients. Be gentle folding it in to keep a fluffy texture.
- Powdered sugar shortcut: If you’re out of powdered sugar, blitz granulated sugar in a blender or food processor until it’s very fine—about 30–45 seconds—but keep the quantity the same.
- Cookie base shortcut: Buy pre-made cookie crumbs from the store’s baking aisle, or use a food processor to blitz the Oreos quickly. If you want a gluten-free base, look into gluten-free cheesecake variations for ideas on swaps and crusts.
- Make-ahead: Assemble up to 24 hours ahead and keep chilled, then add fresh toppings just before serving.
How to Make Oreo No-Bake Cheesecake Cups Step-by-Step
I’ll walk you through this slowly, just like I would if we were baking together in my kitchen. The whole process is forgiving, so don’t stress about tiny imperfections—those are what make a homemade dessert charming.
Prep your cookies
- Put 24–26 Oreo cookies into a sealed plastic bag or the bowl of a food processor. If using a bag, press out the air and seal tightly. Use a rolling pin to crush the cookies into fine crumbs—stop when most pieces are small but leave a few slightly bigger bits for texture. If you have a food processor, pulse until you reach a mix of fine crumbs and a few larger bits.
- Scoop about 1 1/2 to 2 tablespoons of the crushed Oreos into the bottom of each of six small dessert dishes. Press them down gently with the back of a spoon to make a thin, even cookie base. This doesn’t have to be compacted like a pressed pie crust—just enough to give a crunchy foundation.
Soften and sweeten the cream cheese
- Place the 8 oz block of cream cheese in a medium mixing bowl. If it’s not quite soft, microwave in 5–8 second bursts—don’t melt it; just soften it so it’s easy to beat.
- Add 2/3 cup powdered sugar to the bowl. Using a hand mixer or stand mixer on low speed, beat the cream cheese and powdered sugar until smooth, creamy, and free of lumps. This may take 1–2 minutes. Scrape down the sides as needed.
- Mix in 1 teaspoon vanilla extract and beat briefly until fully combined. Taste a tiny dab; you want a balanced sweetness, not overly sugary.
Fold in the whipped topping
- Gently fold the 8 oz Cool Whip (or your whipped cream) into the sweetened cream cheese. Use a rubber spatula and a gentle folding motion: scoop from the bottom and fold over the top to keep as much air in the mixture as possible.
- If you prefer a firmer filling, fold less vigorously. For a lighter, mousse-like texture, fold a bit more until evenly combined.
- Stir in the remaining crushed Oreos—reserve a tablespoon or two for sprinkling on top later. Fold just until distributed so you get little cookie flecks and some larger bits but keep the filling airy.
Assemble the cups
- Divide the filling into the six prepared dessert dishes. Use a spoon or a small cookie scoop for even portions.
- Press the filling lightly so it meets the cookie base and there are no air pockets. You can create a small indentation on top to hold a swirl of whipped cream if you plan to add it later.
Chill and finish
- Place the assembled cups in the refrigerator and chill for about 1 hour. This helps the filling firm up and meld with the cookie base.
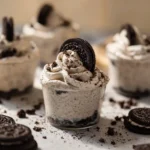
- Before serving, top each cup with a dollop of extra whipped cream and a sprinkle of the reserved crushed Oreos. Add mini chocolate chips, fresh berries, or a peanut butter drizzle if you like.
- For a special touch, garnish with a whole mini Oreo or a fresh berry on top.
Tips while making:
- Keep tools and bowls dry—any water can affect whipped toppings.
- If the filling seems too soft after mixing, chill it 10–15 minutes and then re-whip gently before filling the cups.
- For perfectly even portions, weigh the total filling and divide by six, or use a tablespoon/ice cream scoop.
Common Mistakes to Avoid
Making dessert should feel cozy, not stressful. I’ve made these mistakes myself more than once, so here are the common ones to look out for.
Mistake 1: Using cold cream cheese
If your cream cheese is still cold, it won’t beat smooth and you’ll get lumps in the filling. Always let the block sit at room temperature for 30–60 minutes or soften it in very short microwave bursts. Smooth cream cheese makes for a velvety filling.
Mistake 2: Over-mixing or under-folding the whipped topping
If you mix the Cool Whip in too vigorously you’ll lose the airy texture that keeps these cups light. On the flip side, under-folding leaves streaks of cream cheese. Use a gentle folding motion until the mixture looks uniform and still fluffy.
Mistake 3: Skipping the chill time
It’s tempting to serve immediately, but the brief chill is important. It sets the filling so your cups slice or spoon neatly, and it helps the flavors meld. If you’re in a rush, a quick 20–30 minute chill in the freezer (not freezer long-term) will help, but watch carefully.
Serving Suggestions for Oreo No-Bake Cheesecake Cups
These little cups are so versatile. I like serving them in a relaxed, homey way that brings out the comfort of the cookies and cream flavors.
Party-friendly presentation
Place the cups on a pretty platter, top each with a swirl of whipped cream, and finish with a mini Oreo. Add a small spoon beside each cup. Guests will love the individual portions and the ease of grabbing a dessert without a fork-and-plate fuss.
Kid-approved variations
Let kids top their own cups. Offer bowls of mini chocolate chips, sprinkles, sliced strawberries, and a small jar of peanut butter drizzle. It turns dessert time into a fun activity and keeps things simple for you.
Cozy, after-dinner pairing
Serve one cup with a warm beverage—hot chocolate or a mild coffee—for a cozy end to the night. The cool, creamy texture of the cheesecake pairs beautifully with a warm drink and makes a small dessert feel indulgent.
Conclusion
I hope you’ll tuck this Oreo No-Bake Cheesecake Cups recipe into your regular weeknight dessert rotation—it’s simpler than it looks, endlessly customizable, and perfect for both beginners and seasoned home bakers who want something quick and comforting. If you’d like to see another take on the no-bake Oreo concept, this lovely guide from a fellow food blogger offers extra tips and serving ideas: No Bake OREO Cheesecake Cups – Best Friends For Frosting. Give these cups a try, and if you make them, I’d love to hear which topping you chose.
FAQs About Oreo No-Bake Cheesecake Cups
Q1: How long do Oreo No-Bake Cheesecake Cups keep in the fridge?
A: Oreo No-Bake Cheesecake Cups will stay fresh in the refrigerator for up to 3 days when covered tightly. If you add fresh fruit as a topping, plan to eat them within 24–48 hours so the fruit stays bright.
Q2: Can I freeze Oreo No-Bake Cheesecake Cups?
A: Yes, you can freeze Oreo No-Bake Cheesecake Cups for up to 1 month. Freeze uncovered until solid, then wrap each cup tightly with plastic wrap or place in an airtight container. Thaw overnight in the fridge before serving and add fresh toppings after thawing.
Q3: Are Oreo No-Bake Cheesecake Cups gluten-free?
A: The classic Oreos contain gluten, so these Oreo No-Bake Cheesecake Cups are not gluten-free as written. You can make a gluten-free version by using certified gluten-free chocolate sandwich cookies or a gluten-free cookie crumb alternative.
Q4: Can I make Oreo No-Bake Cheesecake Cups without Cool Whip?
A: Absolutely. Use about 1 cup of homemade whipped cream (heavy cream whipped with a couple of tablespoons powdered sugar) instead. Fold it in gently for a light texture. The overall flavor will be slightly fresher without the stabilized topping.
Q5: How can I make Oreo No-Bake Cheesecake Cups less sweet?
A: To reduce sweetness in Oreo No-Bake Cheesecake Cups, decrease the powdered sugar by 1–2 tablespoons and use regular Oreos mixed with a few plain crushed cookies or graham crumbs to lessen the overall sugar density. You can also add a touch more cream cheese for tang or top with fresh berries that add natural acidity.
Oreo No-Bake Cheesecake Cups
- Total Time: 60 minutes
- Yield: 6 servings 1x
- Diet: Vegetarian
Description
Delightfully creamy Oreo No-Bake Cheesecake Cups with a crunchy cookie base, perfect for satisfying sweet cravings without turning on the oven.
Ingredients
- 1 (8 oz) block cream cheese, softened
- 1 (8 oz) Cool Whip or similar whipped topping
- 2/3 cup powdered sugar
- 1 teaspoon vanilla extract
- 24–26 Oreo cookies, crushed (reserve some for topping)
- Small dessert dishes or cups (6, each at least 3/4 to 1 cup capacity)
- Optional: Extra whipped cream for topping
- Optional: Mini chocolate chips
- Optional: Fresh berries
- Optional: Peanut butter drizzle
Instructions
- Put 24–26 Oreo cookies into a sealed plastic bag or the bowl of a food processor. Crush the cookies into fine crumbs.
- Scoop about 1 1/2 to 2 tablespoons of the crushed Oreos into the bottom of each dessert dish and press them down gently.
- Place the cream cheese in a mixing bowl. Soften if needed, then add powdered sugar and beat until smooth.
- Mix in the vanilla extract and taste for balanced sweetness.
- Fold the Cool Whip into the sweetened cream cheese gently to maintain airiness.
- Stir in the remaining crushed Oreos, reserving some for later.
- Divide the filling evenly into the dessert dishes and press lightly to eliminate air pockets.
- Place the assembled cups in the refrigerator and chill for about 1 hour.
- Top each cup with whipped cream and reserved crushed Oreos before serving.
Notes
Consider adding fun toppings like mini chocolate chips or fresh berries for added flavor. Ensure the cream cheese is at room temperature for best results.
- Prep Time: 15 minutes
- Cook Time: 0 minutes
- Category: Dessert
- Method: No-Bake
- Cuisine: American
Nutrition
- Serving Size: 1 cup
- Calories: 290
- Sugar: 20g
- Sodium: 360mg
- Fat: 18g
- Saturated Fat: 10g
- Unsaturated Fat: 5g
- Trans Fat: 0g
- Carbohydrates: 30g
- Fiber: 1g
- Protein: 4g
- Cholesterol: 25mg
Keywords: Oreo cheesecake, no-bake dessert, easy cheesecake, quick dessert, Oreo recipe