Last updated on February 3, 2026
There’s a velvet-smooth memory I reach for on chilly afternoons—the warm scent of cocoa and butter, the faint tang of vinegar lifting chocolate into something unexpectedly sophisticated. Many home cooks hesitate because red velvet feels like a bakery specialty: precise, dramatic, and a little intimidating. I promise this Red Velvet Brownies recipe delivers that restaurant-quality reveal—deep color, tender crumb, and a satin finish—without elaborate technique; it’s approachable, reliably elegant, and quick enough for a spontaneous dessert. If you enjoy pared-back classics with a twist, you might also appreciate my take on three-ingredient banana brownies for another simple, crowd-pleasing treat.
A Quick Look at This Red Velvet Brownies Recipe
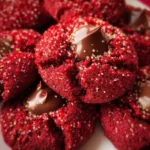
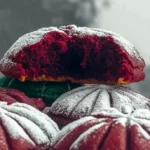
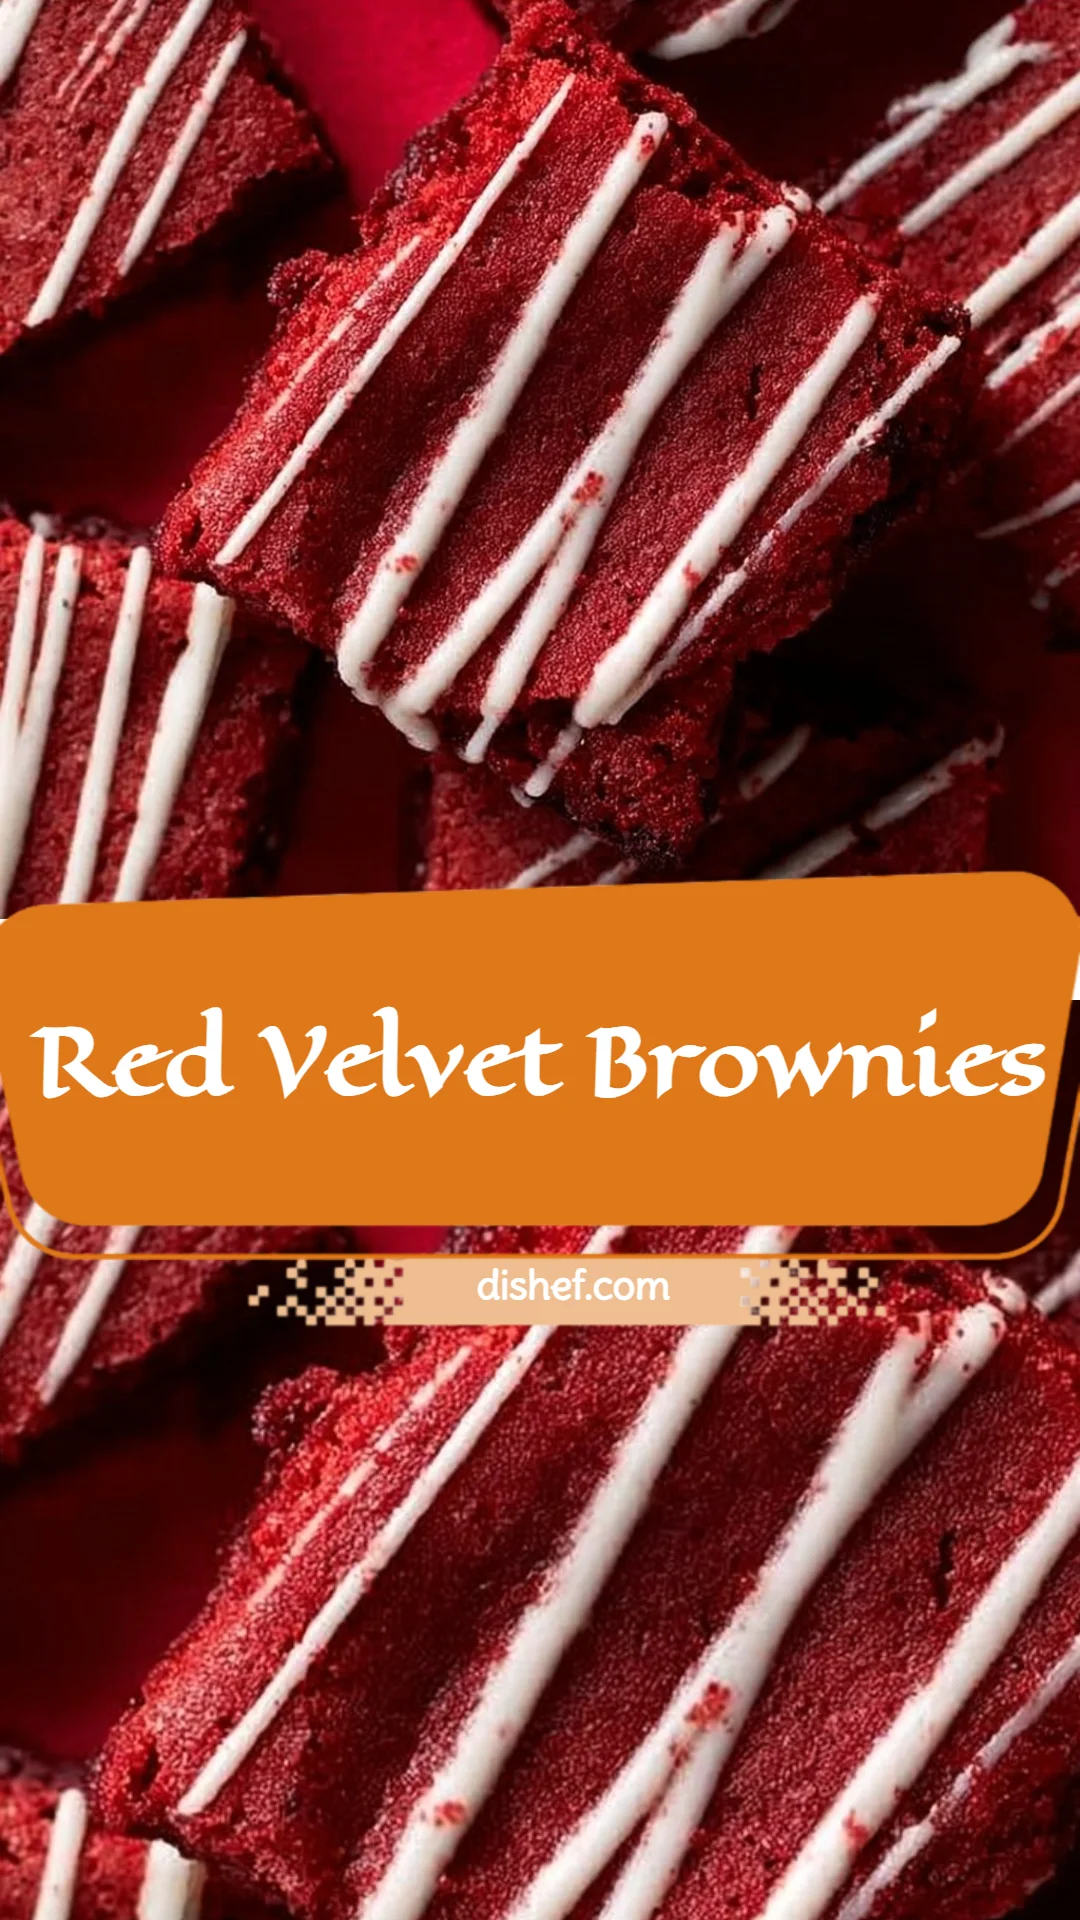
This Red Velvet Brownies recipe pairs the gentle cocoa bitterness of unsweetened cocoa with a whisper of luxurious semi-sweet chocolate and creamy white chocolate accents. The measured vinegar and vanilla lift the batter, producing a tender, slightly tangy crumb that contrasts beautifully with a glossy top. One key benefit is the striking presentation: vibrant color sliced into neat squares makes it perfect for gifting or elevating an everyday dessert. It’s special because it feels like a red velvet cake and a fudgy brownie had a refined offspring—surprisingly achievable with everyday pantry ingredients and a steady hand.
Ingredients You’ll Need for Red Velvet Brownies
Essentials
- 3/4 cup unsalted butter (melted): Use high-quality butter for depth of flavor and a silky mouthfeel.
- 2 oz chopped semi-sweet chocolate bar: Melting in with the butter gives the brownies a nuanced chocolate backbone rather than overt sweetness.
- 1 1/4 cup granulated sugar: Balances the cocoa and keeps the texture tender.
- 2 large eggs: Room temperature eggs incorporate more evenly and give structure without weighing the batter down.
- 2 teaspoon vanilla extract: Pure vanilla enhances the overall aroma—don’t skimp.
- 1 teaspoon white vinegar: A classic red velvet lift; it reacts subtly with the cocoa for brightness and helps set the color.
- 1/2 tablespoon red gel food coloring: Gel coloring is concentrated, so you achieve vivid hue without changing batter consistency.
- 2 tablespoons unsweetened cocoa powder: Use Dutch-process or natural depending on preference (see substitutions).
- 1 1/4 cup all-purpose flour: Provides structure while keeping the crumb tender—measure accurately.
- 1/4 teaspoon salt: Amplifies flavors and balances sweetness.
- 1/2 cup white chocolate chips (optional): Folded into the batter or melted and drizzled on top for creamy contrast.
Notes on quality and freshness: I reach for fresh cocoa and high-fat butter, and I always use a reliable gel coloring to avoid thinning the batter. If your chocolate bar is single-origin or higher cacao percentage, the brownies will be more chocolate-forward; if you prefer a sweeter finish, white chocolate chips bring that creamy lift.
Optional Add-ons
- Cream cheese swirl: Drop dollops of sweetened cream cheese on the batter and swirl with a knife for a luxurious marbling.
- Toasted pecans or hazelnuts: Add 1/2 cup for crunch and a nutty counterpoint to the sweetness.
- Flaky sea salt: A light sprinkle after baking enhances flavor complexity.
- Espresso powder (1/2 teaspoon): Intensifies chocolate notes without making it taste like coffee.
- Freeze-dried raspberry crumbs: A sprinkle on top for a pop of color and tartness that complements white chocolate.
- Cocoa nibs: For adult-friendly texture and a darker chocolate crunch.
Substitutions and Shortcuts
- Butter swap: Use equal parts high-quality margarine or clarified butter if dairy-sensitive, though texture and flavor will shift slightly.
- Chocolate alternatives: If you don’t have a semi-sweet bar, use 2 oz of good-quality chocolate chips. Avoid candy bars with inclusions.
- Cocoa type: Dutch-process cocoa will produce a mellower, less acidic profile; natural cocoa is brighter and reacts more with the vinegar. Either works—adjust your flavor expectations.
- Food coloring: If you prefer less artificial coloring, use less gel for a muted rose-tinted brownie, or experiment with beet powder for a natural tint (note: beet changes flavor slightly).
- Make-ahead shortcut: Prepare the batter and keep it refrigerated for up to 24 hours before baking; just add 3–5 extra minutes of bake time if chilled straight into the oven.
- Flour: For a slightly more tender texture, substitute 1/4 cup of the flour with cake flour.
I like to give home cooks easy, confident swaps so you can adapt the recipe to what’s on hand without sacrificing the refined result.
How to Make Red Velvet Brownies Step-by-Step
This is a straightforward process with a few small techniques that make a big difference. Follow the steps with a calm rhythm—I’ll explain why each one matters so you’ll know what to watch for.
Preheat and prepare
- Set your oven to 350°F (175°C). Line an 8×8-inch baking pan with parchment paper, leaving a little overhang on two sides for easy removal.
- Why: Preheating ensures even oven temperature the moment the batter goes in, and parchment guarantees clean edges and an intact top when you lift the brownies from the pan.
Melt butter and chocolate together
- In a large microwave-safe mixing bowl, combine the 3/4 cup melted unsalted butter and the 2 oz chopped semi-sweet chocolate. Heat in 30-second increments, stirring between each interval until completely melted and smooth.
- Why: Melting slowly protects chocolate from seizing and gives a glossy foundation; stirring helps distribute heat evenly and integrates the butter for a silky batter.
Incorporate sugar and eggs
- Add 1 1/4 cup granulated sugar to the warm chocolate-butter mixture and stir until combined. Add the eggs one at a time, beating well after each addition to create a cohesive, slightly glossy mixture.
- Why: Beating the eggs in gradually helps emulsify the batter and traps small air bubbles that contribute to a tender crumb without becoming cake-like.
Flavor and color
- Stir in 2 teaspoons vanilla extract, 1 teaspoon white vinegar, and 1/2 tablespoon red gel food coloring until the color is evenly distributed. The vinegar is subtle—it won’t make the batter tangy but will brighten the cocoa character and help set the characteristic red tone when combined with the cocoa.
- Why: This combination of vanilla and vinegar layers the flavor: vanilla for warmth and vinegar for a delicate lift.
Sift and combine dry ingredients
- In a separate bowl, sift together 2 tablespoons unsweetened cocoa powder, 1 1/4 cup all-purpose flour, and 1/4 teaspoon salt. Sifting removes lumps and helps the dry ingredients incorporate smoothly into the wet mix.
- Why: Cocoa can clump; sifting ensures even distribution and prevents streaks of dry cocoa in the finished brownies.
Gently fold dry into wet
- Gradually add the dry ingredients to the wet mixture, folding with a spatula until just combined. A few streaks of flour are okay—avoid overmixing.
- Why: Overmixing develops gluten and yields a tougher texture. You want a tender, dense crumb, not a chewy brownie.
Add white chocolate or other mix-ins
- If using, fold in 1/2 cup white chocolate chips now, or reserve them to sprinkle on top once the batter is in the pan. Alternatively, fold in toasted nuts or a small handful of cocoa nibs.
- Why: Gentle folding preserves texture and prevents white chocolate from melting into the batter prematurely.
Bake with care
- Pour the batter into the prepared 8×8 pan and smooth the top with a spatula. Bake for 30–35 minutes, rotating the pan halfway through if your oven has hot spots.
- Watch for doneness: insert a toothpick into the center—when it comes out with a few moist crumbs (not wet batter), the brownies are done.
- Why: The baking window yields fudgy centers and set edges. Overbaking will dry them; underbaking leaves uncooked batter. The moist crumb on the toothpick is the sweet spot.
Cool and finish
- Allow the brownies to cool completely in the pan on a wire rack. If you want a drizzle, melt additional white chocolate and drizzle over the cooled surface, letting it set before slicing with a sharp knife. For a cream-cheese finish, spread a thin layer of sweetened cream cheese and chill briefly.
- Why: Cooling lets the crumb stabilize so you get clean slices; drizzles and glazes adhere better to a cool surface and present more cleanly.
Slice and serve
- Use the parchment overhang to lift the brownies from the pan. Cut into even squares with a knife wiped clean between cuts to maintain sharp edges.
- Why: Clean slices make an elegant impression and preserve the neat appearance you want for a plated dessert or gift box.
Technique tips I use every time: measure flour by spooning it into the cup and leveling rather than scooping; use room-temperature eggs for better incorporation; and always err on pulling the tray out early—residual heat will finish the cook.
Common Mistakes to Avoid
Mistakes are simply lessons in disguise. I view baking mishaps as opportunities to refine technique, and understanding a few common pitfalls will help you achieve consistently impressive Red Velvet Brownies.
Mistake 1: Overmixing the batter
Overmixing develops gluten and introduces too much air, producing a tough or cakey texture rather than the dense, tender crumb you want. Fold dry ingredients until just combined and stop when you can’t see streaks of flour.
Mistake 2: Baking for too long
Relying on time alone is risky because ovens vary. A center that looks slightly underdone but yields moist crumbs on a toothpick is perfect; leaving them until the toothpick comes out completely clean will give you dry brownies.
Mistake 3: Cutting before cooling
Slicing straight from the oven creates ragged edges and a collapsed top. Let the brownies cool fully so the crumb sets; if you’re impatient, refrigerate for 20–30 minutes to speed things up, then cut with a warmed, dry knife for clean lines.
Serving Suggestions for Red Velvet Brownies
These brownies are versatile: they can be an intimate dessert for two, elegant party squares, or a takeaway gift wrapped in parchment. A thoughtful presentation enhances the experience—consider texture contrasts and a hint of acid to balance the sweetness.
Elegant dessert plate
Plate a warm square with a quenelle of lightly whipped mascarpone or crème fraîche and scatter freeze-dried raspberry dust. A tiny spoonful of bright raspberry coulis lifts the palette and adds color contrast.
Casual snack or picnic
Cut into bite-sized bars and stack in a parchment-lined box with a few salted pecans. The white chocolate drizzle adds a polished look, while the smaller size encourages sampling and sharing.
Special occasion centerpiece
Arrange uniform squares on a tiered dessert stand, dust lightly with sifted cocoa or powdered sugar, and garnish with thin curls of white chocolate. A final sprinkle of flaky sea salt on some pieces gives guests a choice between sweet and sweet-salty bites.
Conclusion
I believe this Red Velvet Brownies recipe proves that elegance in baking doesn’t require fuss—just attention to technique, respect for quality ingredients, and a little patience. It’s flexible: fold in nuts or drizzle white chocolate, add a cream cheese swirl, or keep them classic; any variation still reads refined and effortless. If you want another version or inspiration for presentation, I often consult resources that celebrate both simplicity and style, like Red Velvet Brownies – Eats Delightful for additional takes and ideas. Try a batch this week—slice one, share one, and let the confidence of a successful bake carry you forward.
FAQs About Red Velvet Brownies
Q1: How can I tell when my Red Velvet Brownies are perfectly baked?
A1: For these Red Velvet Brownies, the best indicator is a toothpick test: insert into the center and remove it—if it has a few moist crumbs clinging but not wet batter, you’re done. The top should be set with a slight sheen. Remove from the oven and cool in the pan to finish setting; remember residual heat continues to cook the center.
Q2: Can I make Red Velvet Brownies ahead of time?
A2: Absolutely. These Red Velvet Brownies actually keep and develop flavor over 1–2 days at room temperature in an airtight container. For longer storage, refrigerate up to 5 days (bring to room temperature before serving) or freeze slices individually wrapped for up to 2 months. Thaw in the fridge overnight for best texture.
Q3: How do I get a vibrant red color without affecting texture in Red Velvet Brownies?
A3: Use gel food coloring rather than liquid; gel is concentrated and won’t thin your batter. Add the coloring to the wet mixture and stir until even. If you prefer natural color, powdered beetroot can work but may impart a subtle earthy note—use sparingly and taste as you go.
Q4: Can I make these Red Velvet Brownies gluten-free?
A4: Yes. Substitute the all-purpose flour with a 1:1 gluten-free baking blend that contains xanthan gum; results are best with blends formulated to mimic all-purpose flour. Keep mixing minimal to avoid gritty textures, and allow a slightly longer baking time if the batter is chilled.
Q5: Are Red Velvet Brownies suitable for serving to guests with dietary restrictions?
A5: These Red Velvet Brownies are naturally nut-free unless you add nuts, and you can adapt them for lactose-sensitive guests by using lactose-free butter or a vegan butter alternative (note that white chocolate swaps may be needed). If you’re serving someone with severe allergies, confirm all ingredient labels and consider separate utensils to avoid cross-contamination.
Red Velvet Brownies
- Total Time: 45 minutes
- Yield: 16 servings 1x
- Diet: Vegetarian
Description
Decadent and luxurious Red Velvet Brownies with a tender crumb and glossy finish, perfect for any occasion.
Ingredients
- 3/4 cup unsalted butter, melted
- 2 oz chopped semi-sweet chocolate bar
- 1 1/4 cup granulated sugar
- 2 large eggs, room temperature
- 2 teaspoons vanilla extract
- 1 teaspoon white vinegar
- 1/2 tablespoon red gel food coloring
- 2 tablespoons unsweetened cocoa powder
- 1 1/4 cup all-purpose flour
- 1/4 teaspoon salt
- 1/2 cup white chocolate chips (optional)
Instructions
- Preheat the oven to 350°F (175°C) and line an 8×8-inch baking pan with parchment paper.
- In a large microwave-safe bowl, combine melted butter and chopped chocolate, heating in 30-second increments until melted.
- Add granulated sugar to the warm mixture and stir until combined. Beat in eggs one at a time.
- Stir in vanilla extract, white vinegar, and red food coloring until evenly distributed.
- Sift together cocoa powder, all-purpose flour, and salt in a separate bowl.
- Gradually fold the dry ingredients into the wet mixture until just combined.
- Fold in white chocolate chips if using.
- Pour the batter into the prepared pan and smooth the top.
- Bake for 30-35 minutes, checking for doneness with a toothpick.
- Let the brownies cool completely in the pan before slicing into squares.
Notes
For added texture and flavor, consider adding nuts or a cream cheese swirl.
- Prep Time: 15 minutes
- Cook Time: 30 minutes
- Category: Dessert
- Method: Baking
- Cuisine: American
Nutrition
- Serving Size: 1 brownie
- Calories: 290
- Sugar: 20g
- Sodium: 150mg
- Fat: 15g
- Saturated Fat: 8g
- Unsaturated Fat: 7g
- Trans Fat: 0g
- Carbohydrates: 40g
- Fiber: 1g
- Protein: 3g
- Cholesterol: 40mg
Keywords: red velvet, brownies, dessert, chocolate, easy baking