Last updated on September 18, 2025
Every Halloween brings back fond memories of hauntingly fun cookie decorating sessions with my family. I remember the laughter and chaos that ensued as we meticulously trimmed cookie shapes, adding edible “blood” and “ghoulish” decorations. It was pure joy, even with a touch of mess. This year, I’m excited to bring you a straightforward and delightful recipe for Scary Halloween Cookies. Don’t worry if you’ve never baked cookies before; this recipe is designed to make your baking journey enjoyable and stress-free. You’ll be surprising friends and family with these spooky treats in no time!
Table of Contents
Why I Love This Recipe of Scary Halloween Cookies
This recipe holds a special place in my heart, as it combines my love for baking with the playful spirit of Halloween. It’s not just about making cookies; it’s about creating memories with those you love. What’s more, this recipe is perfect for beginner cooks. The ingredients are simple and accessible, and with a little bit of effort, you can produce cookies that are festive, fun, and absolutely delicious.
Beyond just being fun to make, these cookies can be decorated in countless ways to suit your Halloween vibe. Whether you want them to look frightening or whimsical, you have room for creativity. Plus, the aroma that fills your kitchen while they bake is simply unbeatable!
Ingredients You’ll Need for Scary Halloween Cookies
Print
Scary Halloween Cookies
- Total Time: 1 hour 35 minutes
- Yield: 30 cookies (depending on size) 1x
Description
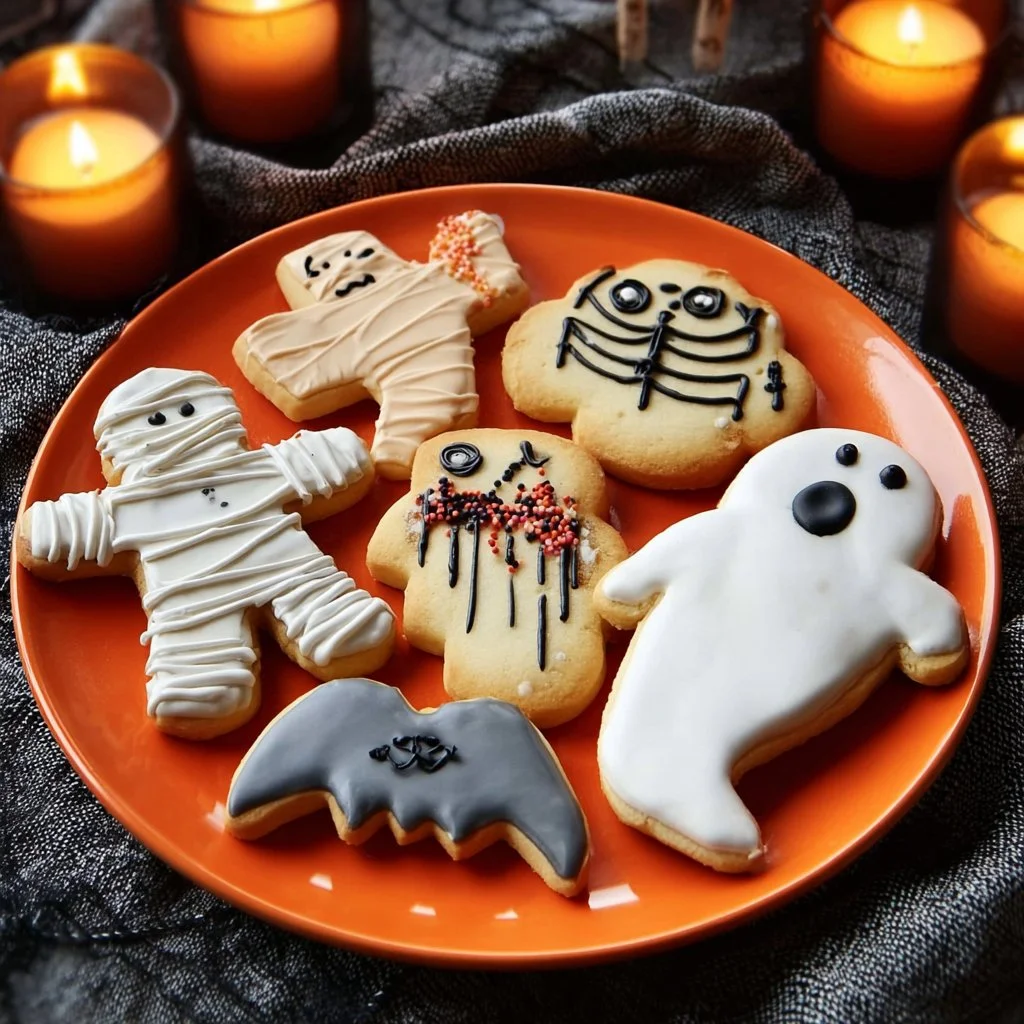
These Scary Halloween Cookies are spooky, buttery, and so much fun to decorate! Perfect for kids and adults alike, these cookies hold their shape beautifully when baked and serve as the perfect canvas for creepy Halloween designs using icing, fondant, or sprinkles.
Ingredients
Essentials:
- 250g unsalted butter (softened)
- 250g golden caster sugar
- 2 free-range eggs, lightly beaten
- 0.5 tsp vanilla extract
- 500g plain flour
- 1 tsp baking powder
Optional Add-Ons:
- Red and black food coloring
- Halloween-themed cookie cutters (ghosts, bats, pumpkins)
- Red, white, and black writing icing
- 200g ready-to-roll fondant icing
- 1 tbsp apricot jam (to stick fondant decorations)
Substitutions & Shortcuts:
- Butter: Use margarine if needed.
- Sugar: Regular granulated sugar works in place of golden caster sugar.
- Flour: Whole wheat flour creates a chewier texture.
- Eggs: For a vegan swap, use 1 tbsp ground flaxseed + 2.5 tbsp water per egg.
Instructions
- Cream the Butter and Sugar: Beat butter and golden caster sugar with an electric mixer until light and fluffy (3–5 minutes). Add eggs and vanilla. Stir in food coloring if using.
- Combine Dry Ingredients: Sift flour and baking powder together. Gradually mix into the wet ingredients until dough forms. Wrap in cling film and chill for 1 hour.
- Preheat the Oven: Set oven to 170°C (325°F) and line baking trays with greaseproof paper.
- Roll and Cut: Roll chilled dough on a floured surface to 0.5cm thick. Cut into Halloween shapes using cookie cutters. Place on trays, spaced 2cm apart.
- Bake: Bake for 12–15 minutes until edges are lightly golden. Cool on a wire rack.
- Decorate: Once cool, use writing icing for blood splatters or faces, and fondant for ghosts, pumpkins, or tombstones. Stick fondant pieces with warmed apricot jam.
Notes
- Chilling the dough is key — it prevents cookies from spreading too much in the oven.
- For sharper details, dip cutters in flour before stamping shapes.
- Decorating tip: Use a toothpick for precision details with icing.
- Prep Time: 20 minutes (plus 1 hour chilling)
- Cook Time: 12–15 minutes
- Category: Dessert, Snack
- Method: Bake
- Cuisine: American, Halloween Treats
Nutrition
- Serving Size: 1 cookie
- Calories: 150
- Sugar: 10g
- Sodium: 60mg
- Fat: 7g
- Saturated Fat: 4g
- Unsaturated Fat: undefined
- Trans Fat: undefined
- Carbohydrates: 19g
- Fiber: 0.5g
- Protein: 2g
- Cholesterol: 25mg
Keywords: Scary Halloween cookies, spooky sugar cookies, Halloween baking, decorated cookies, Halloween party food
Here’s what you will need to get started on your Scary Halloween Cookies. Don’t worry; these ingredients are easy to find and can be adjusted based on what you have at home!
Essentials
250g Unsalted Butter (softened): The foundation of any great cookie. Softened butter helps create a smooth and creamy cookie base.
250g Golden Caster Sugar: This sugar adds a lovely sweetness and contributes to the beautiful golden color of your cookies.
2 Free-Range Eggs (lightly beaten): Eggs help bind the ingredients together and give the cookies a rich texture.
0.5 tsp Vanilla Extract: A splash of vanilla enhances the flavor, making your cookies scrumptious.
500g Plain Flour: The main component that gives structure to your cookies.
1 tsp Baking Powder: Ensures your cookies rise nicely and have that perfect soft texture.
Optional Add-Ons
Red and Black Food Coloring: Perfect for adding a spooky flair to your icing or dough.
Halloween-Themed Cookie Cutters: These playful shapes will get your creative juices flowing.
Red, White, and Black Writing Icing: This icing is perfect for decorating and adding a touch of horror.
200g Ready-to-Roll Fondant Icing: Excellent for creating fun decorations like ghosts or pumpkins to top your cookies.
1 tbsp Apricot Jam: Used to help stick your fondant decorations on the cookies.
Substitutions and Shortcuts
If you’re missing an ingredient or two, here are some substitutions you can consider:
Butter: You can use margarine in place of unsalted butter if necessary.
Sugar: Regular granulated sugar can substitute for golden caster sugar in a pinch; it will yield a slightly different texture but will still taste delicious.
Flour: Whole wheat flour can work as a substitute, bearing in mind it might alter the texture to be chewier.
Eggs: If you’re vegan or allergic, replace the eggs with a mixture of 1 tablespoon of ground flax seeds and 2.5 tablespoons of water per egg — let it sit for a few minutes until it becomes gelatinous.
Now that you have your ingredients laid out, let’s get baking!
How to Make Scary Halloween Cookies Step-by-Step
Making these cookies is simpler than you might think. Follow these straightforward steps for sweet, spooky success:
Step 1: Cream the Butter and Sugar
Start by placing your softened butter in a mixing bowl. Using an electric mixer, beat it together with the golden caster sugar until the mixture looks light and fluffy. This process typically takes about 3 to 5 minutes. With the fluffy base, you can now add the lightly beaten eggs along with the vanilla extract. If you wish to incorporate any food coloring for a more Halloween-themed vibe, mix it in at this stage.
Step 2: Combine Dry Ingredients
Next, in a separate bowl, sift together the plain flour and baking powder. Sifting helps to aerate the flour, ensuring your cookies turn out light. Gradually add this dry mixture into your butter and sugar concoction. Stir gently until the dough begins to form. It’s okay if it looks a little crumbly at first; just keep mixing until everything comes together. Once the dough is formed, wrap it in cling film or place it in an airtight container and chill it in the fridge for at least one hour. Chilling the dough allows the flavors to meld and makes it easier to roll out later.
Step 3: Preheat the Oven
While the dough chills, preheat your oven to 170°C (325°F) or Gas mark 3. Line your baking trays with greaseproof paper to prevent the cookies from sticking during baking.
Step 4: Roll and Cut
After an hour in the fridge, remove the dough. Dust your work surface with a little flour to prevent sticking, and roll out the dough to about 0.5cm thick. Using your Halloween-themed cookie cutters, cut out shapes like bats, pumpkins, and ghosts. Place the cut-out cookies about 2cm apart on your prepared baking trays.
Step 5: Bake
Place your trays in the preheated oven and bake the cookies for about 12-15 minutes. You’re looking for a slight golden browning around the edges. Keep an eye on them to make sure they don’t overbake. Once they take on that perfect color, remove them from the oven and let them cool on a wire rack.
Step 6: Decorate Your Cookies
Once the cookies are cool, it’s time for the best part: decorating! Use the red writing icing to create spooky blood splatters, and use the fondant icing to craft shapes like ghosts or pumpkins. Adhere these shapes to your cookies with the apricot jam — simply warm it slightly with water to create a sticky consistency. Have fun with the decoration; the more creativity, the better!
Common Mistakes to Avoid Scary Halloween Cookies
Every baking adventure comes with its own set of challenges. Here are a few common pitfalls to be aware of:
Not Softening the Butter
One of the biggest mistakes is not allowing the butter to soften properly before mixing. Cold butter won’t cream well, which can result in dense cookies. Aim for butter that’s softened at room temperature to achieve that fluffy texture.
Overbaking the Cookies
It’s easy to lose track of time and end up with over-baked cookies. A trick I use is to set a timer and check them a minute or two earlier than the recipe suggests. Cookies will continue to firm up slightly as they cool, so removing them from the oven while they still look a bit soft is ideal.
Incorrectly Measuring Ingredients
Baking is a science! Make sure you’re measuring your ingredients accurately, especially flour. Fluff it up in its container, spoon it into your measuring cup, and level it off with a straight edge for the perfect amount every time.
Decorating Too Early
Allow your cookies to cool completely before starting the decorating process. If you attempt to ice them while they’re still warm, the icing might melt or run, ruining your spooky designs.
Serving Suggestions for Scary Halloween Cookies
These cookies are not only great for Halloween parties but can also be enjoyed in various settings. Here are some ideas:
Halloween Party Favors
Wrap individual cookies in clear cellophane bags tied with a festive ribbon. They make for delightful party favors that guests can take home, reminding them of your spooky gathering!
Classroom Treats
Consider taking these cookies to school for a fun Halloween-themed treat. They’re no-bake, so they’re perfect for kids to decorate with their favorite spooky designs during a baking party.
Movie Nights
Gather friends or family for a spooky movie marathon. Serve these cookies alongside popcorn and drinks, creating a cozy atmosphere that’s perfect for a night in.
Halloween Themed Breakfast
Wouldn’t it be fun to start Halloween day with a themed breakfast? Pair your cookies with a pumpkin spice latte or some spiced apple cider for a festive morning treat.
Pro-Level Tips for When You’re Ready
If you’re feeling adventurous and want to take your Scary Halloween Cookies to the next level, try these pro tips:
Experiment with Flavors
While vanilla is classic, don’t hesitate to try different flavors in your cookies. Almond extract, citrus zest, or spices like cinnamon or nutmeg can add more personality to your cookies.
Make Cookie Sandwiches
Once you’ve decorated your cookies, consider turning them into fun cookie sandwiches! Spread a layer of yummy frosting, jam, or even ice cream between two cookies for a delightful twist.
Use Different Icing Techniques
Explore different icing techniques, such as flooding or piping, to create intricate designs. Watching a few tutorials can give you the confidence to experiment!
Create a Cookie Decorating Station
Organize a cookie decorating party with friends or family. Set up a station with different icings, sprinkles, and edible decorations for everyone to enjoy decorating their cookies their way.
Conclusion & Next Steps
You’ve now learned that making Scary Halloween Cookies is easier than it looks! With simple ingredients and straightforward steps, it’s a cozy, classic recipe perfect for both beginner and experienced bakers alike. Remember, you can customize them with different shapes, colors, and decorations, making this recipe a delightful canvas for your creativity.
Now it’s time to don your apron, gather your ingredients, and get ready for some Halloween fun! I’d love to see your cookie creations, so don’t hesitate to share your experiences in the comments below. Happy baking!
Looking for more delicious recipes? Follow us on Pinterest and Facebook!
FAQs About Scary Halloween Cookies
Can I freeze Scary Halloween Cookies?
Absolutely! Once cooled, place them in an airtight container or freezer bag and store them in the freezer. They can last for up to 3 months. Just defrost them before decorating!
How can I make these cookies gluten-free?
You can substitute the plain flour with a 1:1 gluten-free baking blend. Just ensure the blend contains xanthan gum or similar, as this helps with the structure of the cookies.
Can I use margarine instead of butter?
Yes, margarine can be used instead of unsalted butter. Just try to choose a high-quality margarine that will still give your cookies a nice taste and texture.
How can I store decorated cookies?
Store cookies at room temperature in an airtight container. If you have multiple layers, place parchment paper between them to avoid sticking.
Can I use other colors of food coloring?
Yes, feel free to get creative! Any color can be used to create unique spooky effects—consider purple, green, or even neon shades for an extra fun Halloween touch.
Happy baking, and may your Halloween be filled with fun, creativity, and plenty of scary cookies!