Last updated on February 4, 2026
There’s a particular hush that comes over a kitchen when I’m dipping something glossy into warm chocolate—the soft clack of a cookie against porcelain, the sweet steam lifting with the aroma of cocoa, and a sprinkle shower that lands like confetti. I know many home cooks hesitate at dessert projects that look fussy: will the chocolate seize, will the decoration look amateurish, will it take forever? I promise you this: these Valentine’s Day Oreo Pops deliver dramatic, restaurant-worthy presentation and an indulgent bite with very little technique. If you’re adapting for dietary needs, I also keep a list of gluten-free baking ideas that pair beautifully with these treats.
A Quick Look at This Valentine’s Day Oreo Pops Recipe
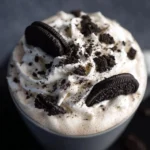
Crunchy, cream-filled Oreo cookies enrobed in glossy chocolate create a delightful contrast of texture and flavor. The standout ingredients are the familiar Oreo cookie—comfortingly sweet with a creamy center—and high-quality chocolate melting wafers for a silky, even coating. This recipe shines for its show-stopping presentation: pops that stand upright in a foam block or pretty vase make a simple dessert feel elevated. It’s a recipe that balances ease and impact—perfect for busy hosts who want something beautiful without complicated pastry techniques. Stay with me and you’ll find a few tips that make the dipping and decorating effortless.
Ingredients You’ll Need for Valentine’s Day Oreo Pops
Essentials
- Oreo cookies (regular or double-stuf) — choose fresh cookies that snap crisply; the contrast of crunchy cookie and creamy filling is the heart of these pops.
- Chocolate melting wafers (white, milk, dark, or candy melts) — wafers are formulated to melt smoothly and set with a glossy finish. I prefer a high-quality white chocolate wafer for coloring and contrast.
- Sprinkles — pick small, flat or non-edible shimmer sprinkles for a refined look, or matte confetti sprinkles for a cute, playful finish.
- Lollipop sticks — sturdy 4–6 inch sticks work best; look for ones designed for cake pops or candy making so they won’t bend.
- A small foam block or a homemade stand (cardboard box with holes) — to hold the pops upright while the coating sets.
Notes on quantities: For a dozen pops, plan on 12–18 Oreos, 6–10 ounces of wafers (depending on how thick you coat), and a generous handful of sprinkles. I often keep an extra dozen wafers on hand; it’s better to have slightly more melted chocolate than to scrape the bowl.
Optional Add-ons
- Colored cocoa butter or oil-based food coloring — for elegant hues; avoid water-based coloring in chocolate.
- Crushed freeze-dried raspberries or dried rose petals — adds tartness and a floral note when sprinkled lightly.
- Crushed nuts (pistachios or almonds) — for a savory crunch that balances the sweetness.
- Edible glitter or metallic dragees — use sparingly for a luxe finish.
- Flavored wafers (strawberry or caramel) — introduce another flavor dimension while keeping the technique the same.
- Mini heart-shaped candies — press onto the wet coating for an immediate seasonal motif.
Optional add-ons let you tailor the pops for texture, color, and flavor without changing steps. I recommend selecting one or two extras so the presentation remains cohesive.
Substitutions and Shortcuts
- Oreos → gluten-free sandwich cookies: If you need a gluten-free option, many brands offer sandwich cookies that mimic Oreo texture. For a lighter bite, use sandwich cookies with airy centers. If you’re exploring other treats, these substitutions pair well with my roundup of quick gluten-free lunch recipes for balanced entertaining.
- Chocolate melting wafers → high-quality chocolate chips with a tablespoon of coconut oil: This shortcut helps if you can’t find wafers; the oil smooths and thins melted chips for easier dipping. Use a gentle double boiler or microwave in short bursts.
- Sprinkles → finely chopped freeze-dried fruit or toasted coconut: These create refined flavor contrasts and look beautiful when used sparingly.
- Lollipop sticks → pretzel sticks or candy sticks: For a rustic twist, use pretzel rods for a salty-sweet contrast (press them into the cookie gently to avoid splitting).
- Foam block → inverted loaf pan lined with parchment and holes: If you don’t have foam, poke holes in a piece of cardboard or use a stand of some sort; just ensure the pops stand straight while setting.
These swaps keep the recipe accessible without sacrificing the elegant finish. I often choose one substitution when short on time or ingredients, and it rarely compromises the result.
How to Make Valentine’s Day Oreo Pops Step-by-Step
I like to think of this process as gentle assembly rather than precision baking. Work with calm and a warm bowl of melted chocolate—this is where the magic happens.
Step 1: Prepare your workspace and tools
Line a baking sheet with parchment or a silicone mat; set a shallow cup nearby for the sticks and have your sprinkles in shallow bowls. Place your foam block or holder within arm’s reach. Organization matters: when the chocolate is ready, the process moves quickly and you won’t feel rushed.
Step 2: Melt the chocolate wafers
Melt the wafers according to package instructions—either in the microwave in 20–30 second bursts, stirring between intervals, or in a double boiler over barely simmering water. The goal is smooth, fluid chocolate that is warm but not hot; overheated chocolate can become grainy. If you need to thin the chocolate, add a small teaspoon of neutral oil (vegetable or coconut) and stir until glossy.
Why this matters: a silky, fluid coating gives a professional shine and ensures the chocolate adheres evenly to the cookie and stick.
Step 3: Anchor the stick in the Oreo
Dip one end of a lollipop stick about 1/4 inch into the melted chocolate, then insert it gently into the cream center of the Oreo—press only until the stick feels secure. The small dab of chocolate acts like glue, anchoring the stick so the cookie won’t slide off during dipping.
Why this matters: this simple anchoring step prevents frustrated breakage and keeps your pops stable for dipping and drying.
Step 4: Dip and coat with intention
Hold the cookie by the stick and lower it into the melted chocolate. Rotate gently to coat all sides, lifting slowly and letting the excess drip back into the bowl. For a thin, elegant coating, lift higher and let gravity pull away surplus chocolate; for a more indulgent, thicker shell, allow the cookie to sit in the chocolate a touch longer.
Why this matters: temperature and movement control the thickness and finish of the coating. Gentle motion keeps the surface smooth and avoids air pockets.
Step 5: Decorate while the chocolate is wet
While the coating is still glossy and wet, sprinkle your chosen decorations—sprinkles, crushed nuts, or freeze-dried fruit—over the top. A focused, light sprinkle gives an artisanal look; a denser application looks playful. If you’re layering colors, allow each layer to firm slightly so the toppings don’t sink.
Why this matters: decorations adhere best when the chocolate is wet; this step ensures a tidy, lasting finish.
Step 6: Set the pops upright
Insert the stick into your foam block or stand the pop in your homemade holder so it stays upright while the coating sets. Avoid stacking or leaning pops against each other; they can stick together. Let them sit at room temperature until fully set—about 20 to 60 minutes depending on coating thickness. If your kitchen is warm, place them briefly in the refrigerator (no more than 10 minutes) to speed firming.
Why this matters: setting upright keeps the coating smooth and prevents deforming the finish.
Step 7: Store and serve with care
Once set, arrange the pops on a pretty platter or display them in a decorative vase lined with tissue paper for a theatrical reveal. Store leftover pops in an airtight container at room temperature for up to two days; refrigeration can cause condensation and dull the finish.
Why this matters: warm storage keeps coating glossy and the cookie crisp; refrigeration risks sogginess and bloom on chocolate.
Common Mistakes to Avoid
Mistakes are simply part of learning—each one tells you how to adjust next time. Below I outline a few common missteps with practical fixes so you can feel confident rather than worried at the dipping station.
Mistake 1: Overheating the chocolate
If you heat chocolate too quickly or too hot, it can seize and become grainy. To rescue slightly overheated chocolate, whisk in a small teaspoon of neutral oil or a bit of melted cocoa butter to smooth it. For best results, melt gently in short bursts and stir often.
Mistake 2: Inserting the stick too far or too shallow
Push the stick too far and you risk cracking the Oreo; insert it too shallow and the cookie will slide off. Aim for about 1/3 to 1/2 inch into the cream center after anchoring with the dipped chocolate. If a cookie splits, use it as a donor piece—dip the perfect half and press the other half on top for a rustic pop.
Mistake 3: Decorating after the chocolate is set
Waiting too long to add sprinkles or toppings means they won’t adhere. Have all decorations ready before you begin dipping, and apply them immediately while the chocolate is still glossy. If some fall off during setting, press a few additional sprinkles gently into the coating before it hardens.
Serving Suggestions for Valentine’s Day Oreo Pops
A finished presentation is part of the romance—these pops deserve an arrangement that honors their playful elegance. Here are three thoughtful ways to serve them that balance visual charm with simple hospitality.
I recommend serving the pops with small palate cleansers—think citrus segments or simple mint sprigs—to balance the sweetness and refresh the mouth between bites.
Elegant Display: Single-Color Palette
Line up pops in a foam block wrapped with a silk ribbon and position them on a mirrored tray. Use a single color palette for wafers and sprinkles—pale pink with gold accents, for example—for a refined, cohesive look.
Casual Gathering: Bouquet Arrangement
For a relaxed brunch or kid-friendly party, present the pops like a bouquet in a mason jar filled with wrapped candy or decorative paper shreds. This approach feels joyful and approachable while keeping the kitchen cleanup minimal.
Dessert Board: Paired Textures
Create a dessert board with a mix of Oreo pops, fresh berries, small bowls of salted nuts, and a dark chocolate dipping sauce. The contrast of textures—crisp cookie, smooth chocolate, juicy fruit—gives guests options and elevates the experience from simple sweet to composed dessert.

Conclusion
I love how Valentine’s Day Oreo Pops turn a handful of simple ingredients into a memorable little indulgence—crisp cookie, creamy center, and a glossy chocolate coat make each bite feel like a tiny celebration. The method is forgiving, and the result is flexible: swap colors, add a sprinkle of tart dried fruit, or pair them with sparkling lemonade for a casual fête. If you’d like a visual reference or another take on a similar project, I often find inspiration in classic recipes like Valentine’s Day Oreo Pops – Happiness is Homemade. Try this recipe once and you’ll find it’s one of those projects that builds your entertaining confidence—fun to make, delightful to share.
FAQs About Valentine’s Day Oreo Pops
Q1: Can I make Valentine’s Day Oreo Pops ahead of time? A1: Yes—Valentine’s Day Oreo Pops keep well for about two days at room temperature in an airtight container. I recommend setting them on a single layer so coatings stay pristine. Avoid refrigerating if possible, as moisture can dull the chocolate finish and soften the cookie.
Q2: Are there gluten-free versions of Valentine’s Day Oreo Pops? A2: Absolutely. Use gluten-free sandwich cookies as a one-to-one substitute for Oreos and proceed with the same dipping method. The texture will be slightly different depending on the brand, but the chocolate coating and presentation remain identical.
Q3: How do I prevent the chocolate on my Valentine’s Day Oreo Pops from streaking or becoming dull? A3: Work with smooth, properly tempered or formulated melting wafers and avoid refrigeration. Stir the chocolate to maintain an even temperature, and dip with a slow, steady motion. If the chocolate begins to thicken, gently rewarm it in short bursts.
Q4: Can I use regular chocolate bars instead of chocolate melting wafers for my Valentine’s Day Oreo Pops? A4: Yes—use high-quality chocolate and thin it with a small amount of neutral oil (about 1 teaspoon per 6 ounces) to mimic the fluidity of wafers. Melt gently and stir frequently to avoid burning. This gives a deeply flavored coating, though it may be slightly less glossy unless properly tempered.
Q5: What is the best way to decorate Valentine’s Day Oreo Pops for a sophisticated look? A5: Keep embellishments minimal and textural: a dusting of crushed freeze-dried raspberries, a line of contrasting chocolate drizzle, or a scattering of finely chopped pistachios. Choose a restrained color palette and consistent decorations for an elegant, high-end finish.
Print
Valentine’s Day Oreo Pops
- Total Time: 45 minutes
- Yield: 12 servings 1x
- Diet: Vegetarian
Description
Delightful and visually stunning Oreo pops coated in glossy chocolate, perfect for Valentine’s Day celebrations.
Ingredients
- 12–18 Oreo cookies (regular or double-stuf)
- 6–10 ounces chocolate melting wafers (white, milk, dark, or candy melts)
- Sprinkles (small flat or shimmer sprinkles)
- Lollipop sticks (4-6 inch)
- A small foam block or a homemade stand
Instructions
- Prepare your workspace: Line a baking sheet with parchment and set up your tools.
- Melt the chocolate wafers according to package instructions until smooth and fluid.
- Dip one end of a lollipop stick into melted chocolate and insert it into the cream center of the Oreo.
- Hold the cookie by the stick and lower it into the melted chocolate, rotating gently to coat all sides.
- While the coating is still glossy, sprinkle your chosen decorations over the top.
- Insert the stick into your foam block or holder to keep the pops upright while they set.
- Once set, arrange the pops on a platter or display them in a decorative vase.
Notes
Optional add-ons include colored cocoa butter for hues, crushed freeze-dried fruits, or flavored wafers for extra flavor. Keep all decorations ready before dipping to ensure smooth application.
- Prep Time: 15 minutes
- Cook Time: 30 minutes
- Category: Dessert
- Method: Dipping
- Cuisine: American
Nutrition
- Serving Size: 1 pop
- Calories: 200
- Sugar: 15g
- Sodium: 150mg
- Fat: 9g
- Saturated Fat: 5g
- Unsaturated Fat: 3g
- Trans Fat: 0g
- Carbohydrates: 26g
- Fiber: 1g
- Protein: 2g
- Cholesterol: 0mg
Keywords: Oreo pops, Valentine's Day dessert, chocolate covered Oreos