Last updated on June 14, 2026
A Cozy Welcome
Have you ever stood in your kitchen, craving something sweet and tiny enough to nibble while you sip tea, and thought, "I could make that"? I have—more times than I can count—and that’s how these Mini Egg Mini Cheesecakes came to feel like a little holiday in my oven. If you’re short on time or new to baking, I promise this recipe is forgiving and low-stress; it’s the kind of dessert I’ll pull out when friends pop over or when I need a small, happy snack. If you like quick egg-forward breakfasts as much as I do, you might also enjoy my take on avocado toast with scrambled eggs for a different kind of easy comfort.
A Quick Look at This Mini Egg Mini Cheesecakes Recipe
This recipe centers on two main ingredients: smooth cream cheese and candy-coated Mini Eggs that add a playful crunch. It’s a quick, refrigerator-set cheesecake in muffin form, so you get creamy texture without a long bake or complicated technique. For busy home cooks, these mini cheesecakes are convenient: make them ahead and fridge-stash for parties or an easy dessert. They’re also great for beginners because the steps are simple and forgiving—curious about how a single tablespoon of graham crackers can transform the base? Keep scrolling and I’ll show you.
Ingredients You’ll Need for Mini Egg Mini Cheesecakes
Essentials
- 12 Mini Eggs (or similar candy-coated chocolate eggs) — for topping and a bit of crunch inside if you like
- 1 cup cream cheese (softened) — full-fat gives the best flavor and texture
- 1/2 cup granulated sugar — balances the richness of the cream cheese
- 1 tsp vanilla extract — simple flavor lift
- 1 cup whipped cream (stabilized or good-quality store-bought) — keeps the filling light and airy
- 1/2 cup crushed graham crackers — pressed into the muffin tin as the crust
- Butter (for greasing muffin tin) — or nonstick spray, to prevent sticking
Optional add-ons
- A pinch of lemon zest — brightens the filling without making it tangy
- A tablespoon of cocoa powder mixed into the crust — chocolate graham base for extra depth
- A few extra Mini Eggs crushed for a sprinkle on top — for texture and color
- A drizzle of chocolate sauce for adults — great if you want to dress them up (non-alcoholic)
- A dusting of powdered sugar — simple, pretty finish
Substitutions and shortcuts
- Whipped cream substitute: If you don’t have stabilized whipped cream, use full-fat whipped cream that’s just been whipped until firm; it will hold up a few hours in the fridge. For an even simpler shortcut, try using light whipped topping from a tub, but expect a slightly different mouthfeel.
- Graham cracker crust swap: Digestive biscuits or plain cookie crumbs work just as well. If you want a gluten-free option, use gluten-free graham crumbs or finely chopped gluten-free cookies.
- Cream cheese timing hack: If you forget to soften the cream cheese, microwave it in 5-second bursts until just soft enough to stir—don’t liquefy it.
- Sugar swap: I use granulated sugar for classic texture, but superfine sugar or caster sugar blends quicker if you’re beating by hand. For a slightly different flavor, try light brown sugar, but know it will add a caramel note.
- Crushed Mini Eggs: If you want extra candy pieces inside, fold in a few crushed Mini Eggs into the filling, but be aware they can bleed color if mixed too long.
- Make-ahead tip: These keep well in the fridge for 3 days in an airtight container, or freeze for up to a month (wrap well). Thaw in the fridge overnight before serving.
How to Make Mini Egg Mini Cheesecakes Step-by-Step
I’ll walk you through this exactly as I do it—slow and steady, with little tips to make each step foolproof.
Prep your pan and oven
- Preheat your oven to 325°F (160°C). This moderate oven temperature helps the cheesecakes set gently without cracking.
- Lightly butter a standard 12-cup muffin tin or use nonstick spray. If you like, place paper liners, but I prefer greased cups so the graham base sticks to the tin and helps with release later.
Soften the cream cheese
- Make sure your 1 cup of cream cheese is softened to room temperature. If it’s still firm, pop it in the microwave for 10–15 seconds—just enough to make it easy to beat. Overheating will make it runny.
- Tip: If you’re in a hurry, cut the brick into small cubes and spread them out on a plate for a few minutes; they’ll soften faster.
Beat the base filling
- In a medium mixing bowl, combine the softened cream cheese, 1/2 cup granulated sugar, and 1 teaspoon vanilla extract. Use a hand mixer or stand mixer and beat on medium speed until the mixture is completely smooth and no lumps remain. Scrape the bowl once or twice so everything blends evenly.
- This is the time to add a pinch of lemon zest if you’re using it—just a whisper of citrus lifts the flavor without making it taste like lemon cheesecake.
Fold in the whipped cream
- Gently fold in 1 cup of whipped cream (stabilized or a firm low-fat whipped topping). Use a rubber spatula and fold with a slow, steady motion so the mixture stays light and airy. You want a uniform pale filling with no streaks of white or cream cheese showing.
- If you overmix and the filling deflates, don’t panic—pop it in the fridge for 15–20 minutes to firm up before piping or spooning into the cups.
Make the crust
- Place about a tablespoon of crushed graham crackers into the bottom of each greased muffin cup. Press the crumbs down gently with the back of a spoon or the bottom of a small glass to form a tidy base. If you’re using cocoa powder in the crust, mix it into the crumbs before pressing.
- This little crust adds texture and keeps the cheesecake from feeling floppy; it’s surprisingly important for each bite.
Fill the cups
- Spoon the cream cheese mixture over the graham cracker base, filling each cup nearly to the top but leaving a tiny gap so the Mini Eggs won’t be buried. I like to use a piping bag (or a zip-top bag with the corner snipped) for neatness; a couple of tablespoons per cup is usually perfect.
- If you want, fold a few crushed Mini Eggs into some of the cups for variation—just don’t overdo it so the filling stays pastel and pretty.
Top with Mini Eggs
- Gently press one or two whole Mini Eggs into the center of each filled cup. They’ll sit on top and look adorable after baking. Reserve a few crushed Mini Eggs to sprinkle on top once the cheesecakes are chilled, if you like.
Bake until just set
- Bake the tin for 15–20 minutes. You’re looking for the edges to look set and the centers to have a slight wobble—think jiggly pudding rather than liquid. Overbaking will dry them out and remove that silky cheesecake feel.
- If your oven runs hot, check at 12–15 minutes. Every oven is different.
Cooling and chilling
- Remove the tin from the oven and let the mini cheesecakes cool in the tin for about 20 minutes at room temperature. This gentle cooling prevents cracking and helps them finish setting.
- After the 20 minutes, transfer the tin to the fridge and chill for at least 2 hours, or longer if you can wait. Chilling is when they fully firm up and get that creamy, sliceable texture.
Remove and serve
- To loosen the cheesecakes, run a thin knife around each cup, then lift them out. If you used paper liners, they usually pop right out. If they stick, a gentle tap or a small offset spatula helps.
- If you want to dress them up, sprinkle crushed Mini Eggs on top, dust lightly with powdered sugar, or drizzle a little chocolate sauce just before serving. For a more adult presentation, a thin drizzle of dark chocolate is lovely—just keep it non-alcoholic.
- Storage notes
- Store in an airtight container in the fridge for up to 3 days. If freezing, place them on a tray until frozen solid, then transfer to a freezer-safe container; thaw overnight in the fridge before serving.
Common Mistakes to Avoid
Making Mini Egg Mini Cheesecakes is forgiving, but a few common missteps can change the final texture. Here are the biggest pitfalls I see, and how I avoid them.
Mistake 1: Overbeating the cream cheese
If you beat the cream cheese too long at high speed, it can become grainy or incorporate too much air, which may cause cracks or an odd texture after baking. I beat only until smooth and then fold in whipped cream gently to keep the filling silky.
Mistake 2: Skipping the chill
Serving these before they’ve fully chilled is tempting, but the centers won’t be set and they’ll be messy. Give them at least two hours in the fridge—longer if you can. Patience pays off with cleaner slices and creamier texture.
Mistake 3: Overbaking
Baking until completely firm is a common error. Remember, you want a slight wobble in the center when you take them out. They’ll firm as they cool, and overbaking leads to dryness and a less pleasant mouthfeel.
Serving Suggestions for Mini Egg Mini Cheesecakes
These little cheesecakes are adorable and versatile. I like to keep the presentation simple so the candy colors pop, but there are a few ways to make them feel special.
Start with a short thought: I serve these for brunch, small gatherings, or as a cheerful weekday treat—little plates and mugs make them feel extra cozy.
On a dessert platter
Arrange a dozen on a small cake stand or platter with a few extra whole Mini Eggs, some fresh berries, and sprigs of mint. It looks festive without much fuss.
With a coffee or tea pairing
These pair beautifully with a milky coffee or a fragrant tea. The creaminess of the cheesecake and the sweetness of the Mini Eggs need a slightly bitter or herbal balance—think Earl Grey or a medium roast coffee.
Dressed-up for guests
If I’m serving adults, I’ll drizzle a small amount of dark chocolate sauce over half of them and add a light dusting of powdered sugar to the others. It’s an easy way to offer two looks from the same batch. If you want a savory contrast on the table, consider serving alongside something warm and eggy—my baked feta eggs recipe makes a lovely brunch companion.

Conclusion
I’ve fallen in love with how easy and charming Mini Egg Mini Cheesecakes are to make: they’re faster than a whole cheesecake, customizable, and comforting in a tiny package. If you’d like a variation or a source of inspiration for a similar treat, I often look at other recipes for ideas—this version leans on simple ingredients and a no-fuss technique. For another take on mini cheesecakes that inspired my love of candy-topped treats, check out Mini Egg Cheesecakes – Always Eat Dessert for extra visuals and serving ideas. Try a batch this week; I bet they’ll disappear faster than you expect.
FAQs About Mini Egg Mini Cheesecakes
Q1: How long do Mini Egg Mini Cheesecakes need to chill before serving?
A1: Mini Egg Mini Cheesecakes should chill for at least 2 hours to fully set. I sometimes leave them overnight when I make them ahead; the texture is even better after a longer chill.
Q2: Can I make Mini Egg Mini Cheesecakes ahead of time for a party?
A2: Yes — Mini Egg Mini Cheesecakes are great make-ahead desserts. Store them in an airtight container in the fridge for up to 3 days, or freeze for up to a month and thaw overnight in the fridge.
Q3: Are Mini Egg Mini Cheesecakes freezer-friendly?
A3: They are. Freeze them on a tray until solid, then transfer to a freezer-safe container. Thaw in the fridge overnight before serving to keep the texture smooth.
Q4: Can I use low-fat cream cheese in Mini Egg Mini Cheesecakes?
A4: You can, but I prefer full-fat cream cheese for richer flavor and creamier texture. Low-fat versions may be slightly tangier and less silky.
Q5: How many Mini Eggs should I put on each Mini Egg Mini Cheesecake?
A5: I usually top each mini cheesecake with one or two Mini Eggs for the cutest look and the perfect bite-sized balance of candy to cream. If you want extra crunch, sprinkle a few crushed Mini Eggs on top after chilling.

Mini Egg Mini Cheesecakes
- Total Time: 135 minutes
- Yield: 12 mini cheesecakes 1x
- Diet: Vegetarian
Description
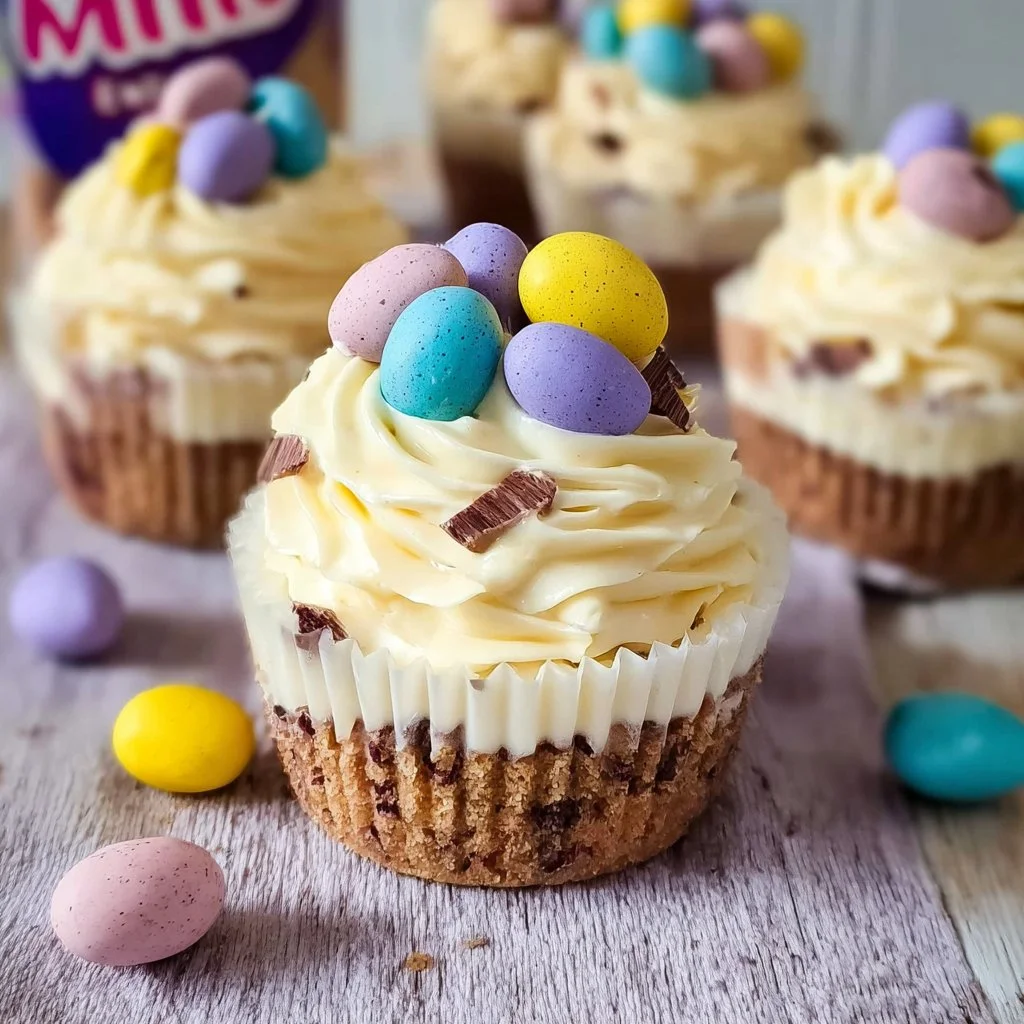
Deliciously creamy mini cheesecakes topped with candy-coated Mini Eggs, perfect for a quick dessert or special occasion.
Ingredients
- 12 Mini Eggs (for topping)
- 1 cup cream cheese (softened)
- 1/2 cup granulated sugar
- 1 tsp vanilla extract
- 1 cup whipped cream (stabilized or good-quality store-bought)
- 1/2 cup crushed graham crackers
- Butter (for greasing muffin tin)
- A pinch of lemon zest (optional)
- A tablespoon of cocoa powder (optional)
- Extra Mini Eggs (for sprinkling on top, optional)
- Chocolate sauce (optional)
- Powdered sugar (optional)
Instructions
- Preheat your oven to 325°F (160°C).
- Butter a standard 12-cup muffin tin or use nonstick spray.
- Soften the cream cheese in the microwave if not at room temperature.
- Combine cream cheese, sugar, and vanilla in a bowl and beat until smooth.
- Add lemon zest if using, then gently fold in the whipped cream.
- Press about a tablespoon of crushed graham crackers into each muffin cup.
- Spoon the cream cheese mixture over the graham cracker base.
- Top each cup with one or two Mini Eggs.
- Bake for 15-20 minutes until the edges are set.
- Cool in the tin for 20 minutes, then chill in the fridge for at least 2 hours.
- Remove from the tin and garnish with additional Mini Eggs, powdered sugar, or chocolate sauce if desired.
Notes
For best results, chill for at least 2 hours before serving. These can be made ahead and stored in the fridge for up to 3 days or frozen for a month.
- Prep Time: 15 minutes
- Cook Time: 20 minutes
- Category: Dessert
- Method: Baking
- Cuisine: American
Nutrition
- Serving Size: 1 mini cheesecake
- Calories: 210
- Sugar: 14g
- Sodium: 150mg
- Fat: 14g
- Saturated Fat: 8g
- Unsaturated Fat: 4g
- Trans Fat: 0g
- Carbohydrates: 20g
- Fiber: 1g
- Protein: 3g
- Cholesterol: 40mg
Keywords: mini cheesecakes, dessert, easy recipe, Mini Eggs, holiday treats