Last updated on June 14, 2026
##Introduction
Have you ever stared into your pantry at midnight and felt the sudden, undeniable urge for something playful and sweet? I certainly have — more than once — and that’s where Oreo Sushi Rolls come to the rescue. If you’re worried this looks fancier than your kitchen skills, I promise it’s a beginner-friendly, low-stress treat that feels a bit like dessert craft time. If you like simple snacks with a fun twist, you might also enjoy this playful 3-ingredient banana sushi I turn to on busy days.
##A Quick Look at This Oreo Sushi Rolls Recipe
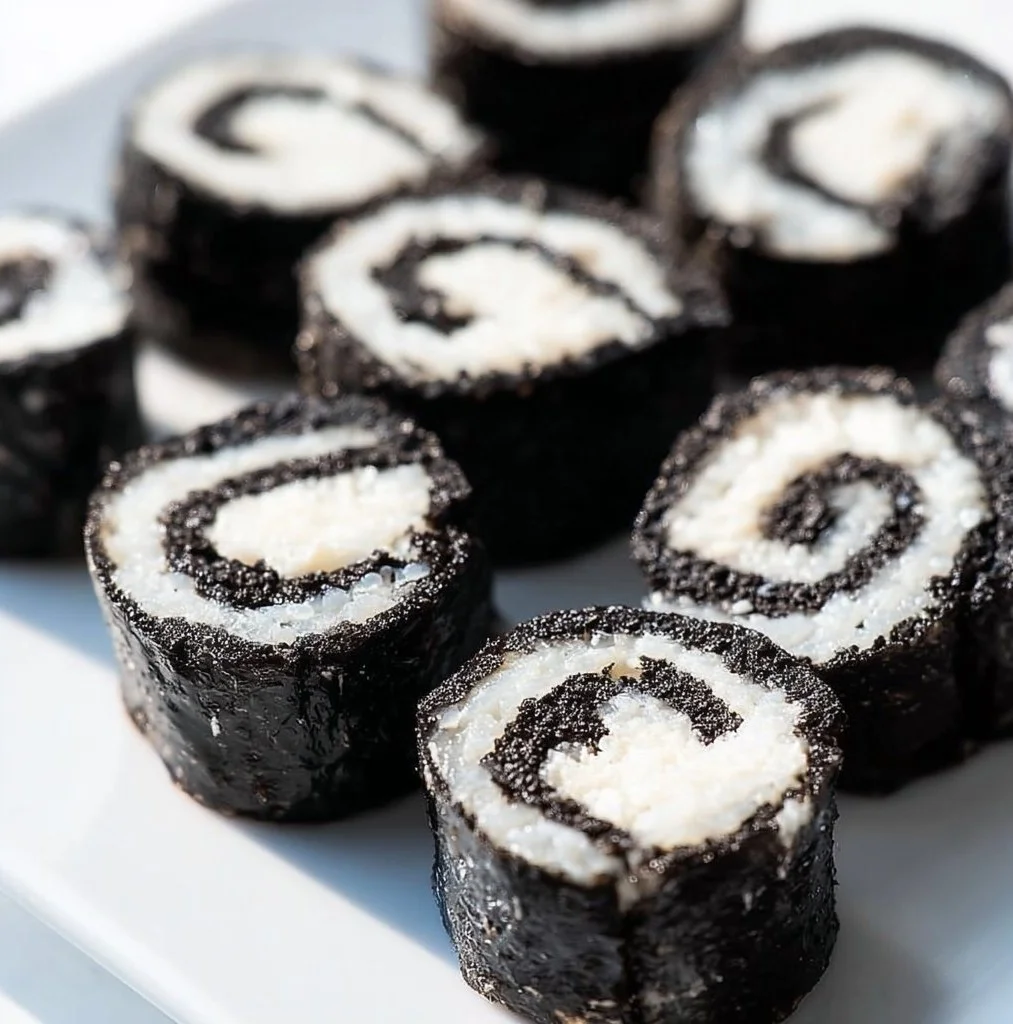
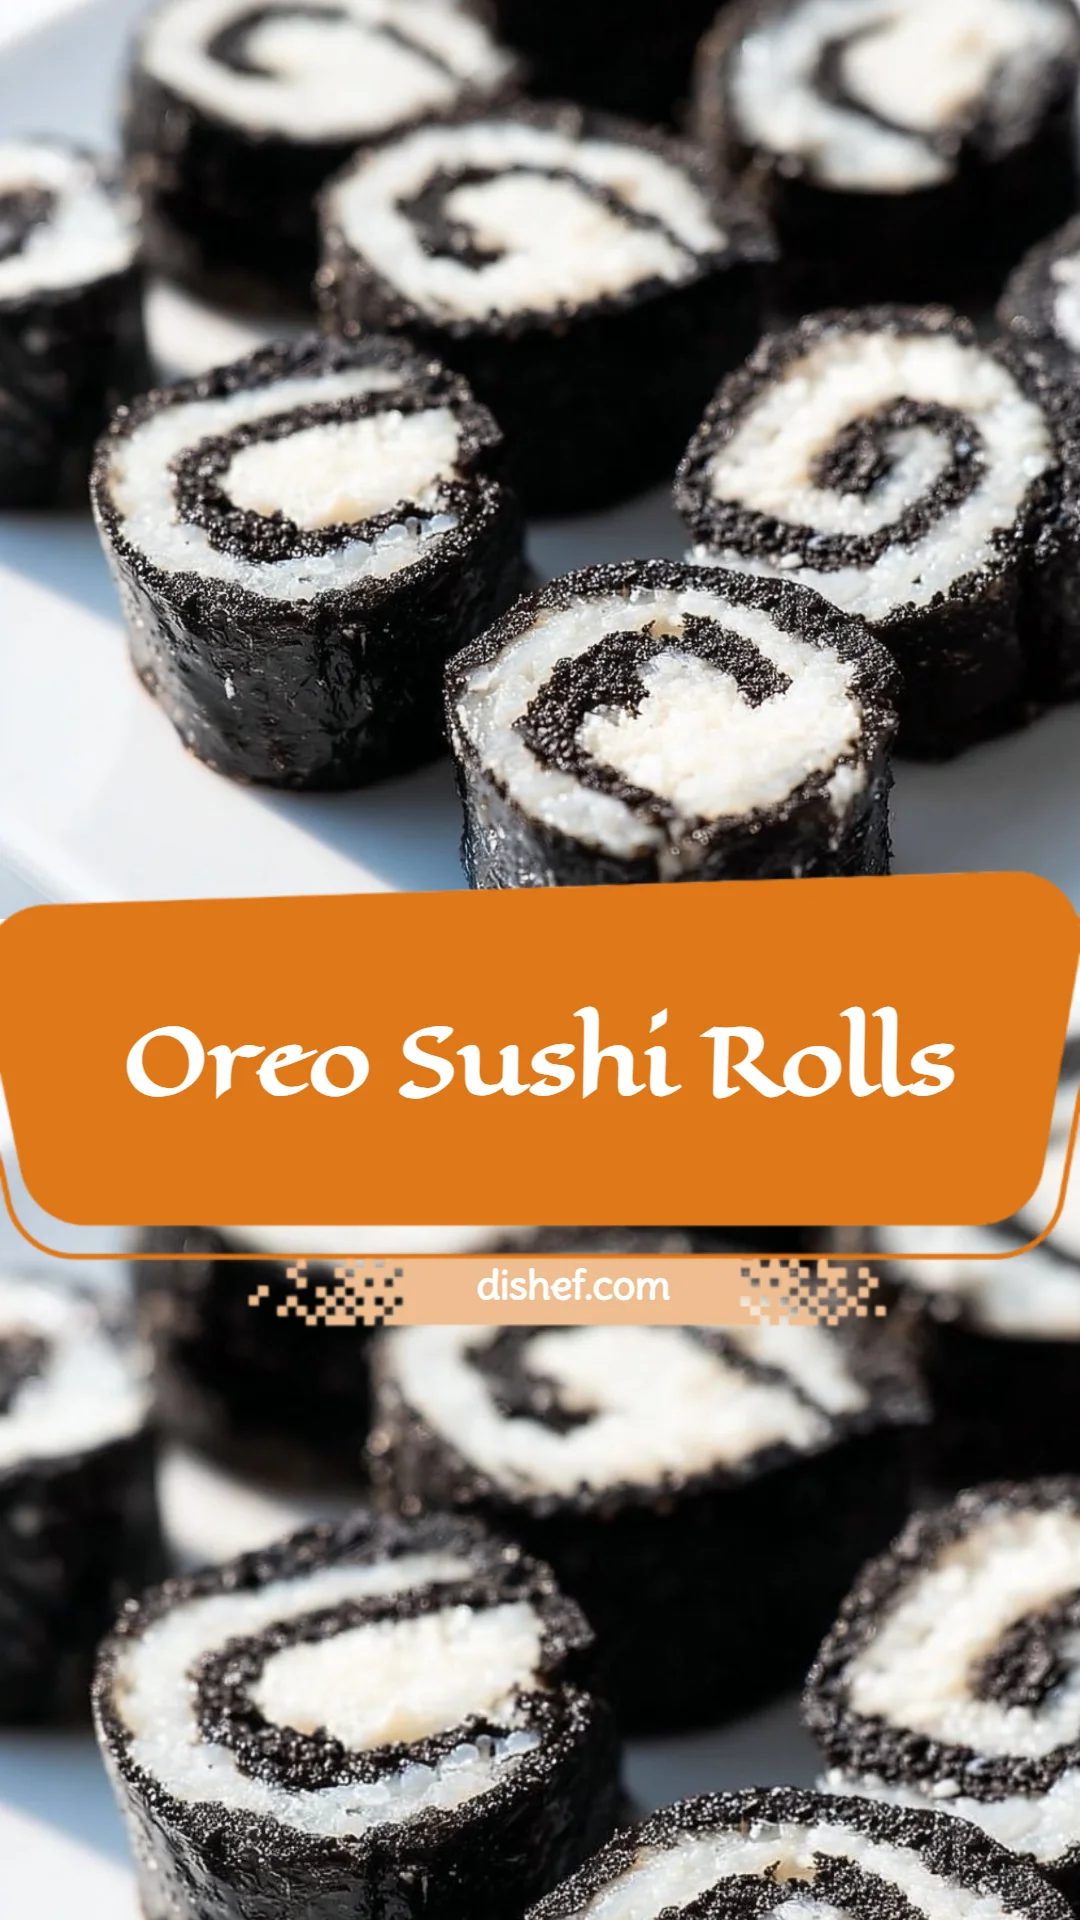
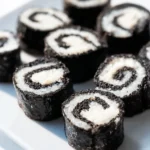
Oreo Sushi Rolls bring crushed Oreos and a creamy filling (think Nutella or sweetened cream cheese) together into bite-sized, sandwich-like rolls. They’re comfort-food simple and perfect for parties, after-school snacks, or a quick cozy dessert. This recipe shines because it’s fast, needs just a few pantry staples, and is forgiving for beginners. Keep reading — you’ll find tips for rolling, flavor ideas, and easy ways to make these look special without a lot of effort.
##Ingredients You’ll Need for Oreo Sushi Rolls
Essentials
- 20–30 Oreo cookies (regular or Double Stuf) — these form the base “rice” of the sushi.
- Filling of your choice:
- Nutella (for a chocolate-hazelnut center), or
- Cream cheese sweetened slightly with powdered sugar (for a tangy, creamy contrast), or
- Marshmallow fluff (for an ultra-sweet, sticky filling)
- Parchment paper or plastic wrap — for rolling and chilling.
- 1–2 tablespoons milk or softened butter (optional) — helps bind the crumbs if they feel too dry.
Optional add-ons
- Chocolate chips or melted chocolate drizzle — for a decorative finish.
- Fresh fruit slices (strawberries, bananas) — tuck thin slices into the roll before sealing for a fresh bite.
- Sprinkles — great for parties or kids’ snacks.
- Shredded coconut or crushed peanuts — to roll the outside of the sushi for texture.
- Mini M&Ms or crushed candy — for color and crunch.
- These rolls can also be served alongside other quick desserts like a scoop of ice cream; I sometimes pair them with a rich chocolate scoop inspired by this chocolate ice cream with Oreos.
Substitutions and shortcuts
- Oreos: Any sandwich cookie works — gluten-free sandwich cookies can be used if needed. Double Stuf gives a slightly sweeter, creamier base.
- Filling: Use peanut butter for a salty-sweet twist (not suitable for nut-free households), cookie butter for a cinnamon note, or store-bought chocolate spread if you don’t have Nutella.
- Binding: If you prefer not to use milk or butter, a spoonful of the cookie cream (from extra Oreos) can help bind crumbs.
- Equipment shortcuts: No rolling pin? Use a sturdy drinking glass to crush cookies and to roll the dough between parchment sheets. No food processor? A zip-top bag and rolling pin work perfectly.
- Make it easier: Use pre-crushed cookies (some stores sell cookie crumbs) or pulse Oreos in a blender if that’s handier.
##How to Make Oreo Sushi Rolls Step-by-Step
I break this into clear steps so you can follow along without fuss. Read them once through and then dive in — the whole process is very forgiving.
Step 1 — Crush the Oreos into fine crumbs
- Place 20–30 Oreos into a large zip-top bag, pressing out excess air before sealing. Use a rolling pin, heavy pan, or bottle to crush them. Aim for a fine, sandy texture with a few tiny bits for a little bite. If you prefer, pulse the cookies in a food processor in short bursts until evenly ground.
- Tip: Leave a few larger pieces if you like a chewy texture. For very fine crumbs, remove the filling first and blend only the cookie portion.
Step 2 — Mix the crumbs with your chosen filling
- Transfer the crushed cookies to a medium bowl. Add 1/2 cup of your chosen filling (Nutella, sweetened cream cheese, or marshmallow fluff) and stir. Use a spatula or your hands to bring the crumbs and filling together.
- If the mixture feels too dry, add 1 tablespoon of milk or softened butter at a time until it becomes a pliable, doughy paste that holds together when squeezed.
- If it’s too sticky, add a little extra crushed cookie or a touch more powdered sugar (if using cream cheese) until workable.
- Tip: For cream cheese filling, I stir 1/4 cup cream cheese with 1–2 tablespoons powdered sugar first to get a smoother spread.
Step 3 — Shape the cookie dough into a mattress for rolling
- Lay a sheet of parchment paper on your counter. Place the Oreo mixture in the center and put a second parchment sheet on top.
- Use a rolling pin to roll the mixture into a thin rectangle about 1/4-inch thick. The rectangle should be wide enough to accommodate your filling strip and long enough to roll tightly (roughly 8–10 inches long for the quantities given).
- Check the thickness; 1/4-inch gives a nice balance — not too thick, not too crumbly when sliced.
Step 4 — Spread the filling evenly over the dough
- Peel off the top parchment. Spread 1/3 to 1/2 cup of your filling choice into an even line down the long edge of the rectangle, leaving a small border (about 1/4 inch) along the sides and the far edge. If using fresh fruit slices, lay them on top of the filling in a single layer.
- Keep the filling narrow so rolling is neat and the ends seal well.
Step 5 — Roll the dough tightly like sushi
- Using the bottom parchment sheet to help, begin rolling the edge closest to the filling over it. Roll slowly and firmly, keeping pressure even so the log stays tight and compact.
- When you reach the far edge, press the seam gently with your fingers to seal. If it won’t stick, use a dab of the filling or a few drops of milk on the seam to help it adhere.
Step 6 — Chill the log
- Wrap the log snugly in parchment paper or plastic wrap and place it in the refrigerator for at least 30 minutes. Chilling firms the log so it slices cleanly.
- For a firmer slice (and easier handling), chill for 1–2 hours. You can also freeze the log briefly (10–15 minutes) if you’re in a hurry, but don’t let it freeze solid.
Step 7 — Slice and finish
- Remove the log from the fridge and unwrap. Using a sharp knife, slice the log into 1/2- to 3/4-inch pieces. Clean the knife between cuts for the neatest presentation.
- Finish with optional toppings: drizzle melted chocolate, roll the edges in shredded coconut or crushed peanuts, sprinkle mini M&Ms or sprinkles on top, or add a dot of marshmallow fluff to the center.
- Serve immediately or keep chilled until ready to serve.
Extra tips while making
- Knife care: Warm the knife blade under hot water and wipe dry between cuts for cleaner slices.
- Kid-friendly assembly: Let kids help spread fillings and press on decorations. It’s a safe, fun task that feels like crafting.
- Make-ahead: Prepare logs a day ahead and store wrapped in the fridge. For longer storage, freeze logs wrapped tightly for up to a month and slice while partially thawed.
##Common Mistakes to Avoid
Making Oreo Sushi Rolls is forgiving, but a few common missteps can make the process messier than it needs to be. Here are the pitfalls I see most often and how to avoid them.
Mistake 1: Using too many or too few Oreos for the filling ratio
If your Oreo crumbs-to-filling ratio is off, the roll can be crumbly (too many crumbs) or goopy (too much filling). Aim for about 20–30 cookies with roughly 1/3 to 1/2 cup of filling. Adjust slightly for Double Stuf Oreos — you may need a touch more crumbs to balance.
Mistake 2: Rolling too loosely or unevenly
A loose roll leads to filling spilling out and messy slices. Roll slowly and keep even pressure; use the parchment to guide the roll. If parts feel thicker, gently press and re-roll to even it out before chilling.
Mistake 3: Slicing without chilling or with a dull knife
Slicing a warm log makes ragged edges and smearing. Always chill at least 30 minutes. Use a sharp, thin-bladed knife and clean the blade between cuts. A warmed-and-dried knife can also help with smoother chocolate finishes.
##Serving Suggestions for Oreo Sushi Rolls
These little bites are playful and adaptable — they can be dressed up for a party, wrapped for lunches, or served as a cozy dessert after a family dinner. I love serving them with a little dipping sauce or on a dessert board.
Suggestion 1: Mini dessert platter
Arrange Oreo Sushi Rolls on a small board with fresh strawberries, banana slices, and a small bowl of melted chocolate for dipping. It makes a casual but lovely spread for guests.
Suggestion 2: After-school snack box
Pack a few rolls in a reusable container with a few red grapes or apple slices for a balanced, fun treat. Kids love the novelty and the size is perfect for little hands.
Suggestion 3: Party-friendly display
Place the rolls on a platter and drizzle with melted white and dark chocolate in opposite directions for a marbled look. Sprinkle colorful mini candies or toasted coconut on top for visual pop.
Conclusion
I love how Oreo Sushi Rolls turn two pantry staples into something unexpected and delightful — they’re easier than they look, endlessly customizable, and a cozy snack that welcomes creativity. If you want a different take or some inspiration for styling and flavors, check out this detailed Oreo Sushi on I Am a Food Blog for more ideas and photos.
##FAQs About Oreo Sushi Rolls
Q1: How long do Oreo Sushi Rolls keep in the fridge?
A1: Oreo Sushi Rolls will keep well in the refrigerator for about 3–4 days if wrapped tightly in plastic wrap or stored in an airtight container. The texture is best the first two days; after that the filling may firm slightly but will still taste great.
Q2: Can I freeze Oreo Sushi Rolls?
A2: Yes — freeze the wrapped log (not sliced) for up to one month. When ready to serve, thaw in the fridge for 30–60 minutes so it’s firm but still sliceable. Slicing partially thawed logs gives the cleanest cuts.
Q3: Are Oreo Sushi Rolls gluten-free?
A3: Traditional Oreos contain wheat, so these are not gluten-free unless you use a gluten-free sandwich cookie substitute. Choose certified gluten-free sandwich cookies and check your fillings to ensure all components are gluten-free.
Q4: Can I make Oreo Sushi Rolls without Nutella or cream cheese?
A4: Absolutely. Marshmallow fluff works beautifully for a sweet, sticky center. You can also use cookie butter, peanut butter (if allergies aren’t a concern), or a simple chocolate spread. The key is to balance moisture so the roll holds together.
Q5: What are some fun decorations or toppings for Oreo Sushi Rolls?
A5: Lots of options — a drizzle of melted chocolate or white chocolate, sprinkles for a party look, shredded coconut or crushed peanuts for texture, and mini candies for color. If you want a fresh contrast, add thin fruit slices (strawberry or banana) inside the roll or serve them on the side.
Oreo Sushi Rolls
- Total Time: 45 minutes
- Yield: 4 servings 1x
- Diet: Vegetarian
Description
Oreo Sushi Rolls combine crushed Oreos with a creamy filling for a playful, bite-sized treat that’s perfect for parties or after-school snacks.
Ingredients
- 20–30 Oreo cookies (regular or Double Stuf)
- 1/2 cup of your chosen filling (Nutella, sweetened cream cheese, or marshmallow fluff)
- 1–2 tablespoons milk or softened butter (optional)
- Parchment paper or plastic wrap
- Chocolate chips or melted chocolate drizzle (optional)
- Fresh fruit slices (optional)
- Sprinkles (optional)
- Shredded coconut or crushed peanuts (optional)
- Mini M&Ms or crushed candy (optional)
Instructions
- Crush the Oreos into fine crumbs by placing them in a zip-top bag and using a rolling pin or food processor.
- Mix the crumbs with your chosen filling in a medium bowl, adding milk or butter if too dry.
- Shape the mixture into a mattress for rolling on parchment paper.
- Spread the filling evenly over the rolled dough.
- Roll the dough tightly like sushi using the parchment paper to help.
- Chill the log in the refrigerator for at least 30 minutes.
- Slice the log into 1/2- to 3/4-inch pieces and finish with optional toppings.
Notes
For cleaner slices, warm the knife blade under hot water and wipe dry between cuts. This recipe is versatile and can incorporate various fillings and toppings.
- Prep Time: 15 minutes
- Cook Time: 0 minutes
- Category: Dessert
- Method: No-Cook
- Cuisine: American
Nutrition
- Serving Size: 1 roll
- Calories: 250
- Sugar: 20g
- Sodium: 150mg
- Fat: 10g
- Saturated Fat: 4g
- Unsaturated Fat: 4g
- Trans Fat: 0g
- Carbohydrates: 35g
- Fiber: 2g
- Protein: 2g
- Cholesterol: 10mg
Keywords: Oreo, sushi rolls, no-bake dessert, quick snack, party food