Last updated on January 18, 2026
A Taste of Spring
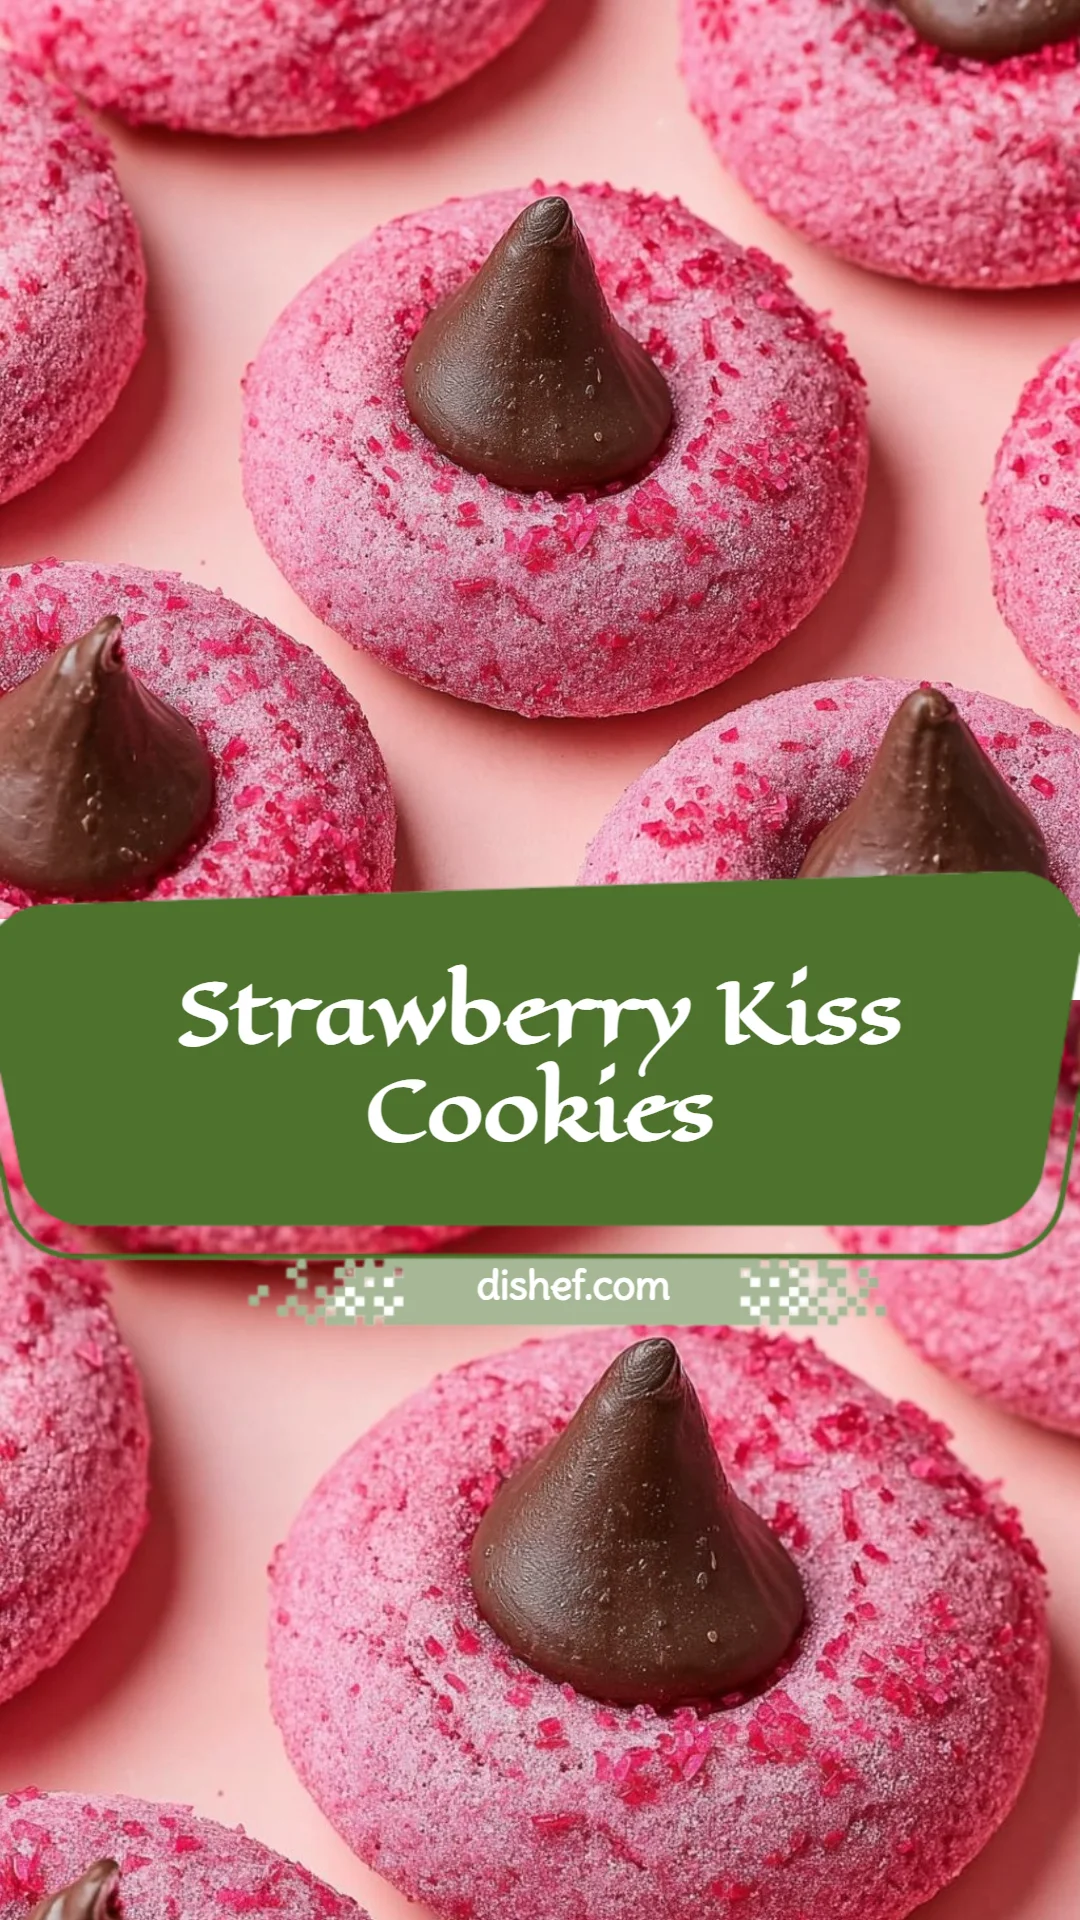
One bite of these Strawberry Kiss Cookies and I’m back at a sunlit table: tender, pale-pink cookies that melt on the tongue, a whisper of strawberry perfume, and a glossy chocolate kiss at the center that gives the whole bite a flirtatious finish. If you worry about complicated techniques, long ingredient lists, or cookies that spread into sad puddles, I promise this recipe is a different breed—sophisticated in flavor but remarkably forgiving. If you enjoy playful takes on classic cookies, you might also like my thoughts on a creamy strawberry-banana pudding cookie that leans into the same bright, nostalgic notes.
A Quick Look at This Strawberry Kiss Cookies Recipe
These Strawberry Kiss Cookies pair a fragrant boost of strawberry gelatin with a buttery sugar-cookie base, producing subtly pink, soft-centered rounds finished with a chocolate kiss. The standout ingredients—strawberry-flavored gelatin for aroma and unsalted butter for a clean, rich mouthfeel—work together to create a cookie that reads both delicate and indulgent. They present beautifully on a platter, with the chocolate center creating an elegant contrast to the pastel cookie, yet the technique is simple: creaming, chilling, baking, and finishing while warm. They’re special enough for gifting or afternoon tea but achievable for a midweek baking session—keep reading if you want my tips for perfect shape, texture, and that just-right chocolate press.
Ingredients You’ll Need for Strawberry Kiss Cookies
Below I break down the ingredients into essentials and thoughtful extras, with practical substitutions so you can bake with confidence.
Essentials
- 1 cup (226g) unsalted butter, softened — Butter is the backbone: use high-quality unsalted butter for a pure, creamy flavor. If your butter is too soft the dough will spread; aim for slightly softened but still cool to the touch.
- 1 cup (200g) granulated sugar — For structure and classic sweetness. If you prefer a less sweet cookie, reduce to ¾ cup, but the sugar also affects texture.
- 1 large egg, at room temperature — Room temperature eggs incorporate more evenly and help the dough bind without overworking.
- 1 tsp vanilla extract — Adds warmth and rounds the strawberry note.
- 1/2 tsp almond extract (optional) — A whisper of almond elevates the strawberry flavor; use sparingly to avoid an overly boozy marzipan note.
- 2 cups + 2 tbsp (280g) all-purpose flour — Provides structure while keeping the crumb tender.
- 1 tsp baking powder — Gives a gentle lift so the cookies look delicate, not flat.
- 1/4 tsp salt — Balances sweetness and amplifies flavor.
- 1 package (3 oz) strawberry-flavored gelatin mix — This is the secret spark: it adds strawberry aroma, light color, and a pleasant fruity aftertaste.
- 24–30 chocolate kiss candies, unwrapped — The glossy, single-serving chocolate that crowns each cookie; milk chocolate is classic, but dark chocolate offers a richer contrast.
- 1/4 cup powdered sugar, for dusting — A soft snow of sugar makes the cookies look finished and lends a pleasant first impression.
Optional Add-ons
- Finely grated lemon zest (1/2 tsp) — A trace of citrus brightens the strawberry and keeps the flavor from feeling one-dimensional.
- 1–2 tablespoons freeze-dried strawberry powder — For a more intense, natural strawberry note (use in place of or in addition to the gelatin if you want less sweetness).
- A splash of high-quality white chocolate drizzle — For elegant plating when serving; drizzle sparingly over cooled cookies (avoid getting heat near the kisses).
- Sprinkles or crushed freeze-dried strawberries — For seasonal flair or a party presentation.
Substitutions and Shortcuts
- Butter substitute: If you must, use European-style butter for an even richer, fudgier cookie; do not use margarine. Vegan bakers can try a high-quality vegan stick butter and a flax "egg" (1 tbsp ground flax + 3 tbsp water) but expect a slightly different texture.
- Gelatin mix alternative: If you don’t want to use pre-sweetened gelatin, substitute 2–3 tablespoons of powdered freeze-dried strawberry plus 1–2 tablespoons of granulated sugar. The gelatin contributes both flavor and color, so adjust sugar to taste.
- Cookie shape shortcut: Use a small cookie scoop (about 1 tablespoon) for consistent size and baking time—no scale required.
- Make-ahead: The dough can rest in the refrigerator overnight, or frozen in balls for up to 3 months; bake from frozen, adding 1–2 minutes to the baking time.
- Chocolate kiss swap: If you prefer a different center, try a small truffle, a half-strawberry jam-filled chocolate, or a white-chocolate kiss for visual contrast.
In case you’re planning a patriotic cookie lineup, I often pair their delicate pink hue with bolder treats like my festive Fourth of July cookies when entertaining—different moods, same idea of built-from-scratch charm.
How to Make Strawberry Kiss Cookies Step-by-Step
I like to keep the method clear and calm: each step has a purpose—texture, shape, or flavor. Follow these directions and you’ll be surprised how elegantly the cookies turn out.
Bring ingredients to the right temperature
- Remove the butter and egg from the fridge about 30–60 minutes before you bake so they come to room temperature. Butter should be softened but not oily; when you press it lightly it should hold the indentation for a second.
Cream butter and sugar until light and airy
- In a large mixing bowl, beat the softened butter and granulated sugar on medium speed for about 2–3 minutes until the mixture becomes paler and slightly fluffy. This step incorporates air to create a tender crumb and is the foundation for a cookie that isn’t dense. Scrape the bowl once or twice to ensure even creaming.
Add the egg and extracts
- Add the room-temperature egg, the vanilla, and the optional almond extract. Beat until the mixture is smooth and homogenous. The egg binds the dough and adds a touch of richness; the extracts round out the strawberry note.
Fold in the strawberry gelatin
- Sprinkle the entire package of strawberry-flavored gelatin into the wet mixture and mix until it’s fully incorporated. The gelatin will add pink color, aroma, and a slightly chewy contrast when baked.
Combine dry ingredients
- In a separate bowl, whisk together the all-purpose flour, baking powder, and salt. Whisking aerates the flour and helps distribute the leavening so the cookies rise evenly.
Bring the dough together
- Gradually add the dry ingredients to the wet mixture on low speed, mixing until a soft, pink dough forms. If your kitchen is warm and the dough feels too soft or sticky, add 1–2 extra tablespoons of flour and mix gently. The dough should be pliable — easy to shape, not tacky.
Shape and chill the dough
- Using a tablespoon or a small cookie scoop, portion out about 1 tablespoon of dough per cookie and roll it between your palms to form smooth, uniform balls. Place the dough balls on a parchment-lined baking sheet and chill them in the refrigerator for at least 1 hour. Chilling is crucial: it firms the fat so the cookies don’t spread excessively in the oven, preserving the rounded, domed look.
Preheat and prepare for baking
- Preheat your oven to 350°F (175°C). When ready to bake, arrange the chilled dough balls on a parchment-lined baking sheet, spaced about 2 inches apart to allow gentle expansion.
Do NOT press an indentation before baking
- Resist the impulse to create a thumbprint before baking—pressing an indentation will encourage excess spreading and thin edges. We want the cookies to bake with a slightly domed center so the kiss sits neatly on top after baking.
Bake until edges are set
- Bake for 11–13 minutes, or until the edges look set and slightly firm. The centers may still appear a touch soft; this is normal. The cookies will continue to set as they cool, preserving a tender center.
Add the chocolate kisses
- Remove the cookies from the oven and let them rest on the baking sheet for 2 minutes. While still warm, gently press a chocolate kiss into the center of each cookie. The residual heat will soften the cookie enough for the kiss to adhere, but won’t melt the chocolate into a puddle if you wait the brief 2 minutes.
Dust with powdered sugar and cool
- To avoid powdered sugar on the chocolate, dust the cookies lightly with powdered sugar before pressing in the kisses. Then transfer the cookies to a wire rack to cool completely, allowing the chocolate to firm and the cookie to finish setting.
Storing and finishing touches
- Store cooled cookies in an airtight container at room temperature for up to 4 days. If you want a crisper edge, pop them in a 325°F (160°C) oven for 3–4 minutes before serving. For gifting, layer with parchment paper in a pretty tin.
Why each choice matters: chilling keeps the shape; the gelatin elevates aroma and color without additional work; waiting 2 minutes before pressing the kiss ensures the cookie holds the chocolate while still allowing it to adhere. These small decisions are what lend the cookies their restaurant-worthy poise.
Common Mistakes to Avoid
Baking is as much about learning as it is about precision. I treat mistakes as friendly corrections—once you know why something went wrong, it’s easy to tweak and succeed next time.
Mistake 1: Using too-soft butter
If your butter is overly soft or melted, the dough will spread too much during baking and the cookies will lose their domed shape. Aim for butter that yields to gentle pressure but still keeps a little structure. If your kitchen is hot, chill the butter briefly and use a longer creaming time to incorporate air.
Mistake 2: Skipping the chill
Chilling the dough is not optional here. It firms the butter and stabilizes the dough so the cookies bake up with that pretty rounded top. If you skip chilling, you’ll likely end up with thin, crispy disks rather than plush, tender cookies.
Mistake 3: Pressing a thumbprint before baking
Pressing an indentation into the cookie before baking invites excess spreading and creates thin edges. Instead, bake the cookies untouched, let them rest for 2 minutes out of the oven, then press the kisses in—this preserves texture and shape while still adhering the chocolate.
Serving Suggestions for Strawberry Kiss Cookies
These cookies are quiet showstoppers: soft, fragrant, and charmingly finished with a chocolate pearl. They pair beautifully with light accompaniments and are versatile across settings.
Elegant Tea Service
Arrange the cookies on a tiered stand alongside crisp shortbread and a lemon loaf. The gentle strawberry aroma pairs exceptionally well with a mild black tea or a delicate chamomile—present them on white porcelain for an elevated, cohesive look.
Casual Party Platter
For a relaxed gathering, scatter cookies across a wooden board with clusters of fresh strawberries, white chocolate shavings, and a small bowl of extra kisses for guests who want seconds. The visual contrast—pale pink cookies and glossy chocolate—makes for an inviting display.
Gift-Worthy Presentation
Layer the cookies in a decorative tin with parchment rounds between layers. Finish with a soft ribbon and a handwritten card. Include a note suggesting they be served at room temperature for the best texture; chilled cookies lose their tender crumb and the kisses can bloom.
Conclusion
I love how these Strawberry Kiss Cookies feel like a thoughtful, elevated treat that’s deceptively simple to make—soft, strawberry-scented dough, precisely domed centers, and the satisfying snap of a chocolate kiss. They’re flexible for flavor play, forgiving for busy home cooks, and confident-looking when plated. If you’d like to compare notes with another lovely version of this idea, take a look at this classic Strawberry Kiss Cookies – Mama Needs Cake® for inspiration and slight variations.
FAQs About Strawberry Kiss Cookies
Q1: How long do Strawberry Kiss Cookies stay fresh?
A1: Strawberry Kiss Cookies keep well in an airtight container at room temperature for up to 4 days. Keep them away from direct sunlight or heat so the chocolate kisses don’t soften. If you want to extend their life, refrigerate for up to a week, but bring them back to room temperature before serving for the best texture.
Q2: Can I make Strawberry Kiss Cookies ahead of time?
A2: Yes. You can form the dough balls and refrigerate them for up to 24 hours, or freeze them in a single layer and then transfer to a freezer bag for up to 3 months. Bake from chilled or frozen (add 1–2 minutes to the bake time for frozen), then press in kisses and cool as directed.
Q3: Can I use real strawberry puree in Strawberry Kiss Cookies instead of the gelatin?
A3: Using fresh strawberry puree will change the dough’s hydration and may affect texture and spread. If you prefer real fruit, reduce the puree to 1–2 tablespoons and compensate by slightly reducing other liquid elements; consider using freeze-dried strawberry powder for concentrated flavor without extra moisture.
Q4: Why do my Strawberry Kiss Cookies spread too much?
A4: Excess spreading is usually due to overly soft butter, not chilling the dough, or a dough that’s too warm when it goes into the oven. Make sure your butter is softened but not melty, chill the shaped dough for at least an hour, and bake straight from the fridge. If the dough still spreads, add 1–2 tablespoons of flour to firm it up.
Q5: Can I substitute the chocolate kisses in Strawberry Kiss Cookies?
A5: Absolutely. If you want a less sweet contrast, use dark chocolate kisses. For a white-chocolate look, white chocolate kisses work beautifully. You can also use small chocolate truffles or half a jam-filled chocolate for a different textural surprise—just press them in the same way after the brief cooling step so they adhere without melting.

Strawberry Kiss Cookies
- Total Time: 1 hour 30 minutes
- Yield: 24 cookies 1x
- Diet: Vegetarian
Description
Delicate, tender cookies infused with strawberry flavor and topped with a chocolate kiss, perfect for gifting or afternoon tea.
Ingredients
- 1 cup (226g) unsalted butter, softened
- 1 cup (200g) granulated sugar
- 1 large egg, at room temperature
- 1 tsp vanilla extract
- 1/2 tsp almond extract (optional)
- 2 cups + 2 tbsp (280g) all-purpose flour
- 1 tsp baking powder
- 1/4 tsp salt
- 1 package (3 oz) strawberry-flavored gelatin mix
- 24–30 chocolate kiss candies, unwrapped
- 1/4 cup powdered sugar, for dusting
- Finely grated lemon zest (1/2 tsp) (optional)
- 1–2 tablespoons freeze-dried strawberry powder (optional)
- A splash of high-quality white chocolate drizzle (optional)
- Sprinkles or crushed freeze-dried strawberries (optional)
Instructions
- Remove butter and egg from the fridge 30–60 minutes before baking to reach room temperature.
- Cream butter and sugar in a large bowl at medium speed for 2–3 minutes until light and fluffy.
- Add egg, vanilla, and optional almond extract, mixing until smooth.
- Incorporate strawberry gelatin into the mixture until fully combined.
- In a separate bowl, whisk together flour, baking powder, and salt.
- Gradually add dry ingredients to the wet mixture on low speed, mixing until a soft dough forms.
- Using a tablespoon, portion and roll dough into balls and chill in the refrigerator for at least 1 hour.
- Preheat oven to 350°F (175°C) and arrange chilled dough balls on a baking sheet.
- Bake for 11–13 minutes until edges are set and centers appear slightly soft.
- Let cookies rest for 2 minutes, then gently press a chocolate kiss into each center.
- Dust lightly with powdered sugar and transfer to a wire rack to cool completely.
Notes
Chill the dough to prevent spreading and ensure a beautiful dome shape. For a delightful presentation, layer cookies in a decorative tin with parchment paper.
- Prep Time: 15 minutes
- Cook Time: 13 minutes
- Category: Dessert
- Method: Baking
- Cuisine: American
Nutrition
- Serving Size: 1 cookie
- Calories: 150
- Sugar: 10g
- Sodium: 50mg
- Fat: 7g
- Saturated Fat: 4g
- Unsaturated Fat: 3g
- Trans Fat: 0g
- Carbohydrates: 20g
- Fiber: 0g
- Protein: 1g
- Cholesterol: 30mg
Keywords: cookies, dessert, strawberry, chocolate, baking